Saturday, 23 June 2012

Emmaus

We recently went to the international, secular charity and community, Emmaus.  We just hopped on a public bus as we are car free and within fifteen minutes after leaving our small city, we were in the countryside. 

Wheat interlaced with bright poppies

An overcast day, but thankfully no rain

I have a thing for undulating farm roads

 A window-framing old vine adorns a small stone building

There are so many aspects of living in France that I appreciate and one of them is encountering charming visual vignettes:  a curtained-with-exquisite-lace tiny window, deeply set in a thick stone wall; a terracotta flower pot exuberately filled and bolted smack on the middle of a stone cottage's wall; and the scene below, a thin strip of a flower bed flanking the village main street, not to mention the matching roof tiles on the property's entrance pillar. 


Emmaus was founded by Abbé Pierre, a much loved figure in France.  His idea was to help down-and-out people by giving them work and a place to stay, thereby creating a community.  There are many interesting stories about him, but one of my favourites is during a deadly frigid Parisian winter decades ago he burst into a radio station and did an impromptu broadcast that people were dying from the cold in the streets.

Emmaus collects unwanted furniture, clothing, appliances and the like, selling them to the public.  Former homeless people work in the stores while living together close by.  The Emmaus at Angouleme is situated in what I suspect is a former paper mill.   It is a large property located just outside the city among vineyards and wheat fields.

The kitchenware shop along with a food truck greets you once entering the sprawling compound.  Naturally, I checked out the china and glasses as I am always on the hunt for photography props for this blog.  Just as naturally, The Calm One wandered off into the electronics building.

That's a painting of Abbé Pierre on the food truck

Down this quiet alley is where the community lives.

Nice palm tree on the left!

The electronics shop is on the front right

The upstairs book hall in the main building is marked by a leaning tower of books

We both spent quite a bit of time exploring the books together

Looking down from the mezzanine book shop, the very spacious hall of the main shop can be seen.


Except for the book shop, all the other shops keep your purchases and issue a ticket which is brought to the cashier in the main building.  Then when you are ready to go, you present your paid voucher at the particular shop to pick up your stuff.  I very cleverly found a petite panier (basket) that accommodated my cups, saucers, and a glass bowl, all which The Calm One carefully wrapped in newspaper provided by the china shop.  With an electronics-laden knapsack, off we went to catch our bus back to the city and our potager.

The Calm One doing his beast of burden number (knapsack is not in view)

In France, it is easy to locate the bus stop you want because the number of the bus is clearly marked on the road.  So yes, I am allowed to leave home alone as it is highly likely I will be able to return.  My lousy sense of direction is legendary--if I tell you to go in a certain direction, make sure you go the opposite as I am never right.  However, I might take the right bus in the wrong direction, but eventually even I will figure out I am going in the wrong direction and correct my mistake!


A solar panel on a nearby house's roof caught my eye.  As this region lends itself to that kind of energy production, hopefully we will be able to get a solar panel for our roof soon.


My share of the goodies cost only three euros--I know, heavy spender!  I especially needed a strong and tightly woven basket for berry harvesting.  My old one allowed berries to go rolling down the garden path where they were mistaken as prey by Dayo the cat.


It is fun to match up cups and saucers as those in the above photo are separate pieces as most of the wares at Emmaus are not sets.  The pretty white and gold cup goes well with both saucers.  Also, noting the origin of the china is interesting--the bone china cup on the left is Limoges, the soup mug on the right is English stoneware, and the soup plate underneath is Italian stoneware.

As our potato crop is just starting to come in,  The Calm One made his speciality, kitchen sink potato salad, the other day and the heavy, cobalt-blue glass bowl looks just smashing with the yellow of the salad which boasts quite a few hard-boiled eggs.  Stay tuned for the recipe and instructions for this family classic.  As I have found a few interesting recipes in that old French cookbook pictured above, stay tuned for those also.   A bientôt!


Tuesday, 19 June 2012

How to Make Red Currant Jelly...plus two summer recipes

Focused on my garden tasks, I often forget how much Dayo likes to be near me until I just happen to stride by his location to get something from the potting room, and lo and behold, I spot him, the little sweetheart that he is.

Dayo inside a lavender bush

Madame M told me the fruit harvest in France has been adversely affected by the fickle weather--cold, hot, cold, hot.  I got just two cups of red currants this season; last season I harvested about four quarts.  While for the black currants, the harvest weighs in so far as two berries!

Translucent little globes of perky flavour

Happily, two cups is enough for one 250 ml jar of red currant jelly.  One jar of this jelly goes a long way as it has intense flavour which I take advantage of by melting a small amount over low heat for a quick and easy desert sauce.  Red currant jelly requires making a puree first.  Add the berries to a pot, barely cover the bottom with water, and over medium heat, cook until soft, about five minutes, mashing all the while.


Pass the mashed berries through a Foley mill and weigh the puree.


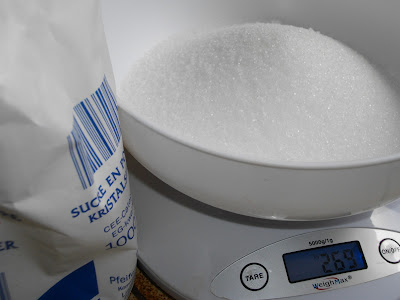
Measure out an equal weight of sugar.


Then follow instructions for regular jam making which can be found here.  Red currant jelly sets fairly quickly, so start testing for setting after a few minutes instead of the usual ten.


Red currant jelly reigns supreme as a glaze for strawberries.  I created an easy recipe for the luscious, jumbo, ever-bearing strawberries--they rival the size of small plums--that are fruiting presently in our patch.  When eating sensibly, that is, when not piling on the calories, focus on flavour.   Large, ripe strawberries stuffed with thick, strained yogurt flavoured with vanilla and topped with red currant jelly supplies just that.

For each serving, strain about four ounces of plain yogurt to which a tiny segment of vanilla has been added and place your straining set-up in the fridge for about two hours--thickening and infusing at the same time!

Almost a third of a cup of whey collected at the bottom.

Slice a bit off the bottom of three washed berries so they will sit flat and carve out a bit from the top of the berry, filling them with some of the yogurt.  Spoon the rest of the yogurt in desert dishes and then place the stuffed berries on top.  Melt  jelly--about two tablespoons per serving--by gently heating it and pour over the strawberries.


Unfortunately, I got a zero appearance from the yellow summer squash seeds I sowed indoors about eight weeks ago.  Since the seeds passed their viability test, I suspect I just did not plant them deep enough in their flats.  I don't care that much for the squash, but I do love to eat the puffy, hot goodness of squash blossom fritters.  Monsieur M caught me coveting their squash plants and asked me what I was looking for.  Flowers, I said.  He graciously let me come and harvest them.

The female flowers should be closed at the top

Yellow summer squash flower beignets (fritters) give two flavours--the mildest eggplant one of their petals and the other of the sweetest globe artichoke of their bottoms.  I gently snap off the female flowers at the end of five-to-six-inch-long squash, choosing flowers that have recently closed which will act like a pillow of hot air steaming the insides tender when being sauteed.  The flowers that do not form on the ends of the summer squash are male; they are edible also and their larger size is perfect for stuffing.  Both flowers are necessary for the squash to form, so keep that in mind when harvesting their flowers.  Mix up 1 part of grated Parmesan to 1 part of flour seasoned with salt and freshly ground black pepper. Beat an egg in a separate bowl.


Wash lightly if required and pat dry the flowers, dip them in the beaten egg, and dredge with the flour mix, rolling them around and filling the crevices well with the coating. There usually is some left over egg and cheese/flour, so I mix them together and shape little patties which get sauteed along with the squash flower fritters.

I add what is left over on the breading plate into the bowl with the eggs

Cover the bottom of a heavy skillet with olive oil, and fry till golden on all sides, about 8-10 minutes.  Blot with paper towels and serve piping hot.  I eat them just as is for supper, but they can also be served with a regular meal.


Bon appétit!

Michelle's Astuce

Any bits of used vanilla pod can be washed, dried, and then put in the sugar bowl.  Voila!  After a day or so, vanilla sugar is yours to sprinkle.


Thursday, 14 June 2012

Book Review: Michelle Obama's 'American Grown'

The Calm One sweetly gifted me with the American First Lady's book on how her White House vegetable garden came to be.  An engaging presentation by a charming person, the book has huge visual appeal, featuring many photos of the dynamic, smiling, brimming-with-health Michelle Obama working in the White House kitchen garden and out and about in various communities.  The prose is simple and direct, always grounded with her concern regarding the obesity epidemic affecting American children.  The sale proceeds of her book being channelled into her Let's Move campaign--aimed to help American kids get healthy--underscores this focus.

Full title:  American Grown, The Story of the White House Kitchen Garden and Gardens Across America

She explains her concern began as she realised despite all the Obamas' emphasis on giving their children the best support possible, they somehow did not give healthy food its due.  Identifying this oversight, she goes to the root of the problem which is that the American lifestyle has radically changed from the one which she experienced growing up.  En bref, kids eat empty calories and live very sedentary lives. The First Lady recalled how she ate with her family at home, eating everything on the plate which always included veggies.  Going to restaurants were special treats as was having candy.  She played hard each day and walked to school and the playground.

As returning to the past is not possible, she counsels parents and communities to make connections between food intake, exercise, and health in a dynamic way.  For her, that means involving children in growing vegetables and fruits and encouraging kids to be physically active, and what better way is there than use her very public person as a focal point to inspire and educate?  Her idea for a White House kitchen garden preceded her husband's winning the presidency.  Considering herself fortunate to have parents who made sacrifices which gave her a good start in life, she wants to give back to the community.  Accepting what a daunting task lies ahead, she equally accepts there is no other choice but to take on this grave problem.


As an inexperienced grower of vegetables, she was apprehensive if she could pull off a White House kitchen garden.  She did not even know if it was legally possible as the grounds are a national park or if the soil was suitable or even what the best location would be which turned out to be a place where the garden can be seen from the street because she regards the White House as the people's house.  Once the garden got going with the help of staff and schoolchildren, she started to make important connections between health, eating well, physical work, patience, flexibility, joy, and community.  She comes off as a thoughtful and gracious person in her pulling all these elements together.


Her attempt, however, to draw a historical precedent for actual White House kitchen gardens is uninspiring.  It is almost she does not want to admit how innovative an idea her White House kitchen garden is or how capable she is by actually getting it completed.  I say, well done!  Mentioning the three sisters of Native Americans--planting beans, corn, and squash together--along with the Second World War victory gardens rounds out the narrative.

Starting with 2009 going through 2011, garden plans are listed. Solutions to problems and changes based on learning from mistakes are explained.  The staff involved in the garden are presented and recipes prepared by White House chefs are described.  Various community gardens/outreach programs are given the spotlight.


Bypassing the problem of food corporations selling non-nutritious and fattening foods, she zeros in on how communities can assure the health of their kids by direct action and grass roots organising which includes using My Plate, an improved version of the food pyramid.   She acknowledges that despite parents wanting to feed their kids the best way, not knowing how to do so because of all the complicated and conflicting information leads often to their just giving up.  She admits some Americans have no access to fresh produce in their neighbourhoods, hence the focus on community kitchen gardens.

She provides medical statistics to show clearly how poor diets have made American soldiers subject to all kinds of health problems, especially bone fractures and bad teeth.  Therefore, unhealthy food intake is directly threatening national security.  Additionally she ties in faith groups and the concept of gratitude with a photo of her and a family saying grace together.

Harvested French-grown garlic and potatoes in the background!

As far as gardening information goes, her book does well as an introductory primer--I especially appreciated her year-round focus of growing food--while being visually pleasing, either with/without its jacket, closed/opened, and indoors/outdoors!

ADDITIONAL READING

Wikipedia:  Epidemiology on Global Obesity

Tuesday, 12 June 2012

Summer Soups: Fresh Pea ... and how to preserve grape leaves

Not only is fresh pea soup easy to make, it is also refreshingly delicious.  When served cold, it makes a perfect culinary accent to a sultry day.


Simple recipes shine when the very best ingredients are chosen so I used my own garden's petite pois/green onions/rosemary along with my home-made chicken stock.  If you don't have a veggie garden, consider going to a farmer's market. 

Fresh Pea Soup Recipe
(Makes 4 small servings, ideal for a first course or two larger servings that can be accompanied with cheese and bread.  Fresh pea soup can be served either hot or cold)

  • Peas, shelled and preferably fresh but a good frozen brand will work, 500 grams (3 cups/roughly 1 pound)
  • Cream, 75 ml (1/4 cup)
  • Chicken broth, if not home-made, get the very best available, 500 ml (2 cups)
  • Scallions/green onions, 4 medium
  • Butter, 30 grams (1-2 tablespoons)
  • Rosemary, fresh/frozen, a small sprig
  • Yogurt, plain, full fat, several tablespoons per serving
  • Salt and freshly ground black pepper

Reserve the tops of the green onions for later garnishing and slice the white bottoms.  Saute them in butter for a minute or too, till soft.  Add broth, peas, and rosemary and simmer till peas are cooked, about five minutes.  Blend in a mixer for the most smooth texture--though a hand-held mixer would do a good enough job.  Season to taste, serve in cups, ramekins, or small soup bowls, topped with a swirl of yogurt and some sliced scallions.

How to make decorative swirls of yogurt without a multi-purpose pastry bag?  Think fluid dynamics!  I beat the yogurt still it is pretty runny and then practice first with a small amount of soup with how high I need to suspend the spoon.  I applied mine in a circular fashion, but a different pattern can certainly be used.

I enjoy crops with dual harvests: beets/turnips roots and greens,  green peas and shoots, onions and scallions, garlic and scapes.  Then there are grapes which bestow those perfect gems of concentrated fruit flavour along with delectable leaves for stuffing.

One of  our ten vines

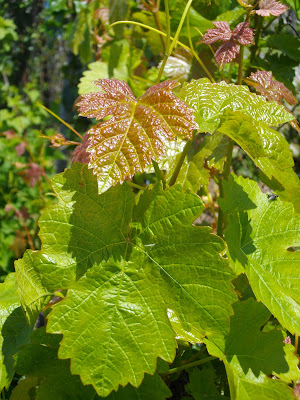
I harvested our grape leaves in mid May when the leaves are light green, unblemished, and roughly the size of a woman's palm. Older, larger leaves are too tough for culinary purposes.  I snip off as much of the stem as I can.


With the fast and heavy pace of sowing, transplanting, weeding, mowing, harvesting, and preserving at present, I only had time for blanching and preserving them--eventually I will make stuffed grape leaves, one of my favourite foods.

Preserving Fresh Grape Leaves

Grape leaves need to be blanched first before using and before preserving. Wash leaves under running water, then either bring water to a boil in a large pot, turn heat off, and add leaves and let sit for around 3 minutes or pour boiling water into a pot, toss in the leaves, and let sit for the same amount of time. Remove with a slotted spoon.  Rinse under cold running water.  Separate leaves and pat dry with paper towels.  You can now proceed with the recipe or place them in a labelled bag for freezing.


The leaves turn olive green once blanched

As they are being patted dry, whittle down any remaining stem to prevent holes being made when they are stacked.

Such a lovely, burnished, gold-green colour


Sorted into piles of similar size


I tear up a few less perfect ones for cushioning layers of Dolmades

It is important to keep one's wits about her when the pace of gardening gets intense.  On that note, I leave you with this calm, cool, collected Calla:


Michelle's Astuce:

All green herbs--as in what you can do with all that fresh rosemary you bought so you can toss a sprig into this soup--can be chopped and frozen.  When needed, just crumble a bit off.  Or a little water can be added to the chopped herbs which are put in an ice-cube tray.  The cubes are then stored in a freezer bag.

RELATED POSTS

How to sow peas
How to preserve peas by freezing


Tuesday, 5 June 2012

How to Make Strawberry Jam

Last weekend I found a two-gallon-sized ceramic crock at a second-hand shop.  It will be the perfect receptacle for home-made sauerkraut sometime late summer.  Dayo is in complete agreement.


Summer is moving along nicely.  Peas are out and tomatoes and cucumbers are in.  Second plantings of green beans and heat-resistant lettuce are done.  Beets and carrots are sturdy little plants now.  The potato beds are lush with foliage.  The leeks in their nursery bed are ready for thinning so they can be eventually planted out in a month.  Unfortunately, only one red sweet bell pepper seedling--so stuffed peppers are still a possibility--and one cantaloupe seedling made it past their infancy this season.  I have just a few days to plant white and red beans along with the flageolets, or else that window of opportunity will slam shut.  All in all, the garden is doing well, and I am still in one piece!

Pulled-out pea plants destined for the compost pile

The roses' first blooming spurt is practically finished except for a couple of bushes.

A spectacular semi-double rose which starts out with red buds and ends up pink and yellow

However, Madame Ms beloved climbing Pierre De Ronsard is still revving along.  When entering my garden from the sous sol's back door, if I turn right, this is what I see now:


The June-bearing strawberries are past peak production, but still putting out a good quantity. Instead of eating fresh strawberries or freezing them, it is time for jam making!  Though I have made a great amount of jam in the past--yellow/purple plum, grape, fig, red/black currant--which all smelled wonderful, I was unprepared for the soft, steamy cloud of sweet fragrance as the strawberries vigorously bobbed in their syrupy juices.  If a house could smile, mine would have.

When making jam for the first time, I was intimidated by all the specific tools, techniques, and most of all, safety issues that I encountered in my web research.  However, it is confirmed that I have come up with a simple and safe method not requiring any special equipment as I ate my last jar of jam about a month ago from the previous season's processing and as you can read, I live still.  Note well that this method is safe for only fruit jam and not canning vegetables.

Strawberry jam is somewhat challenging because the fruit itself does not contain that much pectin which is needed to set the jam into a nice consistency.  Home-made strawberry jam will be not as thick as commercial, but it will have a lovely tendency to soak just the right amount into bread without running down your hand.  At the same time, the flavour will be fresh and bright and not dulled by tons of additional pectin.

Include about a quarter of slightly unripe berries as they contain more pectin than fully ripe ones.

Note the yellowish-red not totally ripe berries

Sugar in sufficient quantities will also encourage setting.   Though certainly high in sugar, a little flavour-rich jam does go a long way.  If you don't have access to your own or a neighbour's, it is worth going to a farmer's market to get the best available strawberries as there are so many tasteless ones sold at supermarkets.  I add lemon juice for additional pectin and for the sharp boost in flavour it gives the finished jam.  Finally, it needs to be boiled long enough for a good set.

Ingredients (filled up three 500 ml jars and one 200 ml jar, roughly 1 3/4 quarts)
  • Strawberries, washed and hulled, 1,000 grams (4 cups)
  • Sugar, 1,000 grams (4 cups)
  • Lemon juice, freshly squeezed, 125 ml (1/4 cup)
Equipment
  • recycled jam jars and lids
  • gravy boat
  • pot holders
  • potato masher
  • several ice-cold spoons
  • ladle
  • heavy bottom pot (jam mixture should take up just 1/3 of the pot)

Put spoons in the freezer and jars/lids in a basin or clean sink, fill with boiling water and let soak till water has cooled off enough to wash the whole lot with a little soap or they can be cleaned in a dishwasher.  Rinse well and dry with a paper towel.  Place the jars and lids on a work surface layered with paper towels/newspapers.

Put strawberries in the pot and mash them up roughly.  Add the sugar and the lemon juice. 


Turn the heat on moderate setting and stir to dissolve the sugar while mashing a bit more and stirring.

Such a gorgeous colour and fabulous fragrance!

Once the sugar is dissolved, turn the heat up high enough to bring the jam to a rolling boil.


Keep an careful eye on the pot and watch for any possible boiling over.  Lower heat if required.  Stir occasionally with a wooden spoon.  An rough estimate--as it is based on the natural pectin content in the berries used--is that setting takes about 12 to 15 minutes of boiling.  I use the sheet test which is one of three ways to determine that the jam has set, because it works well for me.  After ten minutes, dip a ice-cold spoon in the hot jam and let the jam pour off a side, watching as it does for two drops to combine making a sheeting effect.  Being the geek that I am,  I enjoy pinpointing the exact sheeting moment!  If it does not sheet, repeat every minute with a fresh cold spoon until you get a positive reading.  If your jam does not set, it can't be reheated as it will get candy-like, but don't despair as the fluid jam can be used as a desert sauce on top of ice cream, parfaits, pancakes, waffles, and cakes. 

Remove from heat and skim off the pink foam containing air bubbles which make storage less safe.  The foam tastes delicious, and it can be spread on bread for breakfast the next day after making jam.

Ladle some jam into the gravy boat and pour into a jar, stopping about an quarter inch from the top, screw on lid, and then with pot holders, turn the jar upside down which will create a seal.  If you don't have enough to fill a jar, put that in a covered bowl in the fridge.  Let cool and then store in the fridge up to a year.  I find it unnecessary to label the jars as the contents are easily identifiable, and by next summer they will have to be eaten.  Madame M says that refrigeration is not required, but I prefer to play it safe.

Pretty French jars with self-sealing caps that Madame M graciously gave me.

Home-made French bread and strawberry jam, yum!

Stay tuned for other fruit jam, leather, and butter recipes as the summer fruit harvest comes in:  red currant--if I get lucky, as the harvest is looking a bit scarce at the moment--raspberry, purple and yellow plum, blackberry, grape, apple, pear, and fig!