Wednesday, 6 May 2015

Better Late Spring Than Never...

Thankfully it is still spring chez nous so all those tomato, pepper, squash, cucumber, and melon transplants started from seed about six weeks ago and waiting to be put into proper soil still have a chance to become delicious, nutrition-packed edibles. Sustained bouts of heavy rain which are blessing roses and rhubarb with luxuriant growth are making the soil sodden and therefore challenging to work.

Quartered, salmon-pink rose with an astounding fragrance

Rain has been abundant in the last several years, so much more than the usual that the once languishing ivy is sprightly growing up the pillars of our patio pergola.


I am looking forward to the day when the entire pergola is covered in green lushness.


Nothing glows like the papery, scarlet petals of poppies.


While the herb fennel (which is a different plant from bulb fennel) waves its feathery fronds, a sage bush presents its stalwart flower spikes.

The sage will be clipped back after flowering to keep it bushy

Pea shoots, much appreciated in Asian cuisine, are one of the earliest edible greens. In addition to planting peas in their own bed, I plunk down some in a large pot reserved just for harvesting pea shoots. Their delicate flavour and texture makes them a fantastic addition to various recipes (see several in the related links at the end of this post).


The onions planted at the end of March are now sturdy young plants.

Side-dressed with a high nitrogen fertiliser and mulched with dried grass clippings

Dirac the Young Cat loves water as much as the roses and ivy do. His aquatic exploits starts with his batting a thin stream from a faucet. It advances to his biting the water which is so hilarious that our raucous laughter makes him take a pause...


...so he can dry his wet paw by licking it!


Eventually his efforts fatigue him and he sits nearby glaring at the faucet.


À la prochaine!

RELATED POSTS

Pappardelle, Pea Shoots & Creamy Tuna Sauce

Pea Shoots & Sausage Couscous
Linguine with Pea Shoots, Capers, Parsley, Garlic, and Parmesan

Wednesday, 29 April 2015

Socca

Socca is a creamy, crusty chickpea flour flatbread/pancake found in the south of France. When we were in Nice, I got to eat a gorgeous slab served from a huge pan that had done the right amount of time in a mammoth, wood-burning oven.

Fresh thyme from our potager!

To duplicate that delicious charring in my ordinary home oven, I placed a pizza pan under the oven grill. And to match that memorable creaminess, the batter was covered and left out overnight. One test batch without fermentation had less flavour and a grainier texture.

Fleur de sel, freshly ground black pepper, and a drizzle of olive oil increases the lusciousness

Ingredients
makes a 12 inch/30 cm round

  • Chickpea flour, 3.4 dry oz/95 grams
  • Water, 6.8 fluid oz/200 ml
  • Salt, 1/2 tsp
  • Thyme, dried, 1/4 tsp
  • Olive oil, 1 T for the batter, another one to oil the pan
  • Garnish: fresh thyme, fleur de sel, freshly ground black pepper, and a drizzle of olive oil

The night before, mix the first five ingredients, cover, and let stand at room temperature.


The next day, oil a pizza pan and put under the oven grill. Heat at the highest setting for about ten minutes or until the oil just starts to smoke. Carefully remove and pour the batter until the bottom of the pan is covered.


Grill for about five minutes at a distance from the element and then place it closer for a minute or so till a nice blistering occurs.


Garnish and slice into portions. Then proceed to stuff yourself with this lovely, lovely, lovely stuff!


À la prochaine!

RELATED POSTS

Thyme panisse (chickpea fries) with green peppercorn yogurt sauce
Sweet red pepper & green bean pakora (chickpea fritters)

Wednesday, 22 April 2015

Rhubarb Fool

One of the simplest ways to serve any fruit puree is to fold whipped cream into it which has to be the least foolhardy thing one could do. So why is this delicious dessert called a fool? Blame the French word, fouler, which means to mash though this recipe needs no mashing as a brief simmering gets the fruit into a similar state.

The rosebuds are the first for the season!

Ingredients
makes about 1 quart/liter of rhubarb puree
  • Rhubarb, cut into chunks, 6 cups (48 fluid oz)/1420 ml (1.4 L), about 12 stalks
  • Sugar, white, 4 fluid oz/120 ml
  • Water, 4 fluid oz/120 ml
  • Whipped cream, 5-6 heaping T for each serving
  • Cinnamon, ground, for garnishing
  • Optional: a dash of raspberry or grenadine syrup to add some colour, about 1 fluid oz/30 ml
Put the rhubarb, sugar, water and if using, raspberry/grenadine syrup into a saucepan. Simmer while covered for five minutes. Stir a few times. Then uncover and cook, while stirring here and there, for another five minutes. Let cool and store in the fridge or freeze.

From our potager!

For each serving, I used equal amounts of puree and cream. You may want a different proportion of sweet to tart. Spoon the rhubarb first into the dish, then plop the whipped cream on top. Gently fold-in by slipping a spoon under an edge and upturning the rhubarb onto the cream. Turn the bowl as you lightly blend.

Though I am a diehard fan of rhubarb's flavour, I find its tendency to become olive-green once cooked a bit off-putting. A splash of raspberry syrup changed that rather drab colour to one closer to sparkling champagne.


When most of the rhubarb is thinned out into ribbons, dust on the cinnamon.


The Calm One was gallant enough to hoist his serving so I could photograph its marbled effect.

A clear, stemmed glass really shows off this dessert

Outside, the garden has the blues. Bluebells that is...


and irises...


...not to mention lilacs! Setting a vase full of water underneath the lilac bushes in the early morning is one of my great garden joys. I get to take my time as I choose blooms as each will immediately go into the vase. To assist the lilacs to last for several days, use a mallet to smash several inches at the bottom of their stems.

Violet cotton candy!

The second mowing of the season has been done but that doesn't keep the English daisies away for long which is fine by me as they are so dainty and pretty.

All those white dots are daisies!

When selecting irises to cut, choose the ones with many buds.


À la prochaine!

Wednesday, 15 April 2015

Norwegian Rhubarb Cake

Rhubarb juice soaks this cake so thoroughly that I was tempted to use a straw! Its attractively sodden state is similar to that of baba au rhum. Rhum is fine, but so is rhubarb with its fresh and vibrant flavour.

Rainbow colours! The flowers are lilacs and cranesbills from our garden

A baking pan is lined first with rhubarb that has been lightly braised in syrup and then the batter is added. In the oven, the juices bubble up the cake. Out of the oven, it is then flipped over and as it stands, gravity does the rest, fully saturating the cake. It boasts of a lovely texture and taste as the crème fraîche smooths out the tartness while the crust becomes superbly caramelised. Though it can be kept in the fridge for a few days, take it out an hour or so before serving because it is best at room temperature.


Ingredients
makes a 26 cm/10 inch long, 10 cm/4 inch wide, 5 cm/2 inch deep loaf and a smaller 15 cm/6 inch long, 9 cm/3.5 inch wide, 4 cm/1.5 inch deep loaf
adapted from The Missing Flavor
  • Rhubarb stalks, about 4 stalks
  • Sugar, white, 8 fluid oz/237 ml for the batter plus 5 T for simmering/macerating the rhubarb
  • Flour, all purpose, white, 8 fluid oz/237 ml
  • Butter, sweet, 200 gms/7 dry oz, extra for greasing the pans
  • Eggs, 3
  • Crème fraîche, 6 fluid oz/180 ml
  • Pure vanilla extract, 1 tsp
  • Baking powder, 1 tsp
  • Baking soda, 1/4 tsp
  • Salt, 1/4 tsp
  • Optional: Raspberry or strawberry syrup, 1 tsp, for a boost in colour

Bring eggs, crème fraîche, and butter to room temperature. Preheat oven to 350 degrees F/180 degrees F. Before simmering the rhubarb, I cut them to fit snugly in the two pans. Remove the rhubarb and butter inside bottom of pans. Put pans over parchment paper and make tracings with a knife, then cut out. Line the pans and butter again, this time, include all the sides and corners. Reserve.

Rhubarb from our potager

If you prefer a fluffier cake, then macerate the raw rhubarb in the sugar for at least a few hours or overnight. If not, pour one oz/30 ml to two fluid oz/60 ml of water into a skillet and add five tablespoons of sugar. Over low heat stir until dissolved. Place the rhubarb in the pan and gently cook for several minutes. If using raspberry syrup, add now. The rhubarb needs to be mostly firm so be careful as not to overcook. Arrange either the braised or macerated rhubarb in the lined pans and pour syrup/juices over them. Set aside.


Sift the flour, salt, baking powder, and baking soda into a medium-sized bowl. In a large bowl, mash the butter with a fork. Gradually add the sugar in batches, mashing well after each addition. Then beat with a wooden spoon for several minutes. Crack eggs one by one, beating well after each one is added. The batter will look a bit curdled which is OK. Beat in one half of the flour and the crème fraîche. Repeat with the rest, adding the vanilla.

Fill up pan(s) no more than three-quarters way up and smooth/flatten out with the back of a wet metal spoon. Bake around forty minutes or until a wooden skewer comes out clean. Center should also spring back slightly and the edges will have slightly pulled back.


Let cool till it is no longer hot. It may deflate a bit as the juices settle down which is fine. Going around the edges first with a thin, straight spatula will ease the easing-out of the cake. Then turn the pan upside down over a serving plate. The parchment may adhere itself onto the cake. In that case, gently peel it off. A recalcitrant rhubarb strip may need to be coaxed to join the rest.


By the time The Calm One sauntered into the kitchen, the cake had become one with the rhubarb, and so heavy with juice that it was challenging to lift a slice onto his plate. But somehow he managed. Crème Chantilly was whipped and sliced strawberries were sugared. Voilà!


The asparagus picking is finished chez nous. The remaining spears now look like this!

Soon fern-like foliage will appear

Gardening activity continues at a nice clip. Onions, garlic, and peas are now in the ground. Early-season potatoes to follow. Then carrots and beets...

Two of our twelve 4' by 12' veggie beds

À la prochaine!

RELATED LINK

Wikipedia article on edible flowers

Wednesday, 8 April 2015

Baked Parmesan Asparagus Polenta Sausage Frittata

The best situation for me during frantic springtime is if I could have both a cook and gardener. Since that appealing pair is not to be seen anywhere chez nous, what's the next best thing? A frittata brimming with asparagus fresh from our potager, that's what. Though it needs attention for about twenty minutes during batter preparation, once in the oven, it thrives for a half hour on its own, browning and puffing up itself with such prettiness that after I return from topping up the birdbaths and bringing in the tomato seedlings for the night, I hesitate before eating...for about one second.


Though some regard a frittata as a quiche sans crust, my take is that it more like scrambled eggs without the scrambling. Since a top tip for making truly fantastic scrambled eggs is not to add milk or water, I applied that wisdom to this unscrambled version. The polenta cheerfully amplifies the sunny yellow of the eggs, but more importantly it imparts the most delectable creaminess. What we have here are eggs with a built-in porridge perfumed with asparagus, permeated with succulent sausage, and embellished with Parmesan.


Ingredients
makes 4 ample servings
  • Asparagus, blanched, sliced in 2 inch/5 cm pieces, four fluid oz/120 ml (about 4-5 spears)
  • Sausage, Toulouse or Italian sweet, cooked, blotted, crumbled, 10 fluid oz/300 ml (two 6 inch/15 cm long sausages, any extra can be frozen for the next time!)
  • Polenta, fine, quick-cooking, 2 fluid oz/60 ml
  • Eggs, 6
  • Parmesan, freshly grated, 4 fluid oz/120 ml
  • Salt to taste (I used about 1/2 tsp)
  • Olive oil, 1/2 to 1 tsp, for oiling the baking dish

To keep asparagus fresh for about four days in the fridge, wrap the ends with wet paper toweling and put in a sealed plastic bag.

The last of our oh-so-tasty harvest!

Preheat to 350 degrees F/180 degrees C. Whisk eggs and polenta together for several minutes to get a thick batter.


Add sausage, asparagus, salt, and Parmesan. Stir well.


Pour into a well-oiled baking pan. If desired, some of the asparagus can be re-arranged into a pleasing pattern.


Bake for around twenty-five to thirty minutes until it's nicely browned. Test by pressing the center which should be firm. Slice into portions.


Its fragrant, creamy glory is best when served hot from the oven. When cold, the flavour does stand up, but the texture is heavier. When reheated by steaming, it gets a more bread pudding feel. Additionally, it freezes fairly well.

Porridge for adults!

À la prochaine!

Wednesday, 1 April 2015

Do No Harm, Make Parm Broth!

Parmesan's longevity and versatile deliciousness makes it a classic worth having around. Chez nous, it adorns pizzas, blends into Béchamel sauce as a topping for lasagne, rounds out calzone filling, and parts a perfect richness to roasted broccoli soup. Hence there is a rind bounty. Though some are tossed into minestrone and tomato sauce to augment their robust taste, the rest become covered with fuzzy blue mold necessitating a wasteful visit to the bin. Now I pop each one into a ziploc bag in the freezer till there is enough to make a fabulous broth replete with silky body and fantastic flavour!

Olive oil rising to the top forms a delicious, lacy cloud with the aromatic broth

As there were leftovers from simmered chickens, linguine and capers in the larder, and last but not least, some asparagus fresh from our potager, they all got piled into a bowl of steaming broth.


However, there are various ways for serving this lusty fusion of Parmesan, white wine/sherry vinegar, olive oil, and a bouquet garni. It can form a base for soups, casseroles, and sauces. Different combinations of garnishes include other pasta shapes, roasted veggies like broccoli, white beans, poached egg, seared shrimp, crumbled cooked sausage/ham/bacon, and bread crumbs. The broth itself keeps for several days in the fridge. Though I did not test freezing, I suspect it could be reduced and frozen in ice-cube trays which makes plopping them into soups and sauces a breeze.

It's appropriate to leave a little cheese on the rinds!

If your household doesn't generate heaps of rinds, it may be possible to buy an inexpensive bag of them from a cheesemonger.

Ingredients
makes 2 ample servings, adapted from here. If substituting fresh herbs for the dried, use a bit more. Recipe can be doubled but the cooking time most likely will be longer.
  • Olive oil, 2 T
  • Onion, 1, peeled and quartered
  • Garlic, whole head, unpeeled, halved
  • Thyme, dried, 1 tsp
  • Bay leaf, one large
  • Parsley, dried, 1/4 tsp
  • Peppercorns, black, 1/2 tsp
  • White wine OR 1/2 tsp of sherry vinegar diluted in water, 8 fluid oz/237 ml
  • Water, 34 fluid oz/1 liter
  • Parmesan rinds, 10 dry oz/284 gms
  • Linguine, a bundle about an inch/2.5 cm in diameter
  • Garnish: cooked chicken chunks, asparagus tips, capers
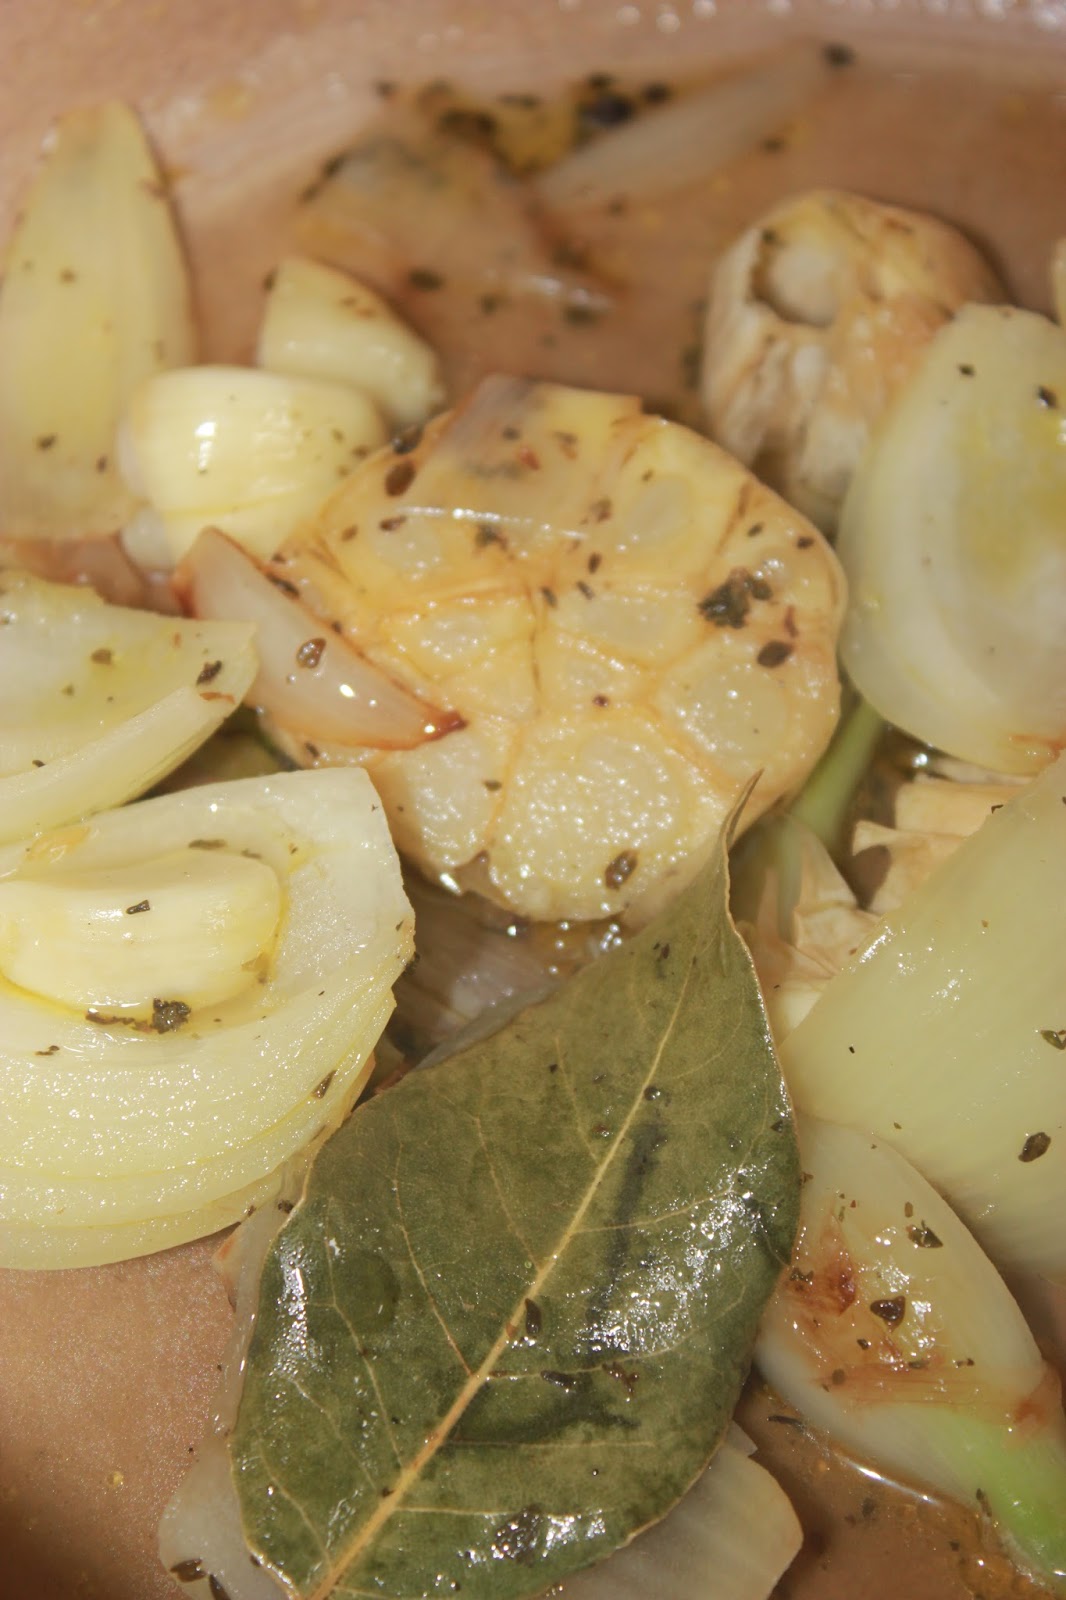
Heat oil in a heavy-bottomed pot, like a dutch oven, over moderately high heat for about a minute, then add the next six ingredients and while stirring, saute until browned, about five minutes.


Carefully pour in the wine or diluted vinegar and simmer for about five minutes or until reduced in half.

This concentrating intensifies the flavour

Toss in the rinds and pour in the water. Stir well and cover with the lid a bit ajar to encourage broth reduction. Simmer for about thirty minutes or until the flavour develops to the point of knocking your socks off. Stir a few times as the rinds tend to stick to the bottom*.


Strain and salt to taste. Cook linguine in the broth then divide evenly in bowls. Using a fork, you can twist the pasta into nests if that is your preference. Garnish with chicken, asparagus tips, and capers. Luscious, I say!


À la prochaine!

*Cleaning tip: that mass of molten rinds will leave strainer and pot somewhat challenging to clean. While the pasta is simmering in the strained broth, I fill up the empty pot/strainer with warm soapy water. I eat. Then I scrape the pot's bottom with a wooden spoon, finish the cleaning with an abrasive sponge and using a veggie brush/toothbrush, clean the strainer. This stuff is so good, it's worth this bother!