Thursday, 21 May 2020

Pea Harvesting Break

We have a sizable pea crop coming in at the perfect time, nearing the end of May before the cool-temperature-loving pods get parched in the southwest France June sun. There's lots of peas needing to be picked over a two-three week period, and just at the right moment when the individual seeds are not too little (not enough sugar) nor too big (too much starch). Pea precision. Then they will be processed for freezing. Presently it's looking there will be enough to fulfill all our pea-eating needs for a whole year.

Shelled pods under the pergola waiting for a trip down to the compost pile

See you next week when the ins and outs of pea whispering will be revealed!

Thursday, 14 May 2020

Potted Cacti Plus Our Garden's Wild Area

The same acquaintance who gave us all those miniature dormant roses this past winter had bestowed upon us a couple of potted cacti earlier in the autumn. Echinopsis oxygona, known as Easter Lily cactus, also called the sea urchin cactus, has fragrant, lavender-pink blooms with long floral tubes which are pollinated by moths. Flowering overnight, they give quite a show the following morning though they are not long-lasting, wilting shortly afterwards. The smaller pot is filled with massed, small candle shapes with bright, orange-red flowers. I am guessing they are Echinopsis chamaecereus whose common name is the peanut cactus. Most cacti are from and adapted to dry regions, though a few thrive in tropical and subtropical areas. After their photo shoot, they were returned to a deeply recessed, south-facing sous sol window sill so as to be sheltered from any surprise rain and to get as much solar heat as possible.


When being gazed from directly above, the Easter Lily cactus flower bears some resemblance to a lotus.


Most of its 'stem' is hollow.


Though pollinated by moths, another type of insect, most likely a bee, was having fun inside the deep interior. It was stumbling about, its head well dusted with pollen, so much so, that it just might be possible there's a tiny, mirrored vanity plus a pot of loose powder replete with a puff hidden in the floral tube's depths! It then climbed up with the help of a very impressive stigma to the petal area.


When our acquaintance was giving me the pots and snipping off bits from an extensive collection flanking an eaves-shielded, south-facing side of her house, The Calm One was visually communicating from our Zoe the Electric Car via subtle facial expressions that he had been ready to depart about a half a hour ago. Therefore the giving of cacti care info was very briefsun, not much water. The first on-hands lesson once arriving chez nous was painfully learning that wearing leather gloves when intimately handling cacti as in potting up (use a mix just for cacti!) any remnants is essential, not to mention that skin punctures can result in irritation or rashes. After all, those sharp structures are protective against animals chomping on the plant. In general, cacti can not tolerate temperatures much below freezing and during summer, may need watering as frequently as twice weekly. This winter was mild, but if necessary, they may have to go into the cold frame in the future. A small amount of balanced liquid fertiliser should be added to the watering can. To snip off blooms, cut just above the fuzzy base which eventually will become more of the plant.


The garden was neglected for two years before we acquired the property a decade ago. I knew I had to pace myself in getting it into reasonable shape. Being on a limited budget at that time, my priority was to grow food which I never had done so the learning curve was steep, actually the incline turned out to be dizzying. So when I noticed a patch of brambles growing under the dying cherry tree, I decided, ah, let it go for a while. Well that while stretched out further into time than desired, and seeing growth midway up to my height, I decided, let it be. The wild area was born. Ivy, laurel, Italian arum, sweet violets, honeysuckle, bay laurel, blue bells, and leather-leafed viburnum were either already there, seeded from elsewhere, or planted from cuttings/divisions of existing established plants. Mostly the earth was uncovered and the wire fence perimeters open to viewing from the outside. Today, it's the reverse. It's hard to catch a glimpse of soil (except for the veggie beds) or sneak much of a peak into what is a lush garden with sturdy, mature green 'bones' like ivy, laurel, and bay laurel. In the below photo, on the left, blackberry and raspberry bushes signal the end of the cultivated garden while on the right, brambles and sweet violets announce the wild area's beginning.


Looking towards the east (I am standing amidst a riot of honeysuckle), right into the heart of the wildest part of this less tended part of our verdant paradise, I know that thorns would stop me from just going where I want to go, so the path surrounding this tall mass of green often alive with a great many starlings will be followed. The more open area is where prunings are put while awaiting chipping and compost piles do their thing.


This is the most eastern edge of the wild area; that bit of white is a large shed that used to house the previous owners' recreational vehicle and now is filled with lavender cuttings waiting to be chipped and various junk, all topped with a sagging roof. Beautifully hidden, I say!


A little further west, the shed's entrance can be spied.


Here's a closeup of the honeysuckle growing over a hedge and sprawling on the ground. My horticultural perpspective is to keep only a small part of the wild area truly unkept while the outside edges are pruned so it's a surprise when the garden's central cement path is followed to its end to see just how woodsy it becomes. Remember that dying cherry tree? Its chopped up branches circle the bramble-covered thick trunk, all rotting away which is excellent for fungi and for emitting a forest fragrance. I regard extension lopers and line strimers as sculpture tools to undulate emerald waves and shape green geometry. I just love how ongoing it all is as I am guided by what nature is doing.


À la prochaine!

Thursday, 7 May 2020

Gardening in the Time of Covid-19, Part IV: Portable Outdoor Mosaic Moss Garden

James Wong, an ethnobotanist and known as @botanygeek on Twitter shared a YouTube video of Mossin' Annie dressed in marvelous shades of purple, mossin' away, selecting them from kid-sized sleds filled with mosses acquired from parking lots and the such before placing a patchwork of different varieties in a shady part of her garden. His enthusiasm for her enthusiam as both are passionate about mosses made me wonder on the fifty-third day of the lockdown (Confinement Jour 53) if there was something I could do with those growing in our urban garden.


Ideas started to bubble up, one by one, until they were realised into a triangular arrangement of square plastic pots whose colours complemented each other as their points came together in the centre, that is, blue almost touches the orange while violet, the yellow. The pots being surrounded by wood chips contained in a terracotta saucer are provided with a neutral background. My moss interest is merely one of a novice, but my love of colour is obsessional. 


One of my garden hats became the inspiration for remembering and then using the recycled, brightly coloured, plastic pots. Strips of bubble-gum pink, lime-green, and orange are toned down with the inclusion of bands of more neutral accents like navy blue and brown.


The lovely emerald patches are most likely fern mosses.


So where was I able to find these specimens? One came from a tub of miniature roses. That dark patch roughly in the middle was where that moss once lived. It was scooped up with a spoon, though it could have just been pulled away with my fingers. Potting mix was moistened and packed all the way to the rim of a pot; the moss was placed on top and lightly pressed down. 


The other three came from the central, cement path's end which is close to our garden's wild area. Those were quite thin and needed to be scraped off with a knife.


They were growing under ivy. 


The wild area is about one-hundred-square-metres and runs across the back width of our six-hundred-square-metre main garden. Since the lockdown, this shady area has been included in my daily, thirty-minute garden walks taken at twilight. Below shows a path flanked with blooming, and ever-so fragrant, honeysuckle.


The portable, shade-loving moss garden was designed to be placed under the ivy-covered pergola where I often go to rest after a gardening chore. As I sat relaxing and looking at the finished project, I thought, very adorable, but not substantial enough, so . . .


. . . the mosses are moving into bigger real estate where they will be spritzed with water from time to time.


À la prochaine!

Thursday, 30 April 2020

Gardening in the Time of Covid-19, Part III: Returning Sounds, Sights & Smells of Nature

On the 45th day of lockdown (Confinement Jour 45), I find myself sitting under our urban garden's ivy-covered pergola to rest after completing a garden task, realising though always pleasant, it is even more so. Birdsong has little competition from traffic noise. True now as before, after a rain, petrichor permeates throughout, but at present, before the rain and its fragrant aftermath, the air is already wonderfully fresh.

Looking through the sous sol's potting room's window with its coloured glass bottle collection towards the ivy-covered pergola

Then there are the moles. One of their many dirt volcanoes can be seen in the below photo's upper right corner. Why have they entrenched themselves for the first time in the ten years since our arrival? My guess is the lockdown-related decrease in vibrations caused by street traffic including fewer trucks rumbling down one long side of our garden flanking a refrigeration depot's entrance has attracted these industrious soil diggers. After some research I have concluded there are three perspectives on having garden moles:

1) Get rid of these dangerous, disease-carrying, dirt-dragons/rodents as quickly as possible with poison. (Call our extermination service for an estimate.)

2) Be humane to both these annoying critters and your lawn. Trap and release them. (Where? Regardless of the lockdown, if released they will either come back or bother someone else.)

3) Co-exist. They bring benefits too like aerating the soil (those mounds of theirs are excellent with which to top up veggie beds), eating tons of detrimental grubs, and fertilising the soil. As our 'lawn' is mostly English daises and moss, and their mounds though plentiful are not disturbing the roots of bushes and plants, this perspective has become mine.

Centre: osteospermum; heucheras of varying hues: clockwise, paprika, Georgia peach & tirasmu; lavender pot: lantana

This past late winter, an acquaintance of The Calm One gave us many a potted miniature rose. At that time, the floral donation was leafless. All got a good pruning. Then I had to wait a few months to see what colour blooms they would have. Out of around fifteen, only a couple have not yet set flowers. I do not know the different varieties' names, but they are all beauties soaking up the sun on sous sol window sills facing south. During the growing season, each gets sprayed for blackspot monthly and have a few drops of liquid fertiliser added to the watering can almost daily.


Here's a close up of a deep-pink one.


And of a tiny white rose.


Also of a gorgeous coral-coloured bloom.


A tub of two turned out to have deep red, quartered roses. Such flowers look fantastic against a complementary background of deep green, so it is now fronting a patio cutout's calla lily thicket.


Such a beautifully formed rose!


That diminutive ruby stunner has big competition though. Outside the balcony entrance's front door, curving up high over the weigela, is a robust climber, Étoile de Hollande, fragrant beyond belief, so deeply red it can look almost black, and with a velvet sheen that is mesmerising.


Here's one huge, ruffled bloom.


À la prochaine!

Thursday, 23 April 2020

Covid-19 Cooking: South Korean Dalgona Iced Coffee

On the thirty-eighth day of the Lockdown in France (Confinement Jour 38), I am blogging about my version of Dalgona Iced Coffee. In South Korea, where not only was the coronavirus met with an admirably disciplined approach, taming the spread early on, but during lockdown with its accompanying sans-Starbucks lifestyle, the country also did some viral activity of its own by popularising via social media the DIY making of Dalgona Iced CoffeeDalgona's name is taken from the popular South Korean street snack of honeycomb toffee because according to the South Korean actor, Jung Il-woo, after having a beaten coffee (coffee powder, sugar, and hot water are whipped together) in Macau, stated they share a similar taste. Both also have a light-caramel colour. Beaten and frappe coffees (originating in Greece though frappe is a french term for mixing with ice) ordinarily could be gotten at eateries before the pandemic.


If you have come across images of this delightful iced coffee, and they are all over social media, you might be asking, but where is that scumptious, glistening mound of coffee foam reaching skywards? It's in there I promise as I first filled the glass with one-third of iced milk, then layered in the foam, and finally followed with the second and final one-third of iced milk. I did this for two reasons. One to be different though soon afterwards, I discovered India had already beaten me to the punch with its phenti hui coffee. Second to get a head start on the pesky business of mixing the whipped content with the milk so it can be quaffed down with ease. The coffee foam though delicious has attitude, an attitude derived from its nature of being foam which is viscous; its similiarity to Italian meringue has been noted by many a culinary eagel's eye. Despite being suspended in milk, it managed to surface, a tip of the 'foamberg'. My version also has the addition of folding in grated dark chocolate into the foam. And sometimes I rim the glass with ground cinnamon. The coffee foam is so enveloping, the chocolate bits disappeared into its welcoming opaque cocoon. But they soon melted leaving visual traces of their delectable existence in streaks, flushes, and scalloped edges.


Ingredients
makes two 237 ml/8 fluid oz servings which can be had on consecutive days as the Dalgona topping keeps several days in the fridge. The quantity can be ramped up as long as the ingredients are all in equal proportions. Ramping down is not feasible because the quantity would be too small to be successfully whipped.

  • Coffee, instant or freeze-dried, 2 T
  • Sugar, white, 2 T
  • Boiling water, 2 T
  • Dark chocolate, grated, 1 heaping tsp
  • Milk, any kind, including nut and grain (I used whole cow's milk), 237 ml/8 fluid oz
  • Ice cubes, 6, crushed (since the coffee foam can be added to hot milk instead, if that is your preference then no ice cubes are needed)
  • If rimming the glass in cinnamon, then a mixture of cinnamon and sugar plus some kind of sticky liquid like honey/syrup/cordial are required

Place the first three ingredients in a small mixing bowl. Though an electric beater/whisk would be the easiest and quickest way to make the coffee foam, in true DIY manner, manual beater/whisk, even a fork, could be used. Be warned, it will take some time, at least five minutes, probably more. My stick blender did it under a minute. As the mixture is beaten, it eventually lightens in colour and forms peaks which means it's ready. Fold the grated chocolate into the foam. Combine crushed ice and milk in a pitcher. If rimming the glass, dip the rim first into honey/maple or plain sugar syrup/flavoured cordial followed with a dipping in a sugar and cinnamon mixture. Use a stamping motion which can be followed by a twisting one. Do the stamping and twisting motion just once or big, unattractive globs will accumulate negating the desired crushed jewels effect. Fill glass one third full of iced milk. Spoon half of the coffee foam on top, and cover almost to the rim with ice milk. Repeat for a second glass. Even after pronounced stirring, clumps of foam still bobbed about but were small enough to be enjoyed while sipping. This was sooooooo good and fun to do!


À la prochaine!

RELATED POST

Iced Coffee Caramel Float


Thursday, 16 April 2020

Covid-19 Cooking: Duxelles

On the thirty-first day of Lockdown in France (Confinement Jour 31), I made duxelles which is a fairly straightforward technique of intensifying mushroom flavour by lessening the moisture content, allowing not only for various uses like pizza topping, pasta adornment, soup and stew enrichment among others, but also for freezing where, because of their reduced state, they won't take up much space. The most important aspect is that the texture doesn't become leathery and tough. You want intense flavour, but tender tidbits at the same time. If most of the liquid already is wrung from them before being sauteed and they are cooked in a large, shallow skillet, the duxelles will be subjected to drying heat for a much shorter time therefore remaining soft despite containing much less moisture.


Ingredients
makes 500 ml/a little over 2 American cups (recipe can be halved)

  • Mushrooms, fresh, 1 kg/2.2 lbs (I chose white button mushrooms, but any edible ones, wild or cultivated, can be used though the taste will vary from mild to strong depending on the variety)
  • Butter, sweet, 3 T
  • Salt, table, 1/2 tsp

As demonstrated by the above list of only three ingredients, this version is the most simple available among numerous recipes. In our household, duxelles is mainly used for pizza topping therefore the plainest form will be more compatible with the garlicky, herb-enhanced tomato sauce and the well-seasoned, often red-wine-enriched Toulouse sausages which also go onto the crust. However, if you desire racier versions, be rest assured they exist with various additions such as garlic, onions, cream, herbs, and booze. Either clean the mushrooms with a soft bristled brush or with a dry paper towel. Slice and then coarsely chop which is just the right size for pizza topping. A finer mince could be more suitable for other dishes.


The cleaned 'rooms are in the foreground, outside the plastic punnet

Drap an old tea towel/dish cloth over a large bowl, pressing it to conform to the bowl's inner contours. Put the amount of chopped mushrooms that can easily fit once the towel is pulled around the mass and twisted closed. Old tea towel you say? Old enough that you don't mind it getting stained, but not so worn and thin that it will tear during the vigorous wringing process.


Squeeze by twisting tighter and tighter and also by massaging the 'bag' with your hands. At first not much liquid will ooze out. After a while, more and more will. Stop when most of the liquid is either squeezed out or you are tired (my preference!). Repeat until all the mushrooms are done. The mushroom liquid is quite plentiful. I couldn't find any information regarding if it could be used in other recipes or if it could be frozen. I am guessing if the raw mushroom liquid is used almost immediately as in a veggie smoothie, than it probably will be okay. Melt the butter over medium high heat in the largest, most shallow skillet you have or work in smaller batches if you only have small/medium sized pans. Add mushrooms and salt. Saute, while stirring frequently, for about five to eight minutes or until the duxelles no longer clump together, are slightly golden, and greatly reduced in volume. Don't mistake their being glazed with butter as moisture.


They then can be portioned and once cooled, popped into the freezer or kept for several days in the fridge.


Though the photo (I forgot to take one of a pizza with duxelles!) below shows how I used to strew a homemade pizza with commercially packaged, pre-sliced, frozen mushrooms which were then thawed before sauteing and added to the yet-to-be baked pie, I ask you to imagine how it would look instead with a dense sprinkling of duxelles applied before baking. Here's a clue: its appearence was charming. Additionally the flavour, texture, and aroma were way up there.


À la prochaine!

RELATED POSTS

Cream of Mushroom Soup Redux


Thursday, 9 April 2020

Covid-19 Cooking: Pea Shoots Soup with Tomato Cream

I am not going to say growing your own shoots, harvesting them, and sieving the fibrous bits from the soup is a doddle in the park. It isn't. But I can say this soup from the first spoonful to the last packs a punch, albeit with a small but determined fist delivered via the combined flavour of the youngest, impossibly fresh peas more akin to green candy than a vegetable and the sweetest spinach without a bit of astringency though neither peas or spinach are included in the ingredients. Add ceps, garlic, thyme, a bit of cayenne or chili powder, butter, and cream, and you have a soup that slams the WOW-meter skywards. One caveat is that it needs to be eaten shortly after being made because its lush, herbaceous brightness fades into increasing and disappointing rankness.


This late winter, three beds of peas were planted thickly so to allow for an abundant pea shoots harvest. In the below photo, the pea seedlings have been thinned to about ten centimetres/four inches from each other leaving enough room for them to mature into pea-bearing plants.


Ingredients
makes four ample servings

  • Pea shoots, fresh, 300 grams
  • Ceps, dried, 2 small handfuls (a gowpen!) plus their sieved soaking liquor, 1.5 L
  • Garlic, cloves, peeled, 2
  • Butter, sweet, 2 T
  • Flour, white, 2 T
  • Thyme, dried, 1.5 tsp
  • Pepper, cayenne, ground or chili powder, a large pinch
  • Cream, 8 T
  • Garnish: tomato paste, cream, and minced pea shoots
  • Salt and freshly ground black pepper to taste

Rinse the shoots well.


Put them on an old tea cloth and with another tea cloth on top, dry them until excess moisture is gone. They will look fluffy and be springy to the touch when sufficiently dry. Chop them fairly finely.


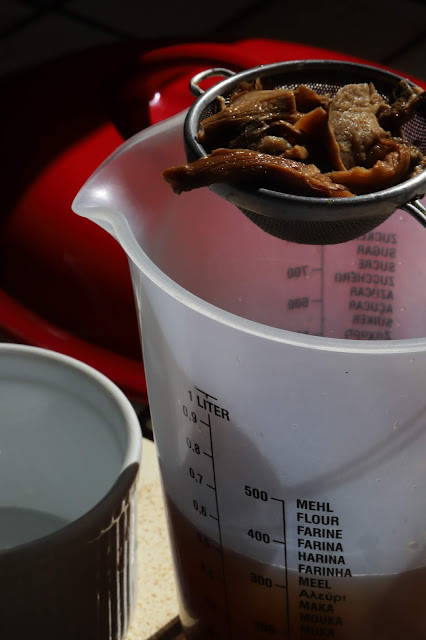
For hydration and separation of grit for the ceps: pour boiling water over the ceps in a bowl and let them steep until the water is coolish to the touch, about fifteen minutes. Work them in the bowl with your fingers and then pour the entire contents into a sieve positioned over a measuring jug. Put the ceps back into the bowl and cover with cool water from the tap. Repeat squishing, sieving, and covering with fresh water till the sieved water is much lighter in tone and you have one and half litres.


Mince them, and also the garlic. Add thyme and cayenne/chili powder. Measure out butter and flour.


Over medium low heat, melt butter. Saute garlic, ceps, thyme, and cayenne/chili powder for about five minutes until fragrant and somewhat softened.


Stir in the shoots. Keep stirring until they cook down significantly, about ten minutes. Stir in the flour. See that brown crust in the corner of my beloved cast-iron pot? Per the gentleman over at his youtube channel, Binging with Babish, that's the wondrous stuff of a chef's dreams, simply called fond.


Add the ceps' liquor which will deglaze the fond, bring to a simmer, and cover. Cook for about twenty minutes. Sieve. Pour back into pot, add cream, and salt & pepper to taste. Reheat if necessary.


Mix about two tablespoon of tomato paste with cream to make the mixture liquid enough for drizzling over a soup serving. In the below photo, it's too thick, but oh so good and would be perfect smeared on hot toast. I just added more cream until it poured from a spoon.


Splotch some tomato cream over a serving and top with a bit of minced pea shoots. I adore this soup. Let's just say this was the closest I ever felt to The Plant Kingdom, and that's coming from one who has been smitten with plants since toddlerhood. I can imagine Treebeard sipping a cup of this and smiling.


À la prochaine!

RELATED POSTS

Pea shoots & Sausage Couscous

Roasted Salmon & Spiced Rhubarb With Fresh Pea shoots