Showing posts with label Preservation of Produce. Show all posts

Thursday, 22 October 2020

Preservation of Produce: Raisin Puree

The other day I finally noticed two, large,  long-neglected bags of raisins in our sous-sol cupboard. They were a smidgin away from their due date. Though I been wanting to bake some whole wheat raisin muffins for a while, I figured doing that would use up just a fraction of this dry fruit deluge so what to do with the rest? Fruit puree, whether fresh or made from dried fruits, freezes well.


I made two separate batches of raisin puree. The larger one was covered with water.


A smaller batch was covered instead with orange juice, and a large pinch of powered ginger was stirred in. Both batches were lidded and placed in the fridge for twenty-four hours.


My 750 watts Bosch hand-held mixer did the small batch with ease, taking about ten minutes to reach a very smooth consistency.


The larger batch took forever, at least it seemed that way. About 8 PM, I started the blending. After ten minutes the mixer heated up so much that it was necessary to let it cool for about a half hour so as not to burn out the motor. This was repeated four times bringing me close to bedtime. Therefore I left the partially processed puree, covered, in the fridge overnight. The next morning, I was able to finish the blending in ten minutes. It's possible that not only was this batch significantly bigger, it is also conceivable that water doesn't macerate the raisins as readily as orange juice.  I would suggest that small batches in general would be easier to do, but also if you want to do a large one, then let soak in the fridge for two to three days. The puree is absolutely delicious and is versatile. I marbled yogurt and swirled some through hot oatmeal. I imagine that it would be great as a topping for ice cream or served with a cheese platter in place of honey or jam. Whole wheat muffin batter is just calling for the marble treatment which is what I am planning to do fairly soon, choosing the orange/ginger batch. Perhaps an orange icing drizzle on top?


To marble either yogurt or muffin/cake batter: Put separate dollops of puree and yogurt/batter in a checkerboard pattern in the first layer. For consequent layers, alternate the dollops, that is, put puree over yogurt/batter, then yogurt/batter over puree until the glass or baking pan is filled. Using a wooden skewer, insert it all the way to the bottom of the glass or pan and working from side to side, twirl the skewer. Turn the glass or pan a quarter turn and repeat the twirling.


À la prochaine!

Thursday, 10 September 2020

Layered Puree Of Roasted Beetroots & Their Greens

Our beet crop is in full swing. Roasting veggies is a wonderful way of preparing them, especially when serving as a mash because their moisture content is decreased to the point that flavour is intensified while the texture is made more pleasing. Beetroots are no exception. Cooler weather makes turning the oven on not too much of a big deal. Beets, along with radishes and turnips, work hard for the kitchen garden as they provide both roots and foliage resulting in a double harvest. Since red and green are complementary colours and pack a visual punch, I layered the roasted, creme-fraiche-enriched beet puree with a puree of greens sauteed in olive oil with garlic. Double harvest, double puree. Topped with a lemon slice and fleur de sel, it makes a light lunch or supper when served with cheese and crackers.


If beets with their greens are not to be had at your market, fret not, roasted beetroot puree topped with creme fraiche is wonderful.


Ingredients are bolded. To roast beets: Preheat oven to 204 degrees C/400 degrees F. (The beets can be roasted along with other stuff at lower temperatures but they will take longer.) Trim both tops and bottoms. Scrub well. Though they can be enclosed in foil, it is much easier to check doneness if they are placed in a foil-lined, lid-covered oven dish. Oil the foil. When checking them as they bake, if they look dry or sticking then add a bit of water. They are done when a knife inserted into their centres meets with no resistance. My melange of small to medium beets took about an hour. Peel carefully with a sharp knife, trimming away any dark bits as they tend toward bitterness. The finished beet will look translucent and bright red. If there are excess beets, let cool, portion, and then freeze. This way you can have borscht in the future. A tablespoon or so of creme fraiche or sour cream added to the blender or a stick mixer's container will ensure lusciousness. Salt to taste. Reserve.

To make the sauteed greens puree: Wash the beet greens.

Trim off most of the red stems as they make a grainy texture in addition to being quite bitter.


Dry them in a kitchen or paper towel.


In a large pot, heat up some olive oil (if you adore olive oil slicked greens as much as I do, then thinly cover the pot's bottom with the oil) over medium low heat. Add as much minced fresh garlic as you want and saute for a minute (no browning!) or as in my case, if you are making do with garlic powder, wait until the greens are added. Turn the heat to high and depending on the size of the pot and the amount of greens, add them in increments. As they start to wilt, add more, stirring all the time. Cover, and lower heat to a small flame, braise until tender, around ten minutes. During that time, check to see if a bit of water needs to be added to prevent any burning and sticking. Blend till smooth. Salt to taste.


To present: When layering, first spoon the puree close to the sides of the glass and then work towards the centre. This way the demarcated layers will be clearly seen from the outside. Start with the greens, followed with the beetroot, another layer of greens, and then edge the top with beetroot letting the previous layer of greens to peek through. Cut a thin slice of lemon from its edge to its centre and then twist it into a swirl, topping the double puree with it. Sprinkle with fleur de sel. I served it at room temperature, but it can be chilled if desired. The sweetness from the beetroots contrasted nicely with the slight bitterness of the greens. Lovely to look at, and lovely to eat.


À la prochaine!

Thursday, 3 September 2020

Keeping Up With The Figs Plus The Late Summer Garden

Our fig tree started last week to present fruit ripe enough for picking. Presently it is yielding about twenty large figs daily. Learning from our massive blackberry harvest earlier in the season, I knew I wanted to process our figgy bounty in a similar way. Without generating any more heat than what the summer was already providing along with retaining as much vitamin content as possible, the uncooked fruit in the case of the blackberries were put through a Foley mill followed by an addition of confectioner's sugar per sweetness preference; in the case of the figs, they, along with maple syrup, cinnamon, ginger, and nutmeg added to taste, were pureed with a stick blender. Once portioned and popped into the freezer, these home-grown fruits will be ready for future use in all kinds of goodies. I do reserve daily some fresh fig puree to mix into yogurt or if I am experiencing a super home-grown-fruit-appreciation day, I make a tall parfait to take out into the garden. It showcases our blackberries, blueberries, and figs all in one fell swoop. First goes in a layer of crumbled blueberry muffin, followed with the spiced fig puree, blackberry coulis, and yogurt. Topped with more muffin crumbs and a deluge of fig puree and blackberry coulis, it is out of this world with the goodness of fruit.

I love digging a spoon in and seeing swirls of fig puree and blackberry coulis spontaneously appear in a plethora of patterns.


A blueberry muffin crumb gracing the gustatory situation just makes everything even better.


Not only are fig trees vigorous, they are also easy to grow and maintain. Pruning is not that difficult as the wood isn't too hard. Since arriving here ten years ago, I haven't yet fertilised it. I do water it in between rains during summer. How to know when they are ripe? First thing, you need to know the colour for your fig variety when it's mature. Ours is mostly purplish brown with swatches of green. Also the fig should not be right angles to its twig/branch, but instead be drooping a bit. Additionally when pressing ever so gently, it will feel like a small balloon filled tightly with air. Lastly, though not always, there will be a drop of juice oozing from the bottom centre. Those are best eating right out of hand immediately. Picking involves slightly twisting the stout stem that afixes each fig to its branch until there's a plump packet of delight sitting in your palm. Since their skin is fragile, bruising easily which is why storebought figs are expensive, place each fig in a single layer. Recycled egg cartons are great as fig harvest baskets.


Two thirds of our tree is in our garden and the other third is in .  .  .

. . . in the yard of a refrigeration depot which is directly behind our urban garden. When their entrance is open I can harvest figs from that side. This coming late winter, I will remember to prune that part of the tree which presently is touching the ground!


Late summer is such a lovely time. It's so enjoyable to sit under the pergola and gaze upon . . .


. . . all the abundance.


Out in the front garden, the border directly in front of the balcony stairs leading to the front entrance door is a tropical riot of yucca and canna with a cooling splash of temperate dahlias, lobelia, and sedum.


À la prochaine!

Thursday, 9 July 2020

Preservation of Produce: Blackberry Coulis

Our single blackberry bush already has given us ten litres and is still going as there's no tomorrow. I suspect there's another ten litres in its future.


Our cultivar is thornless which makes harvesting a cinch.


Though consistently watered and pruned, I yet have fertilised it in the ten years we have been here. I am not sure if I ever want to as its largesse is already a challenge to keep on top of via processing. Pruning is a simple job of keeping the new canes which spring up during summer not much longer than ninety centimetres (three feet) and its lateral branches approximately thirty centimetres (one foot) in length. After all the berries are picked, then the canes that sprung up last summer and carried the present harvest will be clipped off at ground level. In the below photo, the new cane on the left which will bear fruit next season has been trimmed; the older cane, once all its berries have been plucked, will be removed completely.


A ripe berry will have plump, individual drupelets. If they ripen too much, their fibrous centres will be replaced with juice which can be seen oozing among the drupelets. The juice can become slightly fermented; when popping one such berry into your mouth, it's like taking a tiny sip of blackberry wine.


A Foley mill made short order of all those berries.


Icing sugar was added to the sieved, mashed, fresh berries, better known as coulis, until it reached the desired sweetness which isn't too much as additional sweetening can be added if desired. It is the uncooked state of the fruit that gives such a burst of flavour as contrasted to a puree which is sieved, mashed, cooked fruit.


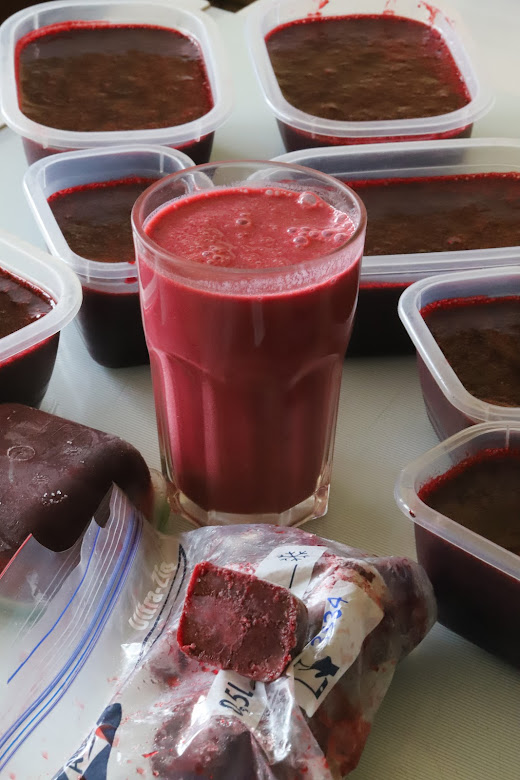
Those ten litres of blackberries became three litres of coulis. Besides ladling it into variously sized containers, ice cube trays were filled also. Once frozen, the cubes were placed into a ziplock bag. The luscious coulis, once defrosted or if your mixer is powerful enough, throw in a few blackberry ice cubes instead, is used in smoothies (the one below has yogurt, water, coulis, maple syrup, and powdered ginger) . . .


. . . and parfaits (the one below has a layer of yogurt and one of creme fraiche, two of coulis, and a topping of yogurt marbled with coulis sprinkled with icing sugar) . . .


. . . not to mention a dessert sauce, as in the below photo, smothering coffee ice cream. Coulis can drench cake/muffins, fill doughnuts/hand pies/cake rolls, and made into blackberry butter (reduce either over a low flame or in an oven until very thick). Versatility, thy name is blackberry coulis.


À la prochaine!

Thursday, 16 April 2020

Covid-19 Cooking: Duxelles

On the thirty-first day of Lockdown in France (Confinement Jour 31), I made duxelles which is a fairly straightforward technique of intensifying mushroom flavour by lessening the moisture content, allowing not only for various uses like pizza topping, pasta adornment, soup and stew enrichment among others, but also for freezing where, because of their reduced state, they won't take up much space. The most important aspect is that the texture doesn't become leathery and tough. You want intense flavour, but tender tidbits at the same time. If most of the liquid already is wrung from them before being sauteed and they are cooked in a large, shallow skillet, the duxelles will be subjected to drying heat for a much shorter time therefore remaining soft despite containing much less moisture.


Ingredients
makes 500 ml/a little over 2 American cups (recipe can be halved)

  • Mushrooms, fresh, 1 kg/2.2 lbs (I chose white button mushrooms, but any edible ones, wild or cultivated, can be used though the taste will vary from mild to strong depending on the variety)
  • Butter, sweet, 3 T
  • Salt, table, 1/2 tsp

As demonstrated by the above list of only three ingredients, this version is the most simple available among numerous recipes. In our household, duxelles is mainly used for pizza topping therefore the plainest form will be more compatible with the garlicky, herb-enhanced tomato sauce and the well-seasoned, often red-wine-enriched Toulouse sausages which also go onto the crust. However, if you desire racier versions, be rest assured they exist with various additions such as garlic, onions, cream, herbs, and booze. Either clean the mushrooms with a soft bristled brush or with a dry paper towel. Slice and then coarsely chop which is just the right size for pizza topping. A finer mince could be more suitable for other dishes.


The cleaned 'rooms are in the foreground, outside the plastic punnet

Drap an old tea towel/dish cloth over a large bowl, pressing it to conform to the bowl's inner contours. Put the amount of chopped mushrooms that can easily fit once the towel is pulled around the mass and twisted closed. Old tea towel you say? Old enough that you don't mind it getting stained, but not so worn and thin that it will tear during the vigorous wringing process.


Squeeze by twisting tighter and tighter and also by massaging the 'bag' with your hands. At first not much liquid will ooze out. After a while, more and more will. Stop when most of the liquid is either squeezed out or you are tired (my preference!). Repeat until all the mushrooms are done. The mushroom liquid is quite plentiful. I couldn't find any information regarding if it could be used in other recipes or if it could be frozen. I am guessing if the raw mushroom liquid is used almost immediately as in a veggie smoothie, than it probably will be okay. Melt the butter over medium high heat in the largest, most shallow skillet you have or work in smaller batches if you only have small/medium sized pans. Add mushrooms and salt. Saute, while stirring frequently, for about five to eight minutes or until the duxelles no longer clump together, are slightly golden, and greatly reduced in volume. Don't mistake their being glazed with butter as moisture.


They then can be portioned and once cooled, popped into the freezer or kept for several days in the fridge.


Though the photo (I forgot to take one of a pizza with duxelles!) below shows how I used to strew a homemade pizza with commercially packaged, pre-sliced, frozen mushrooms which were then thawed before sauteing and added to the yet-to-be baked pie, I ask you to imagine how it would look instead with a dense sprinkling of duxelles applied before baking. Here's a clue: its appearence was charming. Additionally the flavour, texture, and aroma were way up there.


À la prochaine!

RELATED POSTS

Cream of Mushroom Soup Redux


Thursday, 21 November 2019

Winter Preparation 2019: Storage of Glass Ornaments & Frost-Tender Plants Plus Preservation of Carrots

The other day, I did the last preparation for the winter garden which was to bring indoors the four, handblown glass flowersa bluebell, a burgundy digitalis, and two mottled pansiespositioned in the potager's centre bed of sweet alyssum. It was just in time as upon awakening today I saw the garden covered in hoar frost.

Bluebell

Digitalis

One of the two pansies

As appreciative as I am of their beauty, when they are tucked in the bed's four corners, they serve as hose guards.


However sunny, cold days alternating with the typical nightly winter temperature drop means the glass will be subjected to quite a lot of stress. They could be boxed up but then I won't be able to marvel at them. Sooooooooo . . . The Calm One came up with the idea of inserting a large vase into an earthenware urn. The vase was swaddled with bubble wrapping and foam peanuts were stuffed into the vase. They get to see the garden from my office, and I get to see them.


About a week or so ago, several osteospermums and a couple of lantana were dug up from their garden beds and put into pots. Soon after, they along with an already potted bougainvillea were transported into the sous sol and placed near a sunny window.


Several days ago, all the carrots were spaded, rinsed off with a hose, sealed in containers/plastic bags, and placed in the sous sol's fridge. The variety is Carentan (a slightly different strain of Chantenay), a husky bruiser, insisting on developing despite any stones in its way, and believe me, there are lots of tiny pebbles in our soil. The upper third of the carrot is where most of the growth is, that is, lateral growth, so though they tend to be stubby in our garden, there's still a lot of carrot there. The large, carrot-filled colander in the below picture is a small fraction of the total haul.


The process of preserving is still ongoing. They are scrubbed well, sliced or diced according to need, put in a cauldron of boiling waterlots of boiling water to proportion of carrotand boiled for three minutes to kill any taste-destroying bacteria that would grow, albeit slowly, while the carrots are frozen. They are then drained, dried, and packed into freezer bags while squeezing out as much air as possible. Though this preparation is labour-intensive at the moment because of the large number of carrots, in the future all I have to do is get a bag of prepared carrots from the freezer. I am looking forward to that!


Based on the amount I already have processed, I would say I grew enough to last six months. Yay! That's another item that The Calm One, the official grocery shopper chez nous, doesn't have to lug into his shopping cart for a while. He hasn't needed to buy potatoes since August, and they should last another two months. I love growing vegetables as they are fresher and tastier than store-bought, but they are also much more convenient as they are never too far away, either in the garden or in the freezer. In the coming months, the carrots will appear as a side of peas and carrots for our Pot Roast Of Leg Of Lamb, in Chicken Pot Pie (changes from this old post is that I now make the pastry with butter and reduce the amount of broth a bit), in Cream Of Carrot Soup (below photo), and . . .

Served with a slab of Coulommiers and some rye crackers

. . . Minestrone (ingredient list from this very old post is still valid, but I now start the soup with a soffrito/mirepoix of garlic, carrots, porcini, peas, greens, tomato paste, basil, bay leaf, and with potatoes added towards the end of sauteing before adding stock and the remaining ingredients) which included our frozen peas harvested this past early summer. There's probably enough peas in the freezer to last another month. Sadness always descends even after growing food for ten years when I run out of our garden produce. Of course, I am glad our supply of vegetables and fruits can be topped up from the supermarket. But still . . .

Served with freshly grated Parmesan

À la prochaine!

Thursday, 5 September 2019

Peach Butter

Close cousins to jams and preserves, fruit butterssome of the better known ones being apple and prunedo not contain a smidgin of butter despite their name. The butter reference in this case describes the silky, spreadable, fondant (melt-in-your-mouth) texture which is achieved through simmering, sieving, blending, and reduction via a second simmering. It can also be regarded as a paste, similar to tomato paste, but sweet, not savoury and a bit less thick. It is an effective way to process the abundance of peaches streaming in from our potager. This peach butter can be kept in the fridge for a few weeks, or if longer conservation is required, it can be either frozen or canned.


Ingredients
makes around 500 ml (2 American cups of 8 oz)
  • Peaches, fresh, 1.8 kg (4 lbs)
  • Sugar, 8 T
  • Lemon juice, fresh, 2 T
Peaches are beautiful in several ways: their fuzzy, round form with a circular seam connecting a dip on top and a tip on bottom says we are both friendly and substantial; their blend of warm-toned colours, we are drop-dead gorgeous; their fragrance, stay awhile, won't you? And you do, since their flavour is stupendous. How do I pick them? By shaking the tree! A few bounce off my head and the cats. But all in all most of them miss us and eventually get placed in the harvest basket none worse for the wear.


Rinse ripe peaches. Cut each in half (using the seam running around the peach as a guideline). Remove pits and discard them. Place fruit in a heavy-bottomed pot, preferably an enamelled cast-iron one. No need to peel because not only is time saved, the flavour and colour will be more intense.


Toss in sugar and lemon juice. Partially cover and simmer for about thirty minutes or until the peaches are falling apart and extremely soft. Stir occasionally. If peaches are not very juicy, some water may need to be added.


Working in batches, pass them through a Foley mill placed over a pot, that is, crank the handle clockwise three times and then one counter-clockwise turn to unclog. Repeat until the residue is no longer sopping wet. Remember to scrap off the bottom of the mill before using a hand-held mixer, blending well the mixture right in the pot. Rinse out the pot in which the peaches were simmered.


Pour the simmered, sieved peaches into the clean pot and reduce, partially covered, stirring fairly frequently to prevent sticking for around thirty minutes or until it's thick enough . . .


. . . that when a large spoon is dipped into the pot and that spoon is etched with a smaller one down the middle, the parting will stay. Let cool for five to ten minutes. Ladle into a clean jar. Keep covered in the fridge.


Oh, yes!


Almost too pretty for words, but how about translucent and the colour of rosewood?


Much closer to a sauce than a jam or jelly, it sinks deep down into the billowy bread folds. So good!


À la prochaine!