Showing posts with label Carrots. Show all posts

Tuesday, 14 May 2013

Sauteed Radishes and Their Greens...and thinning carrots

Radish greens when young are wonderfully tasty.  Though they can be sauteed by themselves, their delectable, crimson roots can be included. Radishes become mild and a little sweet, somewhat like turnips when cooked. Though I enjoy mashed, buttered turnips, radishes are way more visually attractive than an off-white, mushy mound.

With its cheery green and red, this side dish would be a worthy addition to a Christmas dinner

Gardening holds many sensory delights, and tactile sensations are one of them. Radish leaves are a bit fuzzy, tickling my hands during harvesting and making me smile. Wash them and separate leaves from fifteen to twenty roots. Since my garden radishes are cylindrical ones, just a halving will do. With round radishes, cut several slices.

At the moment, the only vinegar in the world for me is Sherry.

Melt a tablespoon of butter in a skillet and saute briefly a minced garlic clove till translucent, about a minute over medium heat. Add a teaspoon of sugar and stir for a few seconds.  Toss in the radishes and stir occasionally until they start to brown.


Add the leaves and a tablespoon of Sherry vinegar and stir to mix everything together.

Too pretty!

Simmer, covered, for a couple of minutes until the veggies are tender, most of the liquid is gone, and the radishes are slightly glazed.  Any water clinging to the washed greens should be enough liquid, if not add a little water. Salt to taste, and to bring out the flavour even more, sprinkle a little fleur de sel just before serving.

Meanwhile in the potager, another root veggie, can pose a few challenges, though the flavour of home-grown carrots more than trumps any effort required, not to mention the extra bonus of soup-stock-enhancing leaves. One of the peskier aspects is to sow thinly since carrot seed is tiny. If sown thickly, meticulous thinning with its required clipped-off seedlings strewn about invites the carrot fly to come sniffing around to deposit its eggs which will hatch into larvae burrowing inside the carrot. Meanwhile you are happily walking around the carrot bed, lush with leaves, naively thinking about all that golden bounty which is sight unseen being devoured.

Mixing the tiny seed with clean, fine sand helps.  Also, after a while, the knack of thinly distributing seeds develops.  With my fourth sowing, the seedlings did not come up so thickly.


Thin the seedlings when they are about 3-4 inches high, preferably on a windless day and in late afternoon.  Clip them with scissors or using your fingers, pinch off level with the ground as not to disturb the remaining seedlings, leaving about 2-3 inches between each depending on the size of the variety.


Thinning the carrots while on my knees, I cursed and grunted in English, startling a trucker from Spain--his truck was marked with its country of origin--as he walked along the refrigerator truck depot entrance which flanks one side of the potager.  He also startled me, so we were mutually frightened for a few seconds until we managed to smile. At least we did not scream at each other like in that scene from the film, E.T. the Extraterrestrial. My noisy monologue would have been worse if not my using a gardening knee cushion. If you don't have such an indispensable item, please get one.


Try to remove all the felled seedlings.


Then cover the seedlings with horticultural fleece.  Keep watering as necessary right over the fleece and remember to check underneath for any needed weed removal from time to time.

For the last five days, I was out of commission because of a flu replete with muscle aches and extreme fatigue.  The only thing I managed to do was set out the potted seedlings each morning and bring them back in before dark. Today was the first day I began to think about any real work in the garden, like finally planting the remaining fifty seed potatoes--I had managed to plunk into the ground twenty-five early potatoes before the flu transformed me into a limp noodle.

The seed potatoes on the sill are well chitted and needed to go in the ground awhile ago

Dayo also is just recently getting back into his outdoor routine as he is mostly recovered from his paw injury though I am keeping a watchful eye. So we just hung out together while I took photos.

Precision patrol: Dayo neatly walks in between narrow rows of beets during his inspection

Dayo is pleased with how the David Austin climbing Falstaff rose with its damask fragrance is blooming

If you think Dayo is chomping on the cottage pinks, you are wrong.  He is judiciously weeding.

As the lilacs turn brown, the roses are starting to bloom. If you have lilacs but not the flu comme moi, carefully deadhead them just below the bloom so as not to eliminate next spring's flowering.

Those brown masses are lilacs well past their prime

One of the seven Queen Elizabeth hedge rose bushes

Unknown rose, but one of my favourites with its deep pink, ruffled blooms

The peonies are soon to follow.


As will the lavender.


And the honeysuckle.

There is just a hint of their fantastic fragrance in the air

Meanwhile the white Spirea and dark-pink Weigela are holding their own along with Heuchera's delicate, coral blooms.


Not to mention red Dianthus and pale-pink perennial geraniums.

Low growing sedum in the front and heather & Abelia in the background

À la prochaine!

RELATED POSTS

Sowing carrots
Thinly sliced raw radishes on buttered French bread
Braised radishes without greens
Raw radishes and their greens garnishing a stack of sauteed polenta slices with melted Edam
Sowing potatoes

Tuesday, 11 December 2012

Toad-in-the-Hole

Though I try to keep the holiday craziness to a minimum, I do undertake some serious culinary preparation for having a wonderful celebration.   Therefore it's nice to be able to whip up something fast and simple during this rushed time.  The Calm One having grown up in Yorkshire appreciates as well as I do, a simple but satisfying British classic, Toad-in-the-Hole--an enticing soufflé-like Yorkshire pudding studded with succulent sausages.  It's a homey dish that helps one appreciate being cosily ensconced at home while gazing through frosted windows at the sleeping garden. 


Ingredients (Count 'em.  Only five. That's simple!)
Two generous servings or 4 skimpier ones

  • Flour, all purpose, 150 grams
  • Salt, 1/4 tsp
  • Milk, 450 ml
  • Eggs, large, 3
  • Sausages, either British bangers, Toulouse, or Italian Sweet, 4

Bangers, a smooth-textured British sausage, filled with meat and breadcrumbs/rusk, are traditionally used.  However, chez nous, we add a French touch by using Toulouse sausage, made with pork, garlic, and red wine.


Turn on oven to 400 degrees F/205 degrees C.  Put a small, metal roasting pan (18 cm by 25 cm by 4 cm deep) in the preheating oven. Sift flour and salt from up high--this increases baked puffiness--and make a well.


Crack the eggs into the well.  Slowly incorporate the flour into the eggs by beating them in a circular motion with a fork, encroaching gradually onto the flour until mixture is smooth and sticky.


Gradually add milk, incorporating it first with a fork.  Then continue blending with a whisk. Beat until airy and full of bubbles.


Reserve the batter while occasionally whisking it as you saute the sausages.  The main purpose of this step is not to cook the sausages, but to get them to release some of their fat.  Add a tablespoon of oil, then the sausages, pricking them on all sides as they lightly brown over medium flame.  When about 4 to 5 tablespoons of fat has collected in the pan--I tip the pan to the side, roughly approximating the amount--turn off the heat.


Take out carefully the hot roasting pan and place on open oven door.  Empty the contents of the fry pan into the roasting pan. Make sure you get all the fat to follow the sausages!


Pour batter over the sausages, arranging them evenly spaced via tongs.  Put back into oven.


Bake for about 40 minutes, turning after 20 minutes, till very puffy and deeply browned.  The pudding's top should be fairly hard and inflexible to the touch.  Deeper down there will be some soft but firm spots.  Loosen the edges and bottom of the pudding from the pan with a narrow spatula.  Cut into four squares and serve immediately as it will lose height quickly.


Though brown gravy is traditionally served, we enjoy a side of stewed tomatoes made with our potager's Romas.


Bon appétit!

In the potager, the carrots sowed in August are beginning to be harvested in all their earthy, golden goodness.  I carefully dig with a trowel all around the carrot and gently heave it out of the soil.  If the soil is lightly moist, pulling them out is easier with less chance of leaving carrot pieces in the soil.

With diminished daylight, the roots will not fill out much more, but will resume their growth in early spring.  As light frosts are possible not only at night but also during the day, I leave horticultural fleece tucked around the carrot bed which turns it into a storage area.  Keep in mind carrot tops are wonderful additions to the soup stock pot as they are not bitter as I once thought as long as just a few are used.

In the wicker basket, are some fixings for chicken stock

The broccoli plants need to be dug up and put on the compost pile as their harvest is finished.

In the background, there's a yellow flowering broccoli!

The Brussels sprouts will keep producing into the new year so we should be able to have fresh ones for roasting with our holiday dinners.  Yay!  There are already quite a lot frozen.


Dayo thrives on the fresh, cold air and gets very perky and playful.  He will jump up at my hands while I take some close-ups as he intermittently swats the camera.

What's that object in your hand?  Can I nom it?

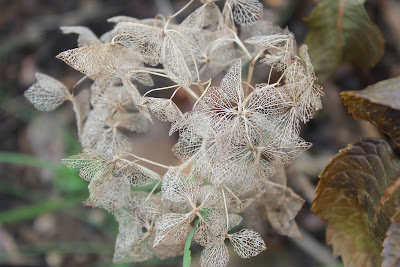
Besides a few intrepid rose buds, pink heather, and white and purple alyssum, the flower garden has a low profile presently.  Though I am a zealous proponent of dead heading flowers, I do make some notable exceptions as in sparing these silver skeletons of Hydrangea flowers as they are lovely in a lacy, ghostly way. 


And these hips on the Rugosa roses warm up the garden with their hot crimson.


What are your plans for holiday eating chez vous?  Is there something new you would like to give a try?  Something you would love not to prepare comme d'habitude (as usual)?  Or perhaps, just not doing much except going to friends/family/restaurants?  Regardless, leave time for yourself to unwind and turn inward, for a break from all the external distractions. Refreshed and in tune with yourself, you will be able to enjoy more fully all the agreeable aspects of this season! 

RELATED POSTS

Sowing Carrots & Making Velouté de carottes
Harvesting, freezing, roasting Brussels Sprouts
Preparation for fall/winter harvests
How to Make Roasted Broccoli Parmesan Béchamel Soup


Tuesday, 28 August 2012

How to Harvest Charentais Melons and Grow Carrots...plus making velouté de carottes

Since we live in the Poitou Charente region of France, it's appropriate to grow succulent, fragrant Charentais melons which look like smoother skinned, small cantaloupes.   To check ripeness,  I smell the unattached end of the melon, often having to contort myself as not to break the vine, but nothing is more disappointing than a melon not bursting with ripe flavour.  It also needs to be flushed with gold and feel heavy.  Stopping watering around a week before harvesting may prevent melons splitting.  During the end of August, I walk and sniff around the melon patch because a split melon that is mostly ripe will fill the air with its heady fragrance.  If I note a split melon soon enough I will be able to eat it before the ants do.


When moving to France over a decade ago, the first dinner I was invited to had as its first course a slice of cantaloupe au nature, separated from its rind, cubed, and served on said rind.  Presenting melons this way emphasises their freshnessThough melons  can be halved, seeds scooped out, and be eaten with a spoon, chunks have a satisfying texture and are a bit neater to eat.  First scrub the outside of the melon with a veggie brush under running water to prevent dirt and bacteria being transferred to the melon flesh.  Cut the seeded halves into slices, slip a knife between the rind and the flesh, and then slice in thick pieces and either serve on the rind or in a dish.  The Calm One eats way more fruit when it is not a chore for him to do.

Slice on the bottom is separated from its rind and cubed.

Luscious, juicy, golden chunks

Watering has been necessary all throughout August and doing it at twilight is a mellow time both Dayo and I enjoy.  He needs to make sure each and every time I drag out the yellow hose that it has not become a snake.  He is very careful about such matters.

Iris foliage, yellow hose, and snake handler Dayo lit up by the setting sun

Carrots have an infamous reputation in the veggie patch as being difficult to grow.  Baby or short, round carrots are a cinch, but if you want substantial carrots it gets a bit more demanding.  My soil is semi-conducive to carrot growing, so half the crop comes out looking like this:


While the other half come out like this:


And if I am really lucky, I get a carrot as intriguing in appearance as this:


About two and half years ago, when I first started to grow our produce, I left out root veggies because home-grown did not seem to be cost-effective as store-bought is so inexpensive, and I had the mistaken conception that the quality would not be that different than if I grew my own.  In addition, the soil was a little stony which would impede the growth of succulent roots.  Be rest assured, beets, potatoes, onions, and carrots grown in the garden are exceptionally flavourful--earthy with a touch of sweetness and worth the effort.

Once you decide what size root is best for your soil--I choose mid-long varieties--the three main problems with growing carrots is that their seed is small so it is difficult to space well, they are vulnerable to getting blitzed by carrot fly, and they take several weeks to become little plants making weeding difficult.

I usually plant two carrot crops, one in early spring and the other in late summer as they prefer cooler weather. For the fall/winter harvest, I choose varieties which can withstand some frost and can be stored in the ground as the soil here does not freeze deeply.  First I prepare the area by spading, removing weeds and as many stones as possible, and forking in compost, letting the bed settle down for a week or so before actually sowing.  Young plants don't take kindly to either an impacted soil or a very loose one.

Taking a large pinch of seeds, I slowly deposit them by rubbing them between my first two fingers and thumb as I go down the furrow--spacing is about four to five inches between rows in my block beds--that has been partially filled with sowing mix.  Using sowing mix will not turn magically a stony soil into the perfect one for growing carrots, but it will allow for a greater number of tiny seeds not to meet up with a pebble or a soil lump that would prevent it from starting the growing process.  Once that process is started, the roots may not form straight, but they will form.

Rake, carrot seed packet, and sowing mix.  Note how fluffy the sowing mix is compared to the soil.

I then sow some widely spaced large radish seeds down the rows and then cover up with a light dusting of sowing mix.  Radishes sprout quickly, marking the row and guiding weeding plus I get a few radishes to eat as I harvest them in several weeks, allowing plenty of room for the carrots to develop, usually about three to four months. Using the back of the rake, I tamp down the rows and water thoroughly with a light spray.  To encourage sprouting, I keep the bed moist, but not soaked.

Once the plants are about two inches high, I place horticultural fleece over the bed, securing it by tucking it under the tiles framing the bed.  The fleece forms a mechanical barrier against carrot fly preventing its depositing eggs which would become legions of  hungry munchers devastating crop yields.  You would not be aware of this underground devouring until harvesting.  There is at least one variety that is resistant to carrot fly, but there are so many delightful varieties that aren't.

Velouté in French cuisine means the addition of chicken broth and cream which lends a velvety richness.  This is a gorgeous soup in taste and looks. It gives me immense pleasure when all the veggies and herbs in a recipe come from my potager Potage after all is the French word for soup. 

Velouté de carottes
(6 servings)

  • Carrots, 8 large, sliced about 1/4 inch thick
  • Chicken broth, preferably homemade, 2 liters
  • Cream, 500 ml
  • Potatoes, 4 medium
  • Celery, 1/4 cup or preferably lovage, 1/8 cup
  • Onions, 2 medium, chopped
  • Parsley, flat leaf, a few sprigs and extra for garnishing
  • butter, 60 grams
  • Salt and freshly ground black pepper
  • Bacon, two slices for each serving
  • French bread, two slices for each serving

Melt the butter in a soup pot and let the carrots, onions, and celery/lovage saute for about 15 minutes.  This step brings out the flavour and ensures a nice colour to the soup.  Then add the cubed potatoes and parsley, mixing well.


Pour in the chicken stock and simmer until all the veggies are tender, about 20 minutes. 


Using a stick mixer, blend until very smooth.  Add cream/seasoning and keep hot.  Fry up the bacon, reserve, and keep warm.  Pan fry slices of French bread in the bacon fat. For each serving, sprinkle crumbled bacon and some minced parsley and serve with a slice or two of fried bread.


Bon appétit!


Wednesday, 21 March 2012

Ready, Set, Onion!

Dayo has the greatest knack of settling down into places providing both security and good views.

He is checking out if I will harvest something interesting, like pork, fish, or milk.

The garden guides my activity.  It says it's time to harvest the last of the winter crops to make room for warm-weather varieties.

Garden-fresh Brussels sprouts have a delectable nutty, slightly sweet taste

Solid honey or carrots? 

Leeks ready to be thoroughly washed

The last of the mâche (superb fresh greens all through winter)

Home-grown onions are wonderful.  Though proper carmelizing of onions is essential for a really good French Onion soup, home-grown onions take it to another level.  The main types are regular (Allium Cepa) and potato/multiplier onions (Allium Cepa var. aggregatum, that is, perennial onions once used in home gardens and fast becoming popular again).  Onions can be grown via seeds, transplants, and sets.  Seeds need more time from sowing to harvest, while transplants and sets take less time. However, there are usually many more intriguing varieties available as seeds. 

For regular onions, I prefer to use sets which are just tiny immature onions.  If planted thickly, some can be harvested as scallions/green onions before reaching maturity, allowing more space for the rest to mature fully.  Onions planted in early spring will be ready for harvest by July.

Block bed containing around 250 Stuttgart onion sets


With my trusty rake, I make short furrows down the whole bed, placing the sets around four inches apart (for harvesting some immature onions as scallions, place closer together) and about one inch deep.  If a bit more depth is required for some of the huskier ones, deepen the furrow with a finger tip and gently place the set, taking care not to press down, as the basal plate can get damaged.  I discard any soft, damaged, rotten sets.  

With the back of the rake I first cover the rows with soil, then tamp down the bed, and finally water well.   If the birds consistently pull out the baby onions by their tops, I cover the bed with horticultural fleece.  So far,  just one set was yanked out (and dutifully replanted). There is no need for labelling as the entire bed is filled with onions.

Onions putting out green growth about a week later

The rather bossy lettuce seedlings are telling me to transplant them now.  Off I go! 

RELATED POSTS

General information on soil preparation for sowing
Leek and Potato soup recipe (cleaning instructions for leeks included)
Fertilising young onion plants