Showing posts with label Lacto-Ovo Vegetarian. Show all posts

Thursday, 19 November 2020

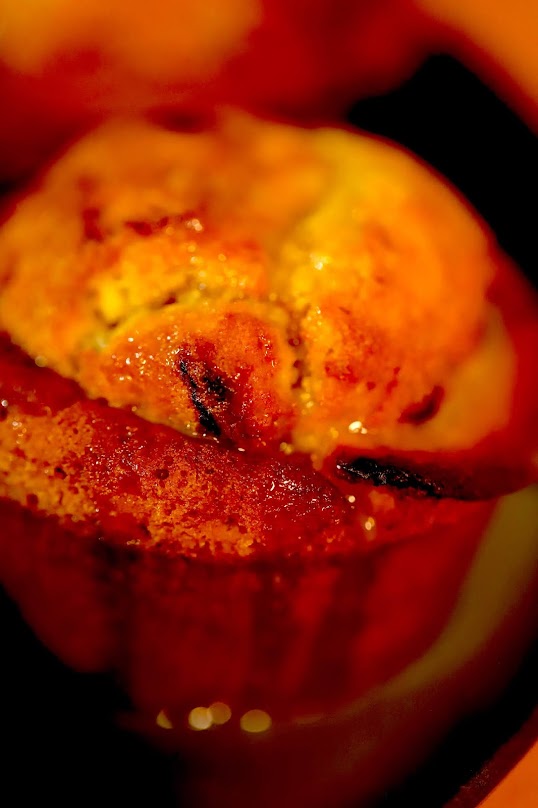
Whole Wheat Muffins Marbled With Ginger Orange Raisin Puree & Topped With Orange Icing

Several weeks ago, I posted about preserving a huge quantity of raisins close to their due date by making a puree. A small batch was done separately, one spiced with ginger and enlivened with orange juice which I envisoned would eventually marble whole wheat muffins. The vision has been realised and here they are! And they are beyond fabulous, fluffy, rich with egg, butter, and milk, sweetened with maple sugar and the oh so tasty ginger orange raisin puree, not to mention the extra oomph of orange icing.

Ingredients
makes ten (batter filled to the brim which is my preference) to twelve muffins (batter filled 3/4 to the brim)

  • Flour, whole wheat, 240 g (2 American 8 fluid oz cups)
  • Sugar, 100 g ( 1/2 American 8 fluid oz cup/8 T)
  • Sugar, brown, (1/2 American 8 fluid oz cup/8T) or in my case stir in 1.5 tsp of maple syrup into white sugar
  • Baking soda, 1 tsp
  • Egg, l
  • Vanilla extract, 1/4 tsp
  • Milk, whole, 1 American 8 fluid oz cup/16 T)
  • Orange ginger raisin puree, 4 T (recipe is here)
  • Orange juice and icing sugar depending on the amount and consistency of the finished icing (I use 3 T of juice to about 9 T of confectioner's sugar)


Preheat oven to 400 degrees F. Liberally brush a 12 muffin tin pan with butter, making sure each well is well doused along with a bit just outside their perimeters. 


If opting for maple sugar instead of brown sugar, stir in 1.5 T of maple syrup to 1/2 cup of sugar and reserve.


Using either an electric aid (in my case, a stick mixer) or elbow grease, cream butter, sugars, and baking soda until resembling mashed potatoes.


In a separate small bowl beat the egg with the vanilla and add to creamed mixture. Beat in the milk, and then gradually the flour until it is all barely incorporated. It's time to fill the muffin tins.


Fill the tin 1/4 the way and drop about 3 to 4 small amounts of the raisin puree. Repeat until the well is either 3/4 filled or in my preference, to the brim.

With a wooden skewer inserted right to the bottom of a well, swirl the batter, Turn the pan a quarter, and repeat.


Bake around 17 minutes or until centres are springy to the touch and/or a skewer is inserted and comes out clean. Let cool in the pan for a minute or two and then work carefully around each well with a butter knife. Turn the pan over and gently shake out the muffins. Let cool.


For the icing start with one tablespoon of orange juice and add enough icing sugar to get the consistency desired. The topping can be quite thick where it is spread on or it can be close to watery so it soaks into the muffin which is what I did.


Best whole wheat muffin ever! It's quite sweet, so besides gracing the breakfast/snack table, it would do just as well if served for dessert. The surplus chez nous was frozen and I can't wait to eat one of these soooooooooooon. Egads, they are DELICIOUS.


À la prochaine!


Thursday, 22 October 2020

Preservation of Produce: Raisin Puree

The other day I finally noticed two, large,  long-neglected bags of raisins in our sous-sol cupboard. They were a smidgin away from their due date. Though I been wanting to bake some whole wheat raisin muffins for a while, I figured doing that would use up just a fraction of this dry fruit deluge so what to do with the rest? Fruit puree, whether fresh or made from dried fruits, freezes well.


I made two separate batches of raisin puree. The larger one was covered with water.


A smaller batch was covered instead with orange juice, and a large pinch of powered ginger was stirred in. Both batches were lidded and placed in the fridge for twenty-four hours.


My 750 watts Bosch hand-held mixer did the small batch with ease, taking about ten minutes to reach a very smooth consistency.


The larger batch took forever, at least it seemed that way. About 8 PM, I started the blending. After ten minutes the mixer heated up so much that it was necessary to let it cool for about a half hour so as not to burn out the motor. This was repeated four times bringing me close to bedtime. Therefore I left the partially processed puree, covered, in the fridge overnight. The next morning, I was able to finish the blending in ten minutes. It's possible that not only was this batch significantly bigger, it is also conceivable that water doesn't macerate the raisins as readily as orange juice.  I would suggest that small batches in general would be easier to do, but also if you want to do a large one, then let soak in the fridge for two to three days. The puree is absolutely delicious and is versatile. I marbled yogurt and swirled some through hot oatmeal. I imagine that it would be great as a topping for ice cream or served with a cheese platter in place of honey or jam. Whole wheat muffin batter is just calling for the marble treatment which is what I am planning to do fairly soon, choosing the orange/ginger batch. Perhaps an orange icing drizzle on top?


To marble either yogurt or muffin/cake batter: Put separate dollops of puree and yogurt/batter in a checkerboard pattern in the first layer. For consequent layers, alternate the dollops, that is, put puree over yogurt/batter, then yogurt/batter over puree until the glass or baking pan is filled. Using a wooden skewer, insert it all the way to the bottom of the glass or pan and working from side to side, twirl the skewer. Turn the glass or pan a quarter turn and repeat the twirling.


À la prochaine!

Thursday, 23 April 2020

Covid-19 Cooking: South Korean Dalgona Iced Coffee

On the thirty-eighth day of the Lockdown in France (Confinement Jour 38), I am blogging about my version of Dalgona Iced Coffee. In South Korea, where not only was the coronavirus met with an admirably disciplined approach, taming the spread early on, but during lockdown with its accompanying sans-Starbucks lifestyle, the country also did some viral activity of its own by popularising via social media the DIY making of Dalgona Iced CoffeeDalgona's name is taken from the popular South Korean street snack of honeycomb toffee because according to the South Korean actor, Jung Il-woo, after having a beaten coffee (coffee powder, sugar, and hot water are whipped together) in Macau, stated they share a similar taste. Both also have a light-caramel colour. Beaten and frappe coffees (originating in Greece though frappe is a french term for mixing with ice) ordinarily could be gotten at eateries before the pandemic.


If you have come across images of this delightful iced coffee, and they are all over social media, you might be asking, but where is that scumptious, glistening mound of coffee foam reaching skywards? It's in there I promise as I first filled the glass with one-third of iced milk, then layered in the foam, and finally followed with the second and final one-third of iced milk. I did this for two reasons. One to be different though soon afterwards, I discovered India had already beaten me to the punch with its phenti hui coffee. Second to get a head start on the pesky business of mixing the whipped content with the milk so it can be quaffed down with ease. The coffee foam though delicious has attitude, an attitude derived from its nature of being foam which is viscous; its similiarity to Italian meringue has been noted by many a culinary eagel's eye. Despite being suspended in milk, it managed to surface, a tip of the 'foamberg'. My version also has the addition of folding in grated dark chocolate into the foam. And sometimes I rim the glass with ground cinnamon. The coffee foam is so enveloping, the chocolate bits disappeared into its welcoming opaque cocoon. But they soon melted leaving visual traces of their delectable existence in streaks, flushes, and scalloped edges.


Ingredients
makes two 237 ml/8 fluid oz servings which can be had on consecutive days as the Dalgona topping keeps several days in the fridge. The quantity can be ramped up as long as the ingredients are all in equal proportions. Ramping down is not feasible because the quantity would be too small to be successfully whipped.

  • Coffee, instant or freeze-dried, 2 T
  • Sugar, white, 2 T
  • Boiling water, 2 T
  • Dark chocolate, grated, 1 heaping tsp
  • Milk, any kind, including nut and grain (I used whole cow's milk), 237 ml/8 fluid oz
  • Ice cubes, 6, crushed (since the coffee foam can be added to hot milk instead, if that is your preference then no ice cubes are needed)
  • If rimming the glass in cinnamon, then a mixture of cinnamon and sugar plus some kind of sticky liquid like honey/syrup/cordial are required

Place the first three ingredients in a small mixing bowl. Though an electric beater/whisk would be the easiest and quickest way to make the coffee foam, in true DIY manner, manual beater/whisk, even a fork, could be used. Be warned, it will take some time, at least five minutes, probably more. My stick blender did it under a minute. As the mixture is beaten, it eventually lightens in colour and forms peaks which means it's ready. Fold the grated chocolate into the foam. Combine crushed ice and milk in a pitcher. If rimming the glass, dip the rim first into honey/maple or plain sugar syrup/flavoured cordial followed with a dipping in a sugar and cinnamon mixture. Use a stamping motion which can be followed by a twisting one. Do the stamping and twisting motion just once or big, unattractive globs will accumulate negating the desired crushed jewels effect. Fill glass one third full of iced milk. Spoon half of the coffee foam on top, and cover almost to the rim with ice milk. Repeat for a second glass. Even after pronounced stirring, clumps of foam still bobbed about but were small enough to be enjoyed while sipping. This was sooooooo good and fun to do!


À la prochaine!

RELATED POST

Iced Coffee Caramel Float


Thursday, 16 April 2020

Covid-19 Cooking: Duxelles

On the thirty-first day of Lockdown in France (Confinement Jour 31), I made duxelles which is a fairly straightforward technique of intensifying mushroom flavour by lessening the moisture content, allowing not only for various uses like pizza topping, pasta adornment, soup and stew enrichment among others, but also for freezing where, because of their reduced state, they won't take up much space. The most important aspect is that the texture doesn't become leathery and tough. You want intense flavour, but tender tidbits at the same time. If most of the liquid already is wrung from them before being sauteed and they are cooked in a large, shallow skillet, the duxelles will be subjected to drying heat for a much shorter time therefore remaining soft despite containing much less moisture.


Ingredients
makes 500 ml/a little over 2 American cups (recipe can be halved)

  • Mushrooms, fresh, 1 kg/2.2 lbs (I chose white button mushrooms, but any edible ones, wild or cultivated, can be used though the taste will vary from mild to strong depending on the variety)
  • Butter, sweet, 3 T
  • Salt, table, 1/2 tsp

As demonstrated by the above list of only three ingredients, this version is the most simple available among numerous recipes. In our household, duxelles is mainly used for pizza topping therefore the plainest form will be more compatible with the garlicky, herb-enhanced tomato sauce and the well-seasoned, often red-wine-enriched Toulouse sausages which also go onto the crust. However, if you desire racier versions, be rest assured they exist with various additions such as garlic, onions, cream, herbs, and booze. Either clean the mushrooms with a soft bristled brush or with a dry paper towel. Slice and then coarsely chop which is just the right size for pizza topping. A finer mince could be more suitable for other dishes.


The cleaned 'rooms are in the foreground, outside the plastic punnet

Drap an old tea towel/dish cloth over a large bowl, pressing it to conform to the bowl's inner contours. Put the amount of chopped mushrooms that can easily fit once the towel is pulled around the mass and twisted closed. Old tea towel you say? Old enough that you don't mind it getting stained, but not so worn and thin that it will tear during the vigorous wringing process.


Squeeze by twisting tighter and tighter and also by massaging the 'bag' with your hands. At first not much liquid will ooze out. After a while, more and more will. Stop when most of the liquid is either squeezed out or you are tired (my preference!). Repeat until all the mushrooms are done. The mushroom liquid is quite plentiful. I couldn't find any information regarding if it could be used in other recipes or if it could be frozen. I am guessing if the raw mushroom liquid is used almost immediately as in a veggie smoothie, than it probably will be okay. Melt the butter over medium high heat in the largest, most shallow skillet you have or work in smaller batches if you only have small/medium sized pans. Add mushrooms and salt. Saute, while stirring frequently, for about five to eight minutes or until the duxelles no longer clump together, are slightly golden, and greatly reduced in volume. Don't mistake their being glazed with butter as moisture.


They then can be portioned and once cooled, popped into the freezer or kept for several days in the fridge.


Though the photo (I forgot to take one of a pizza with duxelles!) below shows how I used to strew a homemade pizza with commercially packaged, pre-sliced, frozen mushrooms which were then thawed before sauteing and added to the yet-to-be baked pie, I ask you to imagine how it would look instead with a dense sprinkling of duxelles applied before baking. Here's a clue: its appearence was charming. Additionally the flavour, texture, and aroma were way up there.


À la prochaine!

RELATED POSTS

Cream of Mushroom Soup Redux


Thursday, 12 December 2019

Mini Banana Naked Cake With Blackberry Cream-Cheese Icing Plus DIY Festive Table Decoration (Last Post Until January 2020)

Though I grew up in America, lofty, frosted, layered cakes did not figure that much in my life.  The blame can't be put on bland Betty Crocker boxed cake mixes but on all those wonderful, taste-bud-spoiling German-American bakeries that dotted NYC at that time. My preference for European styled cakes became even more entrenched after having lived a couple of decades in France. Therefore when coming across the concept of a naked cake, that is, a layered one, but without frosting or icing hiding its layers, I said this is for me. The French frequently showcasing fruits via desserts is an aspect much appreciated by me. Frozen blackberries from a late-summer harvest gives a tartness to this soft icing and colours it a delicate mauve. The cake is the dark, moist banana bread that was baked last week (my recipe) for two hours at a low temperature and of which I have a nice supply in the freezer. The icing can also be made ahead and frozen. Once the ingredients are at the ready, it is a cinch to layer, ice, and serve. Leftover cake lasts at least a day in the fridgeoh, what a nice breakfast that was the next day!


What a cutie!


The festive table decoration was put together thusly: curl, layer, and press close to the sides of a glass jar whatever greenery and berries comes your way. Slowly trickle in water almost to the top. Remove the metal casing from a votive candle by pulling on its wick, place it on the submerged foliage or float on the water, and light it. In our garden, I found sprigs of leyland cypress, ivy with its berries, desiccated hydrangea blooms, orange rose hips, lily of the valley red berries, red blueberry bush twigs, and orange-red strawberry leaves. I love, love, love its portability, the ease in which it was assembled, plus how beautifully shining and translucent it looks! To look its freshest it's best to add water shortly before presenting.


Ingredients (Makes a 7.5 cm/3 inch diameter cake, serving 2 to 3. There is enough frosting and banana bread to make several cakes, either all at once, or gradually in the future as bread and frosting can be frozen. Frosting adapted from Sally's Baking Addiction)


  • Blackberries, fresh or frozen (can be lightly sugared), 1 cup which makes 2 T of blackberry coulis)
  • Cream cheese, 224 g/8 dry oz
  • Butter, unsalted, softened to room temperature, 60 g/4 T
  • Sugar, icing, 360 g (3 American 8 fluid oz cups)
  • Vanilla, extract, 1 tsp
  • Salt, a pinch (1/8 tsp)
  • Banana cake/bread, 3 thick slices (recipe is here)
  • For garnishing, blackberries and banana slices

If you have more berries than a cup, don't hesitate to make extra coulis as it can be frozen. It makes a delicious dessert sauce especially when served over vanilla ice cream. I made the coulis from three cups of frozen slightly sweetened blackberries (they were frozen in that quantity, three cups of garden berries in six separate containers, a total of eighteen cups. A blackberry bonanza from just a solitary bush!) which gave a lot more than the two tablespoons required. If a frosting is preferred rather than a somewhat drippy icing, then reduce the recommended amount of coulis over a medium flame until halved. Also either leave out the vanilla extract or let a split vanilla bean steep in the hot coulis for around ten minutes. Remove bean, cool, and use. For an even fluffier effect, if available choose the block form of cream cheese (less introduced air than the whipped version in the tub). If not, then use more from the tub than recommended, around three extra heaping tablespoons.


Place a sieve (or a Foley mill) over an appropriately sized bowl and add the berries. With a large wooden spoon squish, mash, and push their juice through the sieve. Make sure the spoon by which the sieve's bottom is scraped from time to time is clean. Reserve two tablespoons and if not using the extra soon, freeze the surplus.


If using a stand mixer: beat butter and cheese until fluffy. Add sugar and beat. Add the salt, blackberry coulis, and vanilla (if using). Beat until smooth. Doing it by hand: in a large mixing bowl, work the softened butter with a fork until fluffy and light-coloured. Add the cream cheese and continuing working with a fork. 


Whisk in gradually the sugar.


Add the blackberry coulis, salt, and vanilla (if using).


Whisk until smooth.


Cut thick slices from a loaf of banana bread. Use a jar whose mouth basically covers most of the slice without going over the edges. With a sharp knife, cut straight down around the diameter. Repeat two more times to get a total of three round layers. The cake cuttings can be toasted and used as croutons for fruit salad or toasted, crushed, and layered into a parfait.


Spread the icing thickly over the bottom slice, top with a second, and spread more icing, top with the last slice and spread icing. The more liquid the icing is, the more there will be an attempt for the cake to resemble the Tower of Pisa. In that case, gently coax it back into shape. Garnish with a blackberry and a banana sliver.


It slices well to give three portions.


Lovely in looks, gorgeous in taste! I am so glad that I have enough ingredients in the freezer to turn out more of these delicious beauties. Though I adored the icing soaking the cake, for the next one I will try the instructions following the ingredients list towards the beginning of this post to see how a fluffy frosting works out. I will report back.


See you in January!

Thursday, 5 December 2019

Truffade Auvergnate

For a rustic treatment of potatoes and cheese, look no farther than France. There's Tartiflette (my recipe), also Aligot (my recipe), and then there's the glorious Truffade Auvergnate. The latter two dishes come from Auvergne where la France profonde (heartland) does its thing with excellent and just a few ingredients, serving up an unforgettable taste without much fuss. Truffade is gooey and substantial like another great comfort food, Macaroni and Cheese.


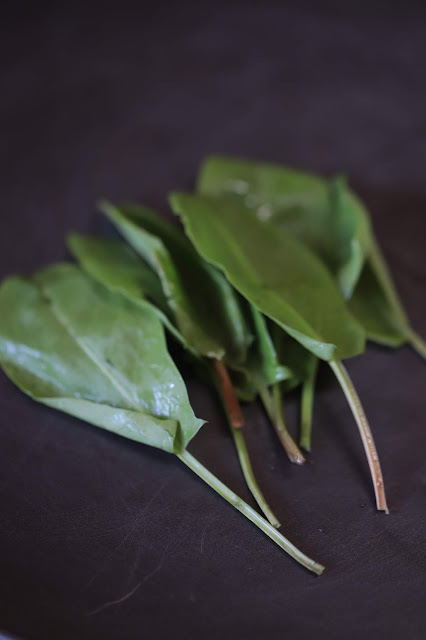
Sorrel, with its lemony taste, is managing to grow in our December garden. It makes a perfect topping for Truffade and per its saucy nature, mostly melts upon contact with the potatoes and cheese served piping hot from the cast iron skillet.


The cheese used traditionally in this recipe, that is, Tomme fraîche du Cantal, may be hard to come by so the very melty Comté can be substituted. I preferred Comté aged twenty months which has deep, complex flavour and welcome any opportunity to eat it. Here's an excerpt from my post on this fabulous cheese:

The flavour hovers between tangy and sweet tinged with caramel, and I mean hover, you're never quite sure which of those two tastes will dominate, keeping your palate awake. The texture is similar to the richest nougat, unctuous beyond belief with a touch of gooeyness before giving way to an umami cloud pervading every nook and cranny of my very fortunate mouth. 


Ingredients
2 ample or 4 smaller servings
adapted from Sarah's Kitchen

  • Potatoes, all-purpose, 500 g (I used Rosabelle potatoes from our potager)
  • Fat, duck or goose, 1 T (I used olive oil)
  • Tomme fraîche du Cantal or Comté (which I used), 200 g
  • Garlic clove, large, crushed
  • Salt and freshly ground pepper
  • Sorrel, fresh, a small handful

Cut the cheese into 1 cm/.4 inch cubes and the peeled potatoes into 2 cm/.8 inch cubes. The size is important allowing the potatoes to be cooked tender within the allotted time and for the cheese to melt quickly.


Peel and crush or mince fine one fat garlic glove.


Heat the fat or olive oil in a heavy-bottomed skillet, preferably cast iron. Toss in the potatoes. Season with salt and freshly ground black pepper. Cook for twenty minutes over a low to medium low heat. Move the taters around with a sturdy spatula, scraping underneath them, from to time.


Add garlic and stir well, getting the tiny bits mixed throughout. Cook for another five minutes or until the largest potato cube is tender and all is golden brown.


Take the pan off the heat (don't forget to turn the burner off). Crush most of the potatoes with a fork or masher. Toss in the cheese cubes, steadily stirring until cheese is melted and has coated totally the potatoes, that is, you can hardly see any potato for the cheese. You can serve as is or you can compress and shape the cheesy mass into a thick pancake with a spatula or a potato masher. It then can be browned on both sides.


Top with chiffonade of sorrel (wash, dry, trim, stack leaves, roll into a cigar shape, and slice thinly). Perhaps because I substituted Comté for Tomme fraîche du Cantal, my version resembled the New York City street food like pizza and knishes with which I grew up, meaning warming food eaten out of hand. The tremendous amount of cheese becoming one with the  potato means the melty fusion passed to a stretchy, stringy state and then one of congealment so quickly that only determined fingers can take on the challenge of pulling off a chunk at least when it's served in a bowl. A challenge I met with gusto. I have since found a local source for Tomme fraîche du Cantal, the cheese used traditionally in this dish. When I remake this I will use that cheese and report back.


Any left-overs can be shaped into a pancake, put in a covered container, refrigerated, and reheated in a skillet with no additional fat. Eventually served on a plate, it was easy to cut with a knife into small pieces.


À la prochaine!

Thursday, 28 November 2019

Banana Bread a la Hot Bread Kitchen Cookbook

This dark, moist banana bread presents serious competition for a certain holiday bread. That's right, fruit cake, I am talking to you! Though the more common and lighter coloured version of banana bread can benefit from the addition of semi-sweet chocolate chips, walnuts, and cream-cheese frosting, this unadorned beauty stands its ground in the holiday season just by the dint of it being baked at a low temperature for two hours.


It's so good that instead of making banana bread for the express purpose of using up bananas too ripe to eat out of hand, I can envision my snapping up any over-ripe bananas at the market and/or leaving some bananas to ripen too much on purpose.


This fabulous recipe comes from The Hot Bread Kitchen Cookbook mostly unchanged except for my substituting maple sugar for brown sugar.


By maple sugar I don't mean crystallised maple syrup but white sugar with the addition of maple syrup in a ratio of two tablespoons of syrup to 237 ml (American 8 fluid ounce cup) of sugar.


Ingredients
makes 1 loaf (I used a 25 x 10 cm/9.5 x 4 inch pan, but the more typical 23 x 13 cm/9 x 5 inch bread pan is fine also.

recipe can be doubled

  • Bananas, very ripe, 3 medium
  • Sugar, granulated, white, 100 g (1/2 American 8 fluid oz cup)
  • Sugar, granulated, white, 100g (1/2 American 8 fluid oz cup) with added:
  • Maple syrup, 2 T
  • Baking soda, 2 1/2 tsp
  • Salt, coarse or Kosher, 1/2 tsp
  • Eggs, large, 2 (I used 3 medium)
  • Yogurt, plain, whole milk, 177 ml (3/4 American 8 fluid oz cup)
  • Oil, Canola (I used safflower), 4 T
  • Flour, all-purpose (I used French T55), 250 g/2 American 8 fluid oz cups)
  • Unsalted butter to grease pan

Place a rack in the middle of the oven and preheat  to 135 degrees C/275 degrees F. Grease the pan's insides well with butter. Trace with pencil the outside bottom of the pan onto parchment paper and cut out. Place into the pan and grease this bottom liner. If using a food processor fitted with the steel blade, puree bananas until smooth. Add both sugars, baking soda, and salt. Mix until combined. Add eggs, yogurt, and oil. Mix again. Transfer mixture to a large bowl and add the flour. Stir just until all the flour disappears and batter is nearly smooth. If mixing by hand, mash bananas in a large bowl using first a potato masher then a wire whisk once it becomes more liquid. Whisk till smooth which took me about five minutes from start to finish. Ooooh, such a lovely fragrance!


Add both sugars, baking soda, and salt. Whisk until incorporated.


Crack eggs into bowl, add yogurt, and pour in the oil. Whisk well.


Add flour and stir with a wooden spoon until all the flour is dissolved and the batter is mostly smooth.


Spoon or pour batter into the prepared pan. My pans were filled to just a bit under the top edge. Bake for around 2 to 2.5 hours.


My pans (I doubled the recipe) are thinner and longer than a regular bread pan, and they took 2 hours to finish baking. Make sure that the top springs back when tapped rather vigorously and/or when a wooden toothpick is inserted, it comes out clean.


This luscious sweet bread is versatile. In the below photo a thick slice (I suppose one could do thin slices, but why bother? The scrumptious texture needs at least 2.5 cm/1 inch of thickness in order to be duly appreciated) is taking a rest before it gets slathered with unsweetened, creamy, natural peanut butter which makes a wonderful quick breakfast or a snack.


For dessert, it will eagerly take on a deluge of maple syrup (see below photo) or a mound of ice cream or both! It can be topped with fresh fruit and whipped cream. Its delightful sponginess could take a good splash of alcohol, allowing it to be used in trifle (cut banana bread slices into sticks to mimic lady fingers) or a square-shaped rum baba. It could be cut into different forms like circles or stars and stacked, an architectural mound layered and filled, perhaps with mascarpone cream, in the manner of small, individual naked cakes. The bits left over could be crushed for layering and topping parfaits or toasted for croutons in fruit salad.


As for a savoury presentation? I am thinking a nice slab of banana bread accompanying eggs scrambled with blue cheese. All of this is possible just in time for the holidays because there is a full loaf plus a good chunk of another one sitting in our freezer. This bread will retain its flavour when frozen for three months.

À la prochaine!

RELATED POSTS

Tortillas de Tiesto a la Hot Bread Kitchen Cookbook


Raisin Challah a la Hot Bread Kitchen Cookbook

Bialys a la Hot Bread Kitchen Cookbook

Book Review / Hot Bread Kitchen Cookbook: Artisanal Baking From Around The World by Jessamyn Waldman Rodriguez with Julia Turshen


RELATED LINKS

Hot Bread Kitchen Cookbook at Amazon

Hot Bread Kitchen Website: Handmade Authentic Multi-Ethnic Breads, Preserving Tradition, Rising Expectations