Showing posts with label Savoury Recipes. Show all posts

Tuesday, 21 October 2014

Roasted Sweet Red Pepper and Garlic Spread/Dip

Our pepper patch surprisingly put out yet more crimson beauties. Being somewhat familiar with Balkan/Turkish cuisine via burek and gözleme, I looked to Lyutenitsa/Ajvar for inspiration. Because that spread is made with a specific variety of pepperthe roga of broad shoulders tapering to a pointand often served with feta, already the departure from the original is so steep since I will have to make do with our potager's piments des Landes and sweet red bell peppers. Therefore I have jumped off the culinary cliff by adding cheese directly to the mixture. Said cheese is not even feta, but cream cheese. Daring is my middle name, bien sûr!

Fennel fresh from our potager is often my go-to herb

If only I ate this as a tiny kid, I would have been able to respond I want to make sweet red pepper spread when asked what I want to do when I grow up. I am tempted to ask Dirac the kitten what he would like to be when he grows up, but I afraid his reply will be, I want to be a paper shredder, so I refrain.

INGREDIENTS
makes about 8 fluid ounces/240 ml
  • Peppers, red, sweet, large, roasted, 4 or the equivalent if using ones much smaller than bell peppers
  • Garlic, roasted, heads, 4 (about 4 T of mashed garlic)
  • Olive oil, 2 T
  • Lemon juice, 6 tsp
  • Fennel, fresh, finely minced, 2 tsp
  • Cream cheese, 10 T
Detailed instructions for roasting peppers are here


...and for roasting garlic, here.


Roasting more heads than required for this recipe makes sense because any surplus can be frozen.

Not a chestnut!

Place coarsely chopped roasted peppers and roasted garlic paste into a food processor and whirl until mostly smooth if you desire tiny bits of juicy pepper remaining. If you prefer complete smoothness, process until you get the consistency/texture you want. Add the olive oil, lemon juice, fennel, cream cheese and whirl again.


Salt to taste. Refrigerate for at least an hour to firm its texture and deepen its flavour.


Serve with any manner of chips, toast, and crackers. Sourdough rye grilled with olive oil was my preferred choice but as my quiet kitchen world suddenly erupted into various, barely contained disasters such as a beloved appliance going kaput, bells, whistles,  paroxysms going off inside and outside the house, and Persistent Percy, better known as Dirac the kitten, getting himself into scrapes I did not know even existed, I instead gratefully embraced packaged Swedish flatbread drizzled with a little olive oil. Pas trop mal! I am thinking ahead...maybe some mixed into pasta or filling ravioli or smeared on a hot sandwich wrapIt's lovely stuff and it's freezes well also!


À la prochaine!

RELATED POSTS

Sweet red peppers and pasta
Sweet red pepper and white bean soup

Wednesday, 8 October 2014

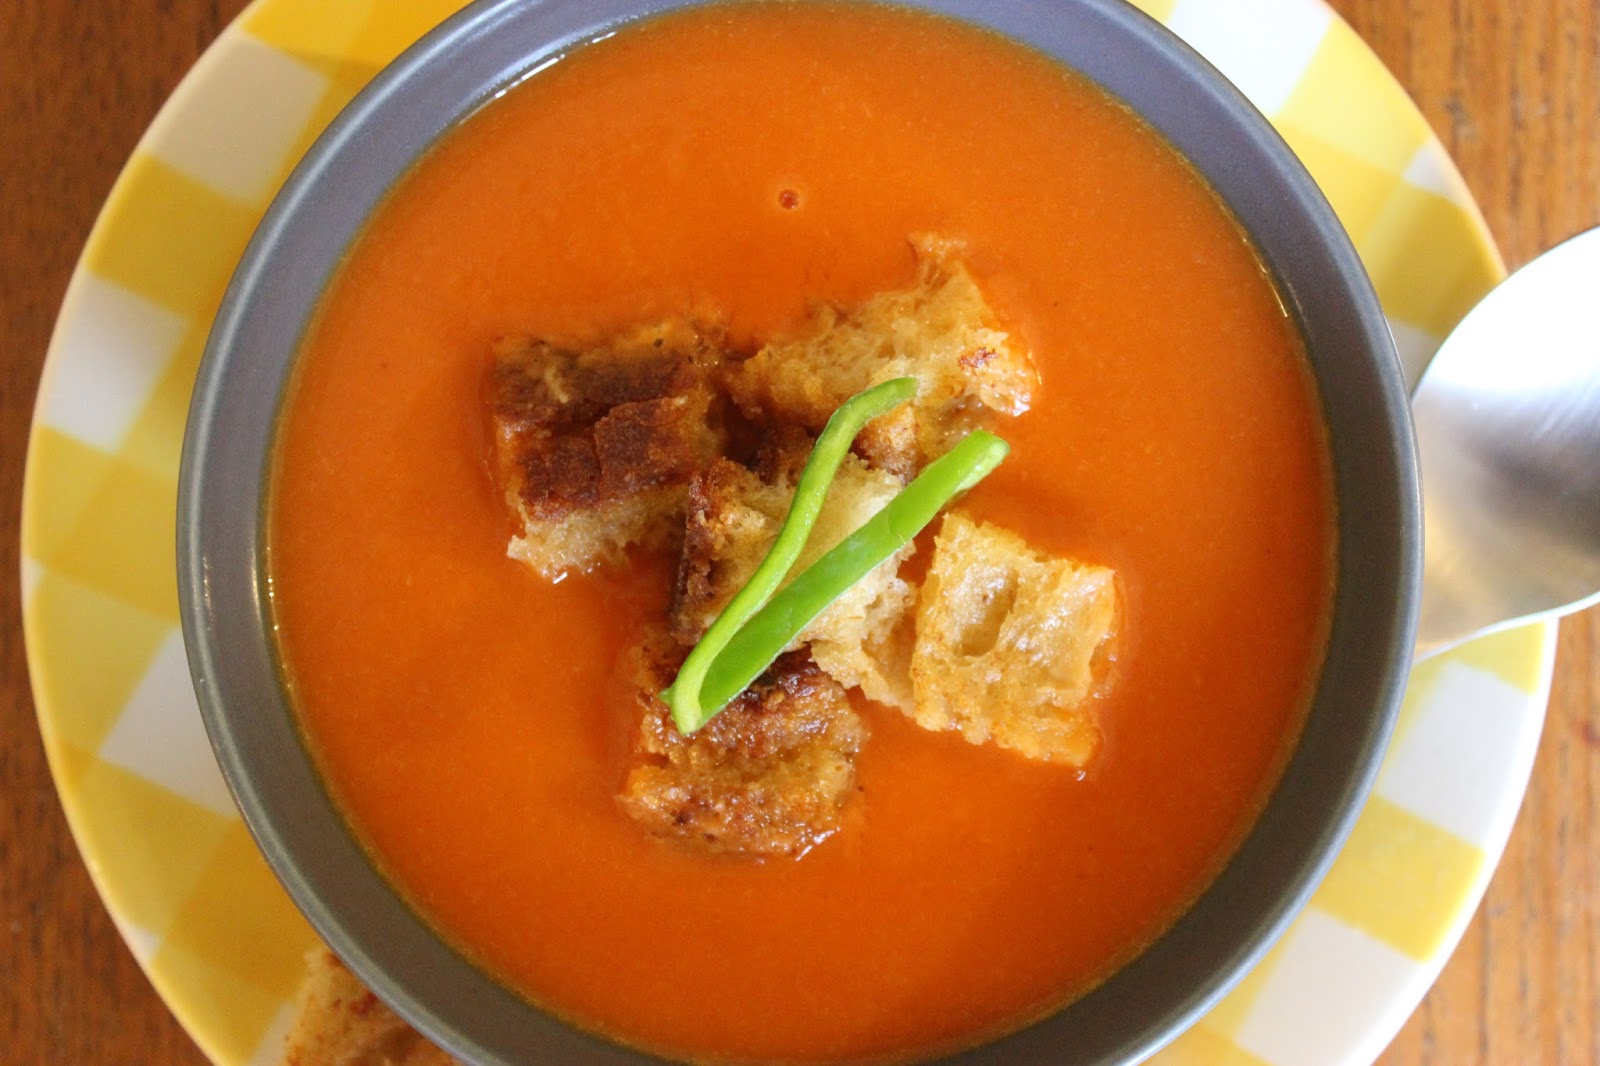
Roasted Sweet Red Pepper & White Bean Soup With Grilled Cheese Croutons

A simple soup of few ingredients becomes outstanding if grilling is used as a preparatory technique, garnishing is done with a flourish, and the flavour is brightened with a dash of sherry vinegar.

Pureed white beans gives body and creaminess to the soup

Sunny, hot weather in the last week has brought our potager's remaining green bell and Landes peppers into the gloriously mellow realm of red.


INGREDIENTS
makes enough for a meal for two or four smaller servings
Peppers, red, sweet, large, 4
Onion, yellow, medium, peeled, diced
Garlic cloves, large, 3, smashed and skin removed
Beans, white, canned or cooked dried, 12 fluid ounces
Stock, chicken, 32 fluid ounces
Olive oil, 3 T
Vinegar, sherry, 1/2 tsp or to taste
Bay leaf, large, 1
Salt and freshly ground black peppercorns to taste
Pepper, green, a few strips for garnishing

CROUTONS
for each grilled cheese sandwich (I made four)
Cheese, grated (I used a mix of cheddar and Parmesan), 2 heaping T
Bread, slices, 2 (I used sour dough rye)
Butter, room temperature, 1 heaping T

Preheat the oven grill. Rinse and dry the peppers. Place about six inches under the hot grill, turning them on all sides until blackened which takes about from ten to fifteen minutes depending on size and type.

Peppers while being grilled ooze goo so lining the pan with foil makes cleaning a cinch

Wrinkling of the skin is a good tell that they will be easily skinned.


Pop them into a sturdy ziploc bag suitable for freezing hot food where they will steam on the counter or table for about ten minutes. If they are a bit recalcitrant than put them back in the bag until they behave.


The skin should easily be pulled off the meaty flesh.


The peeled peppers may look unappetising, but once simmered and pureed, they will impart to the soup a velvety depth of flavour. Chop them coarsely.


Saute the onions and garlic in the hot olive oil for several minutes. Add the red peppers and the rinsed beans. Cook for another minute or so while stirring.


Stir in chicken stock and bay leaf.

I used two small leaves instead of a large one

Cover and simmer for about a half hour. Meanwhile make the grilled cheese croutons. Spread butter on one side of a slice and place buttered side down in a skillet. Cover with cheese. Butter one side of another slice and place it plain side down. Over medium heat, cook til browned and crusty which should take several minutes. Flip it over.


While the other side is getting grilled, press the sandwich with a potato masher, a small plate, or a flexible metal spatula. Pressing only on the grilled sides will prevent the spatula sticking to butter and pulling out bread chunks. 


Cut into small squares.


Grilled cheese croutons are darling.


Remove the bay leaf. Puree the soup with a stick mixer or in a blender. Reheat if necessary and season to taste with sherry vinegar, salt, and freshly ground black pepper. Garnished with  julienne of green pepper, this soup is a lovely bowl of warm deliciousness. 


Along with mums, dahlias rule in the flower garden.

When fully opened, this variety has a diameter the size of a luncheon plate

Early fall is a good time to harvest bay leaves when they are at their most flavourful and mature. The foot-high seedling of five years ago is now nearly six feet. Prunings serves two purposes: leaves for culinary use and shoots for rooting to get more of these hardy, beautiful, evergreen, fragrant bushes.

Letting a few leaves remain on top of the cutting, remove the rest. The bush-to-be can be trimmed to a length of about four to five inches, dipped in rooting hormone, and tucked into a pot filled with a light, non-soil mix. Water it thoroughly and cover with a plastic bag which will act as a moisture-retaining tent. Keep it outside sheltered from winds and direct sunlight throughout the winter to encourage root growth and for it to be ready for spring transplanting.


The Calm One in his quest to use our oven more efficiently bought a four-tiered stand that was supposed to cook that many pizzas at the same time. The soggy results became the mother of invention as I now use it to dry herbs, and at present, specifically bay leaves which need to be crackly dry in order to eliminate any trace of toxicity. Rinse and dry them, spreading a single layer in a wicker basket or a plate and leaving them be for about two weeks until they are completely dessicated. Store in a lidded jar.


Dirac the kitten when concerned that I may be developing eyestrain, lovingly sits on the book I am reading to give me a break.


À la prochaine!

Tuesday, 30 September 2014

Rösti with Hard-boiled Egg and Toulouse Sausage


Two years ago during my visiting family in Britain, The Calm One's sister was embroiled in a rating war. Her kids' number seven out of ten verdict on her mashed potatoesmine was begrudgingly granted a fivewould not budge regardless of her tireless efforts. A potato ricer was hopefully bought. This past August, during their visit to our French home, I got to see that ricer again. While whipping it out from a crammed suitcase, she looked intently into my eyes and exclaimed, salt!

Hashbrowns, Swiss-style

It was not the variety of tater, if the milk was hot, or any other factor that was being considered. Once that simple element was added, everybody was happy, including moi as I always wanted to make rösti using a ricer or at least I did until my research revealed the desired texture is achieved by coarsely grating par-boiled potatoes: the rösti glows while the ricer glowers.

The forlorn ricer

INGREDIENTS
Makes 5-6 side servings or two meal-sized portions

Potatoes, 750 grams, about 4 large
Butter, 2 T
Lard, 2 T
Salt/fleur de sel
Eggs, large, hard-boiled, 2
Sausage, sweet Italian or Toulouse, 1, cooked, crumbled
Parsley sprigs for garnishing 

Potatoes that hold their shape are the best for this dish and are usually sold as salad/steaming/waxy potatoes. The night before or a few hours before making the rösti, scrub and boil them just until tender, but not soft. The fresh, smallish potatoes I used took about ten minutes.

Jeanette, a pretty mid-season variety from our potager

Put the potatoes in the fridge for at least two hours. Peel and then grate them using the largest hole of the grater. If salt is desired, then add it to taste. The purists leave it out as they are not concerned about rating wars. Fleur de sel could be sprinkled on the finished rösti by each eater instead of adding it to the grated potatoes.


Heat to sizzling hot, one tablespoon of butter along with one tablespoon of lard in a heavy-bottomed, eight-to-nine-inch skillet, preferably cast iron.


Put the grated potatoes in the hot fat and let be for a minute or two, then give the skillet a good shake to unstick the starchy mass. Lower the heat.


Using a spatula, even out and lightly press down the potatoes, while molding into a rounded edge.


Resist the urge to compress the rösti too much, as you want it to be somewhat fluffy.


While it's cooking, hard boil two eggs and reserve at room temperature. After around ten minutes check to see if the bottom has browned. If so, then the challenge of flipping awaits you.


This is the way I do it.  Holding securely a lid over the skillet, I flipped it over, leaving the rosti browned side up in the lid.


Placing a plate over the lid, I repeat the maneuver which results in having the rösti land uncooked side up on the plate. If you are still with me, and I know you are, the last step is not to collapse into a tired heap on the sofa, but to bravely finish the task at hand. You saunter over to the skillet that now has the remaining butter and lard sizzling away, with that lovely half-cooked rösti, levelling and touching the plate with the skillet in preparation for flipping. Place your thumbs under each side of the plate, with the rest of your fingers on top. Starting slowly, bring up the plate on an angle and then quickly flip it over the skillet. You can practice with an empty plate.

While it's cooking for ten minutes, re-warm the sausage and reserve. The rösti can be cut in the pan or slid out onto a serving platter. Decoratively arrange egg slices and sprinkle them with sausage. Garnish with a parsley sprig.


Yes, all that flipping was exhausting and silly, but this is what you get to eat!


Dirac the kitten is developing a keen skill for acrobatics. One challenging 'tightrope' is the rocking chair's armrests. The program has been augmented with holding a cloth puck in his mouth while balancing his furry self.


How was he able to pull off such a concerted effort? He first practiced walking on the armrest many a time and then holding a puck right above the surface of my desk, sometimes for ten minutes, before combining the two activities. Obviously a committed artist!


À la prochaine!

RELATED POSTS

La Crique Ardéchoise


Tuesday, 1 July 2014

Fresh Fruit/Veggie Pastry Rounds

The small ball comprised of pastry scraps in our freezer caught my eye. It would not be enough for a full-sized tart, but it could make several smaller ones. In the potager, there are berries, herbs, tomatoes, garlic, and mild hot peppers to be harvested. So a visual image begins...something crumbly, creamy, fresh, vibrant, and not lacking in the looks department so you are compelled to pop one or two or three in the mouth. These are versatile and can be served as appetizers/desserts or at a buffet or an informal gathering/party whether indoors or outdoors or in my case, lunch, well actually a second lunch.


1) First come the pastry rounds. Preheat oven to 450 degrees F/232 degrees C. Roll out about one-eighth-inch thick either scraps gathered into the size of a golf ball (made three 2-inch, three 3-inch, and two 4-inch rounds) or some made just for this occasion. Store-bought can be subbed. I used cookie cutters to make various diameters. 


Prick each round all over. Bake about ten to fifteen minutes or until bottom and edges are nicely browned. The smaller ones will get done faster unless you live in a different universe than I do and then all bets are off. Let cool with space between each pastry on a wire rack (I used an old oven rack).


2) The creamy foundation is next in line. Greek yogurt supplies both tang and body. You only have regular yogurt in the fridge like I did? Pour it into a fine wire mesh sieve held over a bowl, cover, and let it drain in the fridge for an hour. It's best if done overnight.


Since I was making both savoury and sweet rounds, I divided the amount into two, and flavoured one with a drop or so of vanilla extract and the other with finely and freshly grated Parmesan cheese.


3) The toppings! Gather what fresh and prepared ingredients you have on hand and what you think will work together.

Strawberries, red & black currants, raspberries, blackberries, tomatoes, peppers, garlic, thyme & lavender

Don't worry if you can't use all the chosen ingredients or if you at the last minute realise, hey, I got this thing that would work just perfectly with blackberries, in my case, blackcurrant syrup (concentrated fruit syrups are very popular in France for making cold drinks among other things).

Green peppercorns, sherry vinegar, capers, raspberry & maple syrup, vanilla extract

Voilà! Raspberries beg to be filled if not with other fruit, then with chocolate chips, either dark or white, and butterscotch ones.

Blueberry-stuffed raspberry drenched in raspberry syrup

Strawberry half and well drizzled maple syrup

Blackberry half and rivulets of blackcurrant syrup

Plate garnished with black and red currant strigs

And the savoury...

Capers, fresh thyme, garlic sliver, half of a tomato slice, a drizzle of olive oil & sherry vinegar

The larger rounds lend themselves more to the veggie garnishes. All of them, however, were wonderful -- tasty, refreshing, and satisfying! The smaller ones easily could be eaten at one go, the others crumbled a bit, but nothing a napkin/plate held under them couldn't solve.

Tomato slice, pepper sliver, garlic, green peppercorns, thyme, fleur de sel, olive oil & sherry vinegar

In the potager, the blackberries are in full fragrance, ripeness, and toothsomeness.

Guide for ripeness: each drupelet needs to be plump and the berry comes off with a slight tug

This is the first season I am using fresh, uncured garlic. It has a lighter taste and when thinly sliced, has perked up many a sandwich.

Individual cloves, yes, papery outer covering, no.

The rain remains abundant.


The day lilies continue to delight.

Purple blur in background is lavender

The plentiful moisture perks up the weeds too! Weeding therefore is the main task at hand presently along with harvesting. The Abelia is flourishing, and the bees are showing their appreciation with much buzzing. There usually are around ten of them working this bush anytime I glance at it.

Early and mid season taters are now dug up and in storage!

À la prochaine!

RELATED LINKS

Marla Spivak's excellent TED talk on why the bees are dying (one reason: less flowers!)