Showing posts with label Vegetarian. Show all posts

Thursday, 17 September 2020

Homemade Pecan Butter

Nut butter brings out the versatility of nuts in a gorgeously creamy way. If there's a food processor or powerful blender chez vous, then it's possible to make your own, super fresh from scratch allowing the choice of nuts, whether standalones or a mix, roasted or not, blanched or with their glorious skins left on along with any flavourings like vanilla, cinnamon, cocoa powder, maple syrup, etc.  The cost most likely will be lower than store bought.

The only pecans available at the supermarket were raw. Besides intensifying flavour, toasting also encourages oil release which is perfect for making nut butter. 237 millilitres (an 8 ounce fluid cup) of pecans were placed in a single layer on a shallow baking pan in a preheated oven of 177 degrees C (350 degrees F) and roasted for about ten minutes until their colour deepened during which the pan was shook a couple of times. Let cool about ten minutes. They should be warm to the touch when ready for processing.


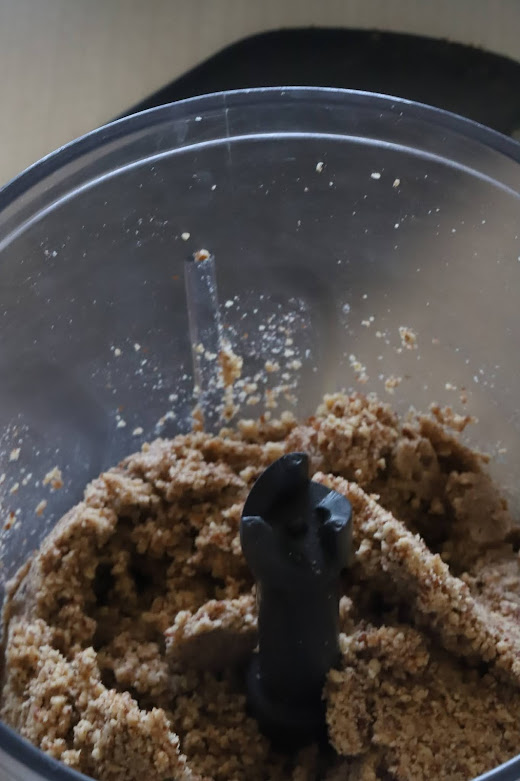
Our food processor's capacity is small hence the paltry number of pecans, but it does boast a wattage of 750, processing them into butter in several minutes. If your appliance has less or more power, the time could be just a minute or up to twenty minutes. If yours has more room than our 2 cup one, then you can process a bigger quantity of nuts. In any case, the procedure has the same visual transition, from finely chopped to . . .


. . . their sticking to the sides of the mixer requiring scraping off with a spatula.


Repeat blending and scraping until you get the level . . .


. . . of creaminess desired. Add what you like, like fleur de sel, nutmeg, ginger among others, or as in my case for a small percentage of the total amount processed, some icing sugar and a melange of sweet spices which thickened the consistency somewhat. It can then be whirred a bit in the mixer to maintain smoothness. Tightly lidded, it will keep for up to a month in the fridge.


This is where a homemade muffin made with our garden blueberries enters the picture.


A muffin gets split and without much ado, receives a light pecan butter slathering.


This pecan butter is more fluid than your average peanut butter . . .


. . . allowing it to fill the fluffy crumb of the muffin to perfection. The slight bitterness of this nut butter offsets the rather sweet muffin very well. I envision marbling a cake batter, dribbling over pancakes, and topping coffee/chocolate/fig ice cream with this easy, delicious saucy pecan butter. For savoury dishes, the unsweetened version can be added to pilafs, casseroles, especially bean for a complementary protein kick, and meat or vegetarian loaf.


À la prochaine!


Thursday, 10 September 2020

Layered Puree Of Roasted Beetroots & Their Greens

Our beet crop is in full swing. Roasting veggies is a wonderful way of preparing them, especially when serving as a mash because their moisture content is decreased to the point that flavour is intensified while the texture is made more pleasing. Beetroots are no exception. Cooler weather makes turning the oven on not too much of a big deal. Beets, along with radishes and turnips, work hard for the kitchen garden as they provide both roots and foliage resulting in a double harvest. Since red and green are complementary colours and pack a visual punch, I layered the roasted, creme-fraiche-enriched beet puree with a puree of greens sauteed in olive oil with garlic. Double harvest, double puree. Topped with a lemon slice and fleur de sel, it makes a light lunch or supper when served with cheese and crackers.


If beets with their greens are not to be had at your market, fret not, roasted beetroot puree topped with creme fraiche is wonderful.


Ingredients are bolded. To roast beets: Preheat oven to 204 degrees C/400 degrees F. (The beets can be roasted along with other stuff at lower temperatures but they will take longer.) Trim both tops and bottoms. Scrub well. Though they can be enclosed in foil, it is much easier to check doneness if they are placed in a foil-lined, lid-covered oven dish. Oil the foil. When checking them as they bake, if they look dry or sticking then add a bit of water. They are done when a knife inserted into their centres meets with no resistance. My melange of small to medium beets took about an hour. Peel carefully with a sharp knife, trimming away any dark bits as they tend toward bitterness. The finished beet will look translucent and bright red. If there are excess beets, let cool, portion, and then freeze. This way you can have borscht in the future. A tablespoon or so of creme fraiche or sour cream added to the blender or a stick mixer's container will ensure lusciousness. Salt to taste. Reserve.

To make the sauteed greens puree: Wash the beet greens.

Trim off most of the red stems as they make a grainy texture in addition to being quite bitter.


Dry them in a kitchen or paper towel.


In a large pot, heat up some olive oil (if you adore olive oil slicked greens as much as I do, then thinly cover the pot's bottom with the oil) over medium low heat. Add as much minced fresh garlic as you want and saute for a minute (no browning!) or as in my case, if you are making do with garlic powder, wait until the greens are added. Turn the heat to high and depending on the size of the pot and the amount of greens, add them in increments. As they start to wilt, add more, stirring all the time. Cover, and lower heat to a small flame, braise until tender, around ten minutes. During that time, check to see if a bit of water needs to be added to prevent any burning and sticking. Blend till smooth. Salt to taste.


To present: When layering, first spoon the puree close to the sides of the glass and then work towards the centre. This way the demarcated layers will be clearly seen from the outside. Start with the greens, followed with the beetroot, another layer of greens, and then edge the top with beetroot letting the previous layer of greens to peek through. Cut a thin slice of lemon from its edge to its centre and then twist it into a swirl, topping the double puree with it. Sprinkle with fleur de sel. I served it at room temperature, but it can be chilled if desired. The sweetness from the beetroots contrasted nicely with the slight bitterness of the greens. Lovely to look at, and lovely to eat.


À la prochaine!
Thursday, 9 April 2020

Covid-19 Cooking: Pea Shoots Soup with Tomato Cream

I am not going to say growing your own shoots, harvesting them, and sieving the fibrous bits from the soup is a doddle in the park. It isn't. But I can say this soup from the first spoonful to the last packs a punch, albeit with a small but determined fist delivered via the combined flavour of the youngest, impossibly fresh peas more akin to green candy than a vegetable and the sweetest spinach without a bit of astringency though neither peas or spinach are included in the ingredients. Add ceps, garlic, thyme, a bit of cayenne or chili powder, butter, and cream, and you have a soup that slams the WOW-meter skywards. One caveat is that it needs to be eaten shortly after being made because its lush, herbaceous brightness fades into increasing and disappointing rankness.


This late winter, three beds of peas were planted thickly so to allow for an abundant pea shoots harvest. In the below photo, the pea seedlings have been thinned to about ten centimetres/four inches from each other leaving enough room for them to mature into pea-bearing plants.


Ingredients
makes four ample servings

  • Pea shoots, fresh, 300 grams
  • Ceps, dried, 2 small handfuls (a gowpen!) plus their sieved soaking liquor, 1.5 L
  • Garlic, cloves, peeled, 2
  • Butter, sweet, 2 T
  • Flour, white, 2 T
  • Thyme, dried, 1.5 tsp
  • Pepper, cayenne, ground or chili powder, a large pinch
  • Cream, 8 T
  • Garnish: tomato paste, cream, and minced pea shoots
  • Salt and freshly ground black pepper to taste

Rinse the shoots well.


Put them on an old tea cloth and with another tea cloth on top, dry them until excess moisture is gone. They will look fluffy and be springy to the touch when sufficiently dry. Chop them fairly finely.


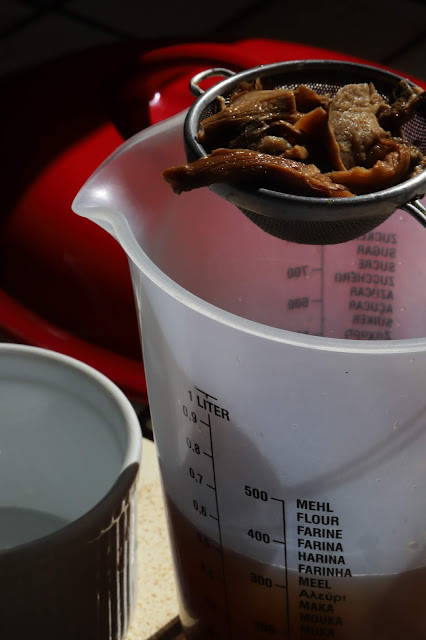
For hydration and separation of grit for the ceps: pour boiling water over the ceps in a bowl and let them steep until the water is coolish to the touch, about fifteen minutes. Work them in the bowl with your fingers and then pour the entire contents into a sieve positioned over a measuring jug. Put the ceps back into the bowl and cover with cool water from the tap. Repeat squishing, sieving, and covering with fresh water till the sieved water is much lighter in tone and you have one and half litres.


Mince them, and also the garlic. Add thyme and cayenne/chili powder. Measure out butter and flour.


Over medium low heat, melt butter. Saute garlic, ceps, thyme, and cayenne/chili powder for about five minutes until fragrant and somewhat softened.


Stir in the shoots. Keep stirring until they cook down significantly, about ten minutes. Stir in the flour. See that brown crust in the corner of my beloved cast-iron pot? Per the gentleman over at his youtube channel, Binging with Babish, that's the wondrous stuff of a chef's dreams, simply called fond.


Add the ceps' liquor which will deglaze the fond, bring to a simmer, and cover. Cook for about twenty minutes. Sieve. Pour back into pot, add cream, and salt & pepper to taste. Reheat if necessary.


Mix about two tablespoon of tomato paste with cream to make the mixture liquid enough for drizzling over a soup serving. In the below photo, it's too thick, but oh so good and would be perfect smeared on hot toast. I just added more cream until it poured from a spoon.


Splotch some tomato cream over a serving and top with a bit of minced pea shoots. I adore this soup. Let's just say this was the closest I ever felt to The Plant Kingdom, and that's coming from one who has been smitten with plants since toddlerhood. I can imagine Treebeard sipping a cup of this and smiling.


À la prochaine!

RELATED POSTS

Pea shoots & Sausage Couscous

Roasted Salmon & Spiced Rhubarb With Fresh Pea shoots


Thursday, 15 August 2019

Iron Cookware Series: Lemon Basil Garlic Smashed Potatoes

Boiling small, unpeeled potatoes followed by gently squashing with a fork and then stove-top roasting in an iron skillet not only doesn't involve turning on the oven in summer, but also results in a superbly roasted tater taking less time than a baked one.


Last week I dug up two beds of all-purpose potatoes, to be specific, Rosabelle variety which has pink skin and yellow flesh; they will find their way into stews, soups, the skillet, and as mashed/scalloped for the next three months. Though it is best to unearth potatoes when the soil is dry, sometimes it's not possible to do so when there's been abundant rain. In that case, clumps of earth adhering to the potatoes can be rinsed off using the garden hose. The ones in the below photo comprise about one-fifth of our haul.


When Rosabelle is harvested early in June, it is suitable for salads, but when mature in August, it becomes multipurpose because it loses some moisture. To summarise the different types, salad potatoes have the most moisture, baking potatoes have the least, and all-purpose are in between. A higher amount of moisture translates texturally into increased firmness and less moisture into more fluffy and floury. However personal preference does dictate as in my own where I shun firm, waxy potatoes even for salads. I am an all-purpose lass! Though I have been known to sneak a few potatoes just for baking into our grocery cart.

Using a spade or fork to dig them up usually results in some getting damaged. When just an end has been cut off, I still store them in the dark, cool cellier. However, when they are slashed lengthwise or on the diagonal, I usually discard them as they are a bother to clean and unsuitable for storage as they can introduce decay into the whole lot. That's why I am as careful as I can be when working around them. There's a specialised potato fork with blunt tips that someday I might get!


After they are clean and dried by the sun, I separate the smallest ones with which I will make mostly smashed potatoes. I love smashed potatoes because they are an easy and yummy way of eating potassium-rich skins which contain as much potassium as the flesh. Since the recommended adult intake is about 5,000 mg, most of us don't get what we need, hence we feel lethargic and experience muscle cramps at times. If made in a pan other than cast-iron, they will be better than OK, but they won't develop the same depth of flavour and crackly skin.


Ingredients for Lemon Basil Garlic Smashed Potatoes are in bold. For two side servings or one meal-sized, boil till tender ten small potatoes in their skins. Let cool. Put a thin layer of oil (I used safflower) in the skillet and turn the heat on to medium. While the pan gets nice and hot, flatten out each potato on a solid surface by cradling one by one with your thumb and index finger while pressing down with a fork. The motion needs to be steady and gentle as to keep the potato flesh intact and not broken into pieces. If that happens, the finished dish will be fine, just a bit messy looking and more challenging to flip over. Mince a garlic clove and along with a teaspoon of dried basil and a halved lemon put close to the skillet. Carefully position each potato with the side of the most intact skin face down in the skillet using a spatula. Keep some distance between each one. Let be for around five minutes or until the skin has developed a deep-golden crust. Sprinkle with salt, minced garlic (using a small spoon, place some on each one, then smoosh down with the spoon's back), and basil. Lower heat a bit and flip over and let be for another five minutes.  Additional oil may be needed. Turn off the heat. Flip again (to the side where skin is most cracked) and carefully (don't splatter hot oil on you!) squeeze lemon juice over all. By the time the skillet is brought to table, the piping hot potatoes will have soaked up the lemon juice. A sprinkling of fleur de sel is the final touch.


The skin was crunchy, the insides soft and cushiony, and everything was gorgeously seasoned as if the lemon, garlic, and basil were a natural part of the potato flesh and not upstart additions. Also a serving offers around 1000 mg of potassiumprobably more because there is increased skin surface with several small potatoes than for an equivalent large potato⁠—for the summer road when our requirement goes up even further because of perspiration and increased activity.


À la prochaine!

OTHER IRON COOKWARE SERIES POSTS

Roasted Salmon & Spiced Rhubarb With Fresh Pea shoots

Mashed Potato Cantal Onion Pancakes

RELATED LINK

Everything you need to know about potassium


Thursday, 7 February 2019

Maple Raisin Challah

When living in the East Village neighbourhood of Manhattan all those years ago, I loved popping into the wonderful Eastern European bakeries nearby for a bagel, bialy, babka, dark rye, and challah. Though it is not impossible to find challah in our small city, its distant relative, brioche, though much lighter in texture because of loads of butter, often substitutes. Since my baking bialys a la Hot Bread Kitchen Cookbook turned out well, I used their recipe for challah. Well that is not true, even if those bialys didn't come out as fantastic as they did, I would still have opted for that book as I appreciate any opportunity to hold that beauty in my hands, flipping through all the wondrous recipes, photos, and stories. Challah is made from yeasted dough that has been enriched with honey, eggs, and oil (making it parve, that is, neutral, neither meat or dairy). My returning to baking bread after a long hiatus meant the yeast languishing in our cupboard was not too fresh. The texture, therefore, was closer to a denser babka, then challah. Subbing maple syrup for honey gave an uplift in taste and adding raisins increased the contrast between salty and sweet. It was delicious, especially served with hot cinnamon apple cider.


Ingredients

Flour, white, bread or all-purpose, plus more for shaping, 315 g (2.5 American cups, that is, 8 fluid oz cups)
Sugar, white, 2 T plus 2 teaspoons
Salt, kosher, 3 1/4 teaspoons
Yeast, active, dry, 1 1/4 teaspoons
Pâte fermentée (see below), cut into walnut-size pieces
Egg yolks, large, 3
Maple syrup, 2 T
Water, warm, 3 T or more if needed (I used 8 T)
Oil (I used sunflower) plus more for coating the bowl
Eggs, large, beaten, 2
Raisins, Thompson, 150 g/1 cup (American cup, that is, 8 fluid oz)

Pâte fermentée

Water, lukewarm, 8 T plus 1 teaspoon
Yeast, active, dry, 2/3 teaspoon
Flour, white (bread or all-purpose)
Kosher salt, 1 teaspoon

Put water and yeast in a medium-sized mixing bowl and add flour and salt. Stir for a minute or two with a wooden spoon until a shaggy dough forms. Cover bowl with a plate, a damp, wrung-out tea cloth, or plastic wrap. Let stand for thirty minutes then refrigerate for a minimum of 8 hours and a maximum of 24. Therefore make this either the day or the night before you plan to bake the bread.


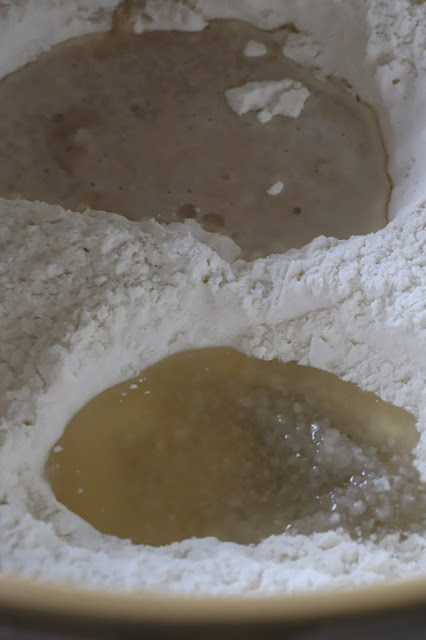
I prefer to mix and knead yeasted dough by hand so if your preference differs, then use an electric mixer with a dough hook. If you want to learn or refresh manual kneading skills, this video has the basics. My preferred method is the same I used when kneading clay back in the distant past when I was a potter. So if you know that nifty spiral manual technique, it can be transferred to dough. Measure/weigh flour into a large mixing bowl. Make two wells, one for yeast, warm water, and sugar, the other for salt and oil. Mix with a wooden spoon for a minute or two.


Whisk the egg yolks.


Put the maple syrup, yolks, and pâte fermentée into the mixing bowl.


Stir with a wooden spoon until the dough pulls together.  Empty contents onto a floured work surface (I used a silicon mat). Knead until mostly smooth.


Flatten out the dough and spread the raisins onto it. Fold dough over and finish kneading.


Let rise in a warm spot, covered with a damp, wrung-out dish cloth, plate, or plastic wrap. Because of my using stale yeast, it took two hours, but it should be closer to one hour.


Flatten out the dough into a rough oblong and start rolling the farther side towards you, pressing down on the juncture between the roll being made and the remaining flat surface of the dough. The aim is to create surface tension which aid in the bread rising well in the oven. Pinch/seal both ends and seam.


Choose a work surface that will accommodate rolling the dough into a rope approximately 90 cm (3 feet) long. Try to get away without flouring the surface as particles of flour drags on the coil flattening it out. If flour is needed to prevent sticking, sprinkle it as sparsely as possible. Place the part of both hands just under the base of fingers, that is, the top of your palm on the centre of the rope, and with a back and forth rolling motion thin and lengthen the dough to the ends as you move each hand farther and farther away from each other. Repeat until you get the desired length.


Using parchment paper, form a turban by curling one end and wrapping the other around that centre curl. Wash with beaten egg, cover with plastic or a damp dish towel, and set in a warm place till doubled. Preheat oven to 180 degrees C/350 degrees F.


Uncover and coat with beaten egg again. Bake in an oven for around 30 to 40 minutes until the bottom sounds hollow when tapped and a thin knife inserted between the strands come out dry.


I will bake challah again soon with newly bought yeast so as to try to get a lighter crumb. But as it stands, the taste is the best I have ever experienced because the pâte fermentée having a prolonged rising allowed for a minimum of yeast. Less yeast, more flavour.


À la prochaine!

RELATED POSTS

Making bialys a la Hot Bread Kitchen Cookbook
My book review of Hot Bread Kitchen Cookbook

Tuesday, 8 January 2019

Iron Cookware Series: Mashed Potato Cantal Onion Pancakes

Grating raw potatoes for pancakes can be a bother, so how to get that same delectable earthy flavour complete with creamy insides and outside crunch without shredding your fingers in the process? Just ensure that you always make more mashed potatoes than needed. Consider leftover mashed potatoes as having a seat at your table. You are cooking for four? Make believe it is five or six.

Yogurt makes a good accompaniment, both taste and nutrient-wise

When I lived and worked in New York City all those decades ago, a trusty cast-iron skillet had a place of honour on my stove. I loved it so much I use to sneak it into our backpack when we went camping. After yet another move, it got left behind. I have made do with stainless steel frypans with heavy aluminium bottoms. Recently The Calm One ambled into the kitchen with not only a replacement for the cast-iron Dutch Oven which had finally given up the ghost after twenty years of use, but also with a lovely iron skillet with two pouring spouts. The former is a fetching enamelled cherry-red with ivory insides, the latter, equally enamelled, is tomato-red. On to the pancakes! Ingredients (which are in bold) amount just to minced onion, egg, flour, salt, and cheese. I chose Cantal, not my usual entre-deux whose taste is similar to mild cheddar, but Cantal jeune whose flavour is closer to Muenster.


Did I forget an ingredient? Oh, yes, leftover mashed potatoes, of course! The better the mash, the better the pancake. This is how I made mine (choose a variety good for mashing, so no salad potatoes please!): boil peeled potato chunks till tender, strain them, add back to the pot, and dry them out a bit by shaking the pan over a low flame. Put them back in the strainer. While they are being riced, warm milk and butter (about a tablespoon of milk and a teaspoon of butter for each medium potato) in the same pot in which the potatoes were boiled. Add the riced potatoes, beat well with a wooden spoon. Salt to taste. Add more milk and butter if required. Wire-whisk till fluffy. When taking the leftover mashed potatoes out of the fridge, break them up with a wooden spoon to soften them.


For each cup of mash (American cup, 8 fluid oz= 16 tablespoons), make a well, and crack an egg into it.


Beat egg with a fork.


Stir in a tablespoon of minced onion and four heaping tablespoons of grated cheese. Parmesan, gruyere, cheddar, and comte would be nice choices. Add enough flour (I used around four heaping tablespoons) to get the consistency close to the original mashed potatoes, but it will be more moist. Add salt, around one half teaspoon. Cover the bottom of the skillet with oil and heat over medium high for around five minutes. Put heaping tablespoons of the mixture, leaving room between them so they can be smoothed out with the back of a metal spoon dipped in cold water (make sure not to get any water into the hot oil). Lower the flame a bit because iron retains heat well. Brown on one side, around three minutes, flip over, and brown for another three minutes. All the mixture needs to be used because it does not stand well. Drain on paper towels and serve with yogurt. Satisfying and warming on a cold night, they are a treat.


À la prochaine!

RELATED POSTS

Cantal Apple Clafoutis (different cantal affinages are explained)
Cantal Asparagus Tart
Fig Apple Walnut Cantal Dark Rye Hot Open-Faced Sandwich (recipe can be found halfway down the post)