Showing posts with label Michelle's Astuce. Show all posts

Tuesday, 19 June 2012

How to Make Red Currant Jelly...plus two summer recipes

Focused on my garden tasks, I often forget how much Dayo likes to be near me until I just happen to stride by his location to get something from the potting room, and lo and behold, I spot him, the little sweetheart that he is.

Dayo inside a lavender bush

Madame M told me the fruit harvest in France has been adversely affected by the fickle weather--cold, hot, cold, hot.  I got just two cups of red currants this season; last season I harvested about four quarts.  While for the black currants, the harvest weighs in so far as two berries!

Translucent little globes of perky flavour

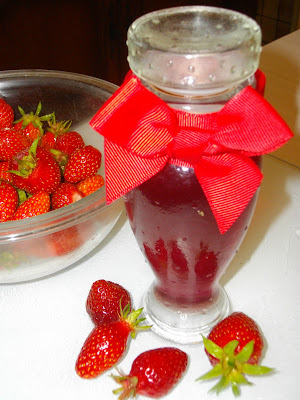
Happily, two cups is enough for one 250 ml jar of red currant jelly.  One jar of this jelly goes a long way as it has intense flavour which I take advantage of by melting a small amount over low heat for a quick and easy desert sauce.  Red currant jelly requires making a puree first.  Add the berries to a pot, barely cover the bottom with water, and over medium heat, cook until soft, about five minutes, mashing all the while.


Pass the mashed berries through a Foley mill and weigh the puree.


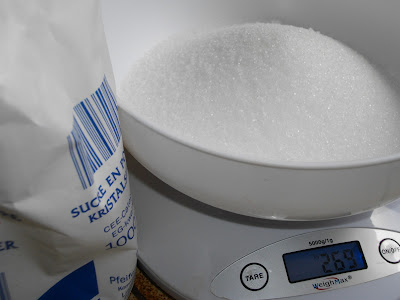
Measure out an equal weight of sugar.


Then follow instructions for regular jam making which can be found here.  Red currant jelly sets fairly quickly, so start testing for setting after a few minutes instead of the usual ten.


Red currant jelly reigns supreme as a glaze for strawberries.  I created an easy recipe for the luscious, jumbo, ever-bearing strawberries--they rival the size of small plums--that are fruiting presently in our patch.  When eating sensibly, that is, when not piling on the calories, focus on flavour.   Large, ripe strawberries stuffed with thick, strained yogurt flavoured with vanilla and topped with red currant jelly supplies just that.

For each serving, strain about four ounces of plain yogurt to which a tiny segment of vanilla has been added and place your straining set-up in the fridge for about two hours--thickening and infusing at the same time!

Almost a third of a cup of whey collected at the bottom.

Slice a bit off the bottom of three washed berries so they will sit flat and carve out a bit from the top of the berry, filling them with some of the yogurt.  Spoon the rest of the yogurt in desert dishes and then place the stuffed berries on top.  Melt  jelly--about two tablespoons per serving--by gently heating it and pour over the strawberries.


Unfortunately, I got a zero appearance from the yellow summer squash seeds I sowed indoors about eight weeks ago.  Since the seeds passed their viability test, I suspect I just did not plant them deep enough in their flats.  I don't care that much for the squash, but I do love to eat the puffy, hot goodness of squash blossom fritters.  Monsieur M caught me coveting their squash plants and asked me what I was looking for.  Flowers, I said.  He graciously let me come and harvest them.

The female flowers should be closed at the top

Yellow summer squash flower beignets (fritters) give two flavours--the mildest eggplant one of their petals and the other of the sweetest globe artichoke of their bottoms.  I gently snap off the female flowers at the end of five-to-six-inch-long squash, choosing flowers that have recently closed which will act like a pillow of hot air steaming the insides tender when being sauteed.  The flowers that do not form on the ends of the summer squash are male; they are edible also and their larger size is perfect for stuffing.  Both flowers are necessary for the squash to form, so keep that in mind when harvesting their flowers.  Mix up 1 part of grated Parmesan to 1 part of flour seasoned with salt and freshly ground black pepper. Beat an egg in a separate bowl.


Wash lightly if required and pat dry the flowers, dip them in the beaten egg, and dredge with the flour mix, rolling them around and filling the crevices well with the coating. There usually is some left over egg and cheese/flour, so I mix them together and shape little patties which get sauteed along with the squash flower fritters.

I add what is left over on the breading plate into the bowl with the eggs

Cover the bottom of a heavy skillet with olive oil, and fry till golden on all sides, about 8-10 minutes.  Blot with paper towels and serve piping hot.  I eat them just as is for supper, but they can also be served with a regular meal.


Bon appétit!

Michelle's Astuce

Any bits of used vanilla pod can be washed, dried, and then put in the sugar bowl.  Voila!  After a day or so, vanilla sugar is yours to sprinkle.


Tuesday, 12 June 2012

Summer Soups: Fresh Pea ... and how to preserve grape leaves

Not only is fresh pea soup easy to make, it is also refreshingly delicious.  When served cold, it makes a perfect culinary accent to a sultry day.


Simple recipes shine when the very best ingredients are chosen so I used my own garden's petite pois/green onions/rosemary along with my home-made chicken stock.  If you don't have a veggie garden, consider going to a farmer's market. 

Fresh Pea Soup Recipe
(Makes 4 small servings, ideal for a first course or two larger servings that can be accompanied with cheese and bread.  Fresh pea soup can be served either hot or cold)

  • Peas, shelled and preferably fresh but a good frozen brand will work, 500 grams (3 cups/roughly 1 pound)
  • Cream, 75 ml (1/4 cup)
  • Chicken broth, if not home-made, get the very best available, 500 ml (2 cups)
  • Scallions/green onions, 4 medium
  • Butter, 30 grams (1-2 tablespoons)
  • Rosemary, fresh/frozen, a small sprig
  • Yogurt, plain, full fat, several tablespoons per serving
  • Salt and freshly ground black pepper

Reserve the tops of the green onions for later garnishing and slice the white bottoms.  Saute them in butter for a minute or too, till soft.  Add broth, peas, and rosemary and simmer till peas are cooked, about five minutes.  Blend in a mixer for the most smooth texture--though a hand-held mixer would do a good enough job.  Season to taste, serve in cups, ramekins, or small soup bowls, topped with a swirl of yogurt and some sliced scallions.

How to make decorative swirls of yogurt without a multi-purpose pastry bag?  Think fluid dynamics!  I beat the yogurt still it is pretty runny and then practice first with a small amount of soup with how high I need to suspend the spoon.  I applied mine in a circular fashion, but a different pattern can certainly be used.

I enjoy crops with dual harvests: beets/turnips roots and greens,  green peas and shoots, onions and scallions, garlic and scapes.  Then there are grapes which bestow those perfect gems of concentrated fruit flavour along with delectable leaves for stuffing.

One of  our ten vines

I harvested our grape leaves in mid May when the leaves are light green, unblemished, and roughly the size of a woman's palm. Older, larger leaves are too tough for culinary purposes.  I snip off as much of the stem as I can.


With the fast and heavy pace of sowing, transplanting, weeding, mowing, harvesting, and preserving at present, I only had time for blanching and preserving them--eventually I will make stuffed grape leaves, one of my favourite foods.

Preserving Fresh Grape Leaves

Grape leaves need to be blanched first before using and before preserving. Wash leaves under running water, then either bring water to a boil in a large pot, turn heat off, and add leaves and let sit for around 3 minutes or pour boiling water into a pot, toss in the leaves, and let sit for the same amount of time. Remove with a slotted spoon.  Rinse under cold running water.  Separate leaves and pat dry with paper towels.  You can now proceed with the recipe or place them in a labelled bag for freezing.


The leaves turn olive green once blanched

As they are being patted dry, whittle down any remaining stem to prevent holes being made when they are stacked.

Such a lovely, burnished, gold-green colour


Sorted into piles of similar size


I tear up a few less perfect ones for cushioning layers of Dolmades

It is important to keep one's wits about her when the pace of gardening gets intense.  On that note, I leave you with this calm, cool, collected Calla:


Michelle's Astuce:

All green herbs--as in what you can do with all that fresh rosemary you bought so you can toss a sprig into this soup--can be chopped and frozen.  When needed, just crumble a bit off.  Or a little water can be added to the chopped herbs which are put in an ice-cube tray.  The cubes are then stored in a freezer bag.

RELATED POSTS

How to sow peas
How to preserve peas by freezing


Tuesday, 22 May 2012

How to Make Rosewater

Roses are beauty and fragrance workhorses.  They grace views, fill vases extravagantly, add to the memorable quality of time spent in the garden because of their fabulous scent, and if that heavy duty was not enough, they offer an edible aspect with their hips and petals.

Rose bouquet doing its colourful, fragrant act on a cloudy day

When checking how my twenty or so rose bushes are doing each day during their blooming season, I make various cutting decisions:  for buds beginning to open, I cut those for bouquets, for flowers that have opened but still are mostly fresh--a few outer raggedy petals can be removed--I use for rosewater making, and for the ones that are close to dropping their petals, the compost awaits for them along with the faded bouquets. In late summer, I let some go to seed so I can harvest their fruits--vitamin C rich hips for jam and tea.

Observing my patio shenanigans, Dayo perches on a sous sol window sill

ROSEWATER RECIPE

1)  Choose the most fragrant roses of which the petals need to be separated from their stems and then washed.  Red and deep pink petals will give nice colour to the rosewater.  Use only roses not sprayed with chemicals.  If you have no rose bushes of your own, you may find a neighbour or two that will let you have some of theirs.  Gift them with some of your rosewater as a thank you.

Petals from my most fragrant roses

Well washed petals resting in their strainer

2) Put petals in a large non-aluminium metal, ceramic, or glass bowl, add boiling water to cover, and let steep overnight covered in the fridge.


3) Next morning, strain the rosewater into a large bowl.  Then with well washed hands, grab a large fistful of petals from the strainer, squeezing them as dry as possible over the bowl holding the strained rosewater.  Repeat until all petals have been hand-squeezed.  Then re-squeeze to make sure to get the last precious drop.

Note the spent petals on the right

4)  Pour the rosewater into ice-cube trays, freeze, separate cubes, and place in a freezer bag.  Take out desired amount when needed for cooking and the bath.  When using rosewater in recipes, gradually add a few drops and always test taste as too much will make the dish tasting like perfume.  The right amount  however is sublime.

Tough day?  Plop a couple of these in your bath.

Culinary uses for rosewater abound.  It can be added to the cooking water for rice and to cake/cookie batters.  There are many wonderful recipes on the web.  I wanted a simple, fairly low caloric recipe that uses my garden's present abundance of strawberries, so I devised the recipe below adding in another favourite fruit flavour of mine, raspberry.

Luscious Gariguettes fresh from the garden

GLAZED FRESH STRAWBERRY PASTRY-FREE TARTELETTES

For each tartelette:
  • Fresh, ripe, flavourful strawberries, about 15 medium strawberries
  • Raspberry jam, several tablespoons
  • Rosewater, a few drops

1)  In a small pot, heat the raspberry jam till fairly liquid and add  rosewater by drops to taste, then strain.  If you use fruit jelly instead, there is no need for straining.  Red currant jelly is often used for glazing strawberry tarts.  If your strawberries are lacking flavour, a good strawberry jam could be used.  Don't hesitate to experiment with various fruit jams/jellies

2) If buying, get the very best in terms of freshness and flavour.  Sort strawberries--some for slicing and some to leave whole.  If your strawberries are not small enough to be used whole for the top layer, slice off their tips.  Layer slices in small ramekins or teacups up to about an inch from the top, keeping the layers fairly level.  Pour some of the glaze on them, then place the tips or small whole strawberries on top with their bottoms sliced flat, and lay one large berry on its side in the middle, and re-glaze.

A dollop of whipped cream or vanilla ice cream would look nice, with maybe a dribble of the glaze.  If a fancier look is wanted, then pipe the whipped cream around the centre strawberry, ending with a solitary rosette on that strawberry.

When watching calories, think flavour!

I enjoy making lemonade with my home-made rosewater syrup.  This syrup can be used in place of regular syrup in most cases. I top pancakes/French toast and sweeten coffee/herbal teas, plain yogurt, and cereal with it.

ROSEWATER SYRUP RECIPE

  • 2 cups sugar
  • 1/2 cup rosewater
  • 1/2 cup water

Put water and rosewater into pot, bring to boil, add sugar, stirring until dissolved and syrup becomes clear, usually around five minutes--much longer and you will be making candy.  Cool and pour into a covered container.  It will keep at least a week in the fridge.  I know that because we always eat ours within a week!


The light pinkish, violet-coloured water suddenly turned a stunning deep amethyst.


Rosewater syrup and Flastaff, one of the fragrant roses used

On to making the lemonade.  Squeeze some lemons, about one lemon for each glass.


Add cold water and rosewater syrup to taste--lemonade suddenly turns a bashful pink--and decorate with a lemon slice and a strawberry.

Pink lemonade!  It actually is a colour closer to the nearby rose.

As you can see rosewater is as adaptable as it is lovely, fragrant, and delicious.  If you do buy it for cooking, make sure it is marked for culinary use.

Michelle's Astuce

If whole fresh lemons are placed in hot water for a few minutes, then squeezed, not only is much more juice produced, they are easier to squeeze.

RELATED POSTS

Wednesday, 25 April 2012

The Stalwart Leek

The roses are close to blooming.  Though roses themselves are gorgeous, the leaves are attractive in their own right.

One of the seven Queen Elizabeth hedge roses taking a shower

Handsome, versatile leeks function both as an food crop and structural plants.  Sow seeds by May and they will provide visual/culinary interest starting in early autumn all the way through to next spring.  They can be popped into the bays between shrubs in a sunny location as long as the area is pesticide/herbicide free. They will stay in the ground looking smart and perky until you are ready for them so no real need for successive planting.

Leeks are biennials.  The second year, that is, their second spring, they go to seed. Edible plants often go bitter when they go to seed, so I make sure I harvest what I want as food before that happens, leaving a couple of plants for seed collection.  Or if you have the space just let nature eventually do it for you and then transplant the volunteers into better locations.

Note the lovely self-sown youngster.

Select the sturdiest and most robust leeks to be your seed bearers.  The seed head itself looks like a gnome's pointy hat.  Leeks are such a class act as they look as dapper as ever while sporting their steely-blue, violet, or white globular flower heads.

Leek seeds being tiny and black makes it difficult to regulate their spacing.  In addition, leeks are best transplanted so their lower fleshy parts are fully buried ensuring that they will be white and sweetly succulent.

Transplanting allows for the better placed leek on the right which is buried right up to bottom leaves

Leeks certainly can be mounded if grown in place.  However, both problems are solved more easily if they are sown first in flats.  Or a few seeds can be sown in small pots, obviating the need to transplant later to larger pots.  Leeks do not need heat to germinate so the flats/pots can go out on the terrace/patio/balcony. In either case choose the sturdiest seedlings to remain, clipping the others off at soil level with scissors.   Another approach is to sow directly into a nursery bed, with later transplanting to where they will mature and be harvested. When transplant size, they are as thick as a pencil and should be placed about five inches apart.

As leeks and potatoes are such a perfect pairing one does not have to stop with leek and potato soup.  This agreeable coupling works well when making twice-baked potatoes.  Eight halves make for a very nice packed lunch for two if one has access to a microwave.  Some people do without re-heating, not that I would know about that!  Or two halves can accompany a larger meal providing a total of four servings.

TWICE-BAKED POTATOES WITH LEEK STUFFING
(Makes eight halves)

  • Four medium-large baking or all-purpose potatoes 
  • Leeks, thoroughly washed and sliced, two cups 
  • Parmesan cheese, grated, 1/2 cup
  • Cream, 1/3 cup 
  • Garlic, one large clove crushed
  • Red pepper flakes
  • Butter, salt, freshly ground black pepper as needed

Having a block of aged Parmesan is nice to have handy

Scrub potatoes well.  Arrange on a rack in a 450 degrees F oven and bake till tender when tested with a knife's point--when done, the knife will feel like it is sliding of its own accord into the centre--about 45 to 60 minutes depending on the potatoes' size.

While the potatoes are baking, cook the prepared leeks and crushed garlic with a tablespoon each of butter and water--sauté for a few minutes first in butter, then add the water--in a covered skillet till tender for about 15 minutes.  Cut the baked potatoes into halves and scoop out the insides into a mixing bowl, leaving enough potato to make 1/8 inch thick walls.  This is a rather important detail for the finished dish--if the walls are too thin, the shells will not do their job holding the filling neatly in place, if too thick, you miss out on the delectable filling that could have been there.

Score first around the edge and then hollow out, neither too thickly or thinly

Rice or mash the potatoes in a large mixing bowl.  Reserving a couple of tablespoons of leeks for garnishing, put the rest in a small bowl and purée with an immersion blender with just enough cream to get a smooth texture. Then add the pured leeks, Parmesan, and the rest of the cream along with the desired amount of salt and freshly ground pepper to the potatoes.  Beat well with a large wooden spoon or whisk till a luscious consistency.  Stuff the potato  halves.

This nifty masher is really a ricer

Note the leeks smoothly blended with just enough cream and the leeks  reserved for garnishing


Any time food preparation requires mixing/beating, I use it as an excuse to make percussion music

The filling can be piped into the shells or a scored pattern  following the contours of the potatoes can be made using a fork.  Bits of butter placed on top will increase browning.  Bake 400 degrees F for about a half an hour or until the top is crusty and golden brown. Garnish with red pepper flakes and the reserved leeks which may need to be reheated to make them glisten attractively.


Bon appétit!

Michelle's Astuce

If a more puffy, pillow-like look is preferred, mound the shells as fully as necessary, using the extra ones as the basis for making potato skins.  There will be about four halves constituting heftier portions, so keep that in mind when menu planning.

RELATED LINKS
Cleaning leeks and leek/potato soup recipe


Wednesday, 22 February 2012

How Green Is My Leek Soup?


When making Leek and Potato soup, I use the green, tender part of leeks along with the white.  I adore fresh colour, scent, and taste.  The leeks being under six inches of snow for a week has left them somewhat bedraggled.  Fortunately, leeks are one of those vegetables if the cold does not kill them, it makes them sweeter.

Using a spade to harvest leeks

Harvested just enough leeks for the soup

Diagonally trimmed leeks on a marble table in the garden.  When trimming roots, leave the basal plate intact

I also make sure there is no grit.  Place a leek flat on a cutting surface and put a sharp knife's tip just above the bottom root, slicing almost all the way through and past the top. Under comfortably tepid running water, splay out the strap-like leaves using your fingers to scrap/move off dirt.  I wash my home-grown leeks in this meticulous manner twice, as grit in food does not go away.  I rather not enrich the compost with my culinary endeavours!

Cutting leeks this way allows for thorough washing

Store-bought potatoes will have to do as last season's harvest has all been used.   My nursery order for spring recently arrived, and next season's harvest is sprouting, that is, chitting,  in their recycled egg cartons.  Dayo, the young tabby cat, shows his intense love for seed potatoes by licking and nibbling them.  I mercilessly broke up this torrid affair by putting them on the potting room's window sill in the sous sol.  Certified seed potatoes can be chemically treated and this affair may not be healthy for him, but he never listens to me.  When harvesting potatoes, there is no concern because the original seed potato resembles a brown prune.


Dayo confined to his box at the end of the long, food preparation table

Sous sol is not exactly interchangeable with basement.   In France, they come in various forms.  The floor of ours is flush with the back potager as our house is built on a gentle, front-facing slope.  Ours is nicely windowed, unheated, and has  lower ceilings than our living quarters above--a very clever way to divvy up domestic space, practically a vertical version of a longhouse.  

Dayo loves the huge brick barbecue in the potting room which was formerly used as a summer kitchen.  Actually, it is its chimney that intrigues him.  Via shallow ledges, he gets a few feet up it, getting cobwebs and soot on his pink nose.  When first moving here, I went on and on about our fantastic brick bread oven to Monsieur M.  He smiled wanly and said softly, but, it has no door.  Then he told me it was he who built the indoor barbecue as a favour for the previous inhabitant.

The Calm One is wary of what he calls green things in his food, and I have found smooth, creamy soups and his own choice(s) from a selection of interesting toppings aid his receptivity to the vegetable kingdom.  This soup has a medium thick consistency and makes four generous servings.  Served with croutons or French bread and Gruyère cheese, it makes a nourishing, tasty hot meal.

 Recipe for Leek and Potato Soup
  • 3 cups (around 4 medium leeks) of carefully washed, trimmed, thickly sliced (about an inch thick) leeks, including the tender green part
  • 5 medium all-purpose potatoes, cut into quarters
  • 1/2 (120 ml) cup of cream
  • 6 cups (1.4 L) of water
  • Salt and freshly ground pepper to taste
  • one or more of the following for garnishing:  green herbs like chives, chervil, or parsley, croutons, crumbled bacon, crème fraîche, grated cheese like Parmesan or Gruyère, red pepper flakes.

The trimmings on the right are too tough and bitter to be added.

Veggies in an enamelled cast-iron pot

Put the potatoes, leeks, and water in a suitably sized lidded pot, cover, bring to a boil and then lower to a simmer.  Cook until veggies are soft, about twenty-five minutes. Turn off heat and blend with an stick/immersion mixer for the texture you like.  Add cream, gently reheat, and season to taste.  Serve with toppings of choice or au naturel.  

Topped with grated Gruyère


The soup is really a refreshing, light shade of green.  Honest!

When whipping/blending potatoes in general, use a light touch.  They can go grey and gummy if worked too long.  I pulse the soup a few times to break up big pieces, and then continuously blend not more than two minutes on high. If you don't have a stick mixer, you can use a food processor, Foley mill, potato masher, or even just a fork to give some body to the soup.

Bon appétit!

Michelle's Astuce:  If utensils having cooked potato residue are rinsed in cold water soon after use, they are much easier to wash later as an initial hot-water soaking congeals said residue into a hard mass.

RELATED LINKS

Twice-baked potatoes stuffed with leeks recipe