Radish greens when young are wonderfully tasty. Though they can be sauteed by themselves, their delectable, crimson roots can be included. Radishes become mild and a little sweet, somewhat like turnips when cooked. Though I enjoy mashed, buttered turnips, radishes are way more visually attractive than an off-white, mushy mound.
Gardening holds many sensory delights, and tactile sensations are one of them. Radish leaves are a bit fuzzy, tickling my hands during harvesting and making me smile. Wash them and separate leaves from fifteen to twenty roots. Since my garden radishes are cylindrical ones, just a halving will do. With round radishes, cut several slices.
Melt a tablespoon of butter in a skillet and saute briefly a minced garlic clove till translucent, about a minute over medium heat. Add a teaspoon of sugar and stir for a few seconds. Toss in the radishes and stir occasionally until they start to brown.
Add the leaves and a tablespoon of Sherry vinegar and stir to mix everything together.
Simmer, covered, for a couple of minutes until the veggies are tender, most of the liquid is gone, and the radishes are slightly glazed. Any water clinging to the washed greens should be enough liquid, if not add a little water. Salt to taste, and to bring out the flavour even more, sprinkle a little fleur de sel just before serving.
Meanwhile in the potager, another root veggie, can pose a few challenges, though the flavour of home-grown carrots more than trumps any effort required, not to mention the extra bonus of soup-stock-enhancing leaves. One of the peskier aspects is to sow thinly since carrot seed is tiny. If sown thickly, meticulous thinning with its required clipped-off seedlings strewn about invites the carrot fly to come sniffing around to deposit its eggs which will hatch into larvae burrowing inside the carrot. Meanwhile you are happily walking around the carrot bed, lush with leaves, naively thinking about all that golden bounty which is sight unseen being devoured.
Mixing the tiny seed with clean, fine sand helps. Also, after a while, the knack of thinly distributing seeds develops. With my fourth sowing, the seedlings did not come up so thickly.
Thin the seedlings when they are about 3-4 inches high, preferably on a windless day and in late afternoon. Clip them with scissors or using your fingers, pinch off level with the ground as not to disturb the remaining seedlings, leaving about 2-3 inches between each depending on the size of the variety.
Thinning the carrots while on my knees, I cursed and grunted in English, startling a trucker from Spain--his truck was marked with its country of origin--as he walked along the refrigerator truck depot entrance which flanks one side of the potager. He also startled me, so we were mutually frightened for a few seconds until we managed to smile. At least we did not scream at each other like in that scene from the film, E.T. the Extraterrestrial. My noisy monologue would have been worse if not my using a gardening knee cushion. If you don't have such an indispensable item, please get one.
Try to remove all the felled seedlings.
Then cover the seedlings with horticultural fleece. Keep watering as necessary right over the fleece and remember to check underneath for any needed weed removal from time to time.
For the last five days, I was out of commission because of a flu replete with muscle aches and extreme fatigue. The only thing I managed to do was set out the potted seedlings each morning and bring them back in before dark. Today was the first day I began to think about any real work in the garden, like finally planting the remaining fifty seed potatoes--I had managed to plunk into the ground twenty-five early potatoes before the flu transformed me into a limp noodle.
Dayo also is just recently getting back into his outdoor routine as he is mostly recovered from his paw injury though I am keeping a watchful eye. So we just hung out together while I took photos.
As the lilacs turn brown, the roses are starting to bloom. If you have lilacs but not the flu comme moi, carefully deadhead them just below the bloom so as not to eliminate next spring's flowering.
The peonies are soon to follow.
As will the lavender.
And the honeysuckle.
Meanwhile the white Spirea and dark-pink Weigela are holding their own along with Heuchera's delicate, coral blooms.
Not to mention red Dianthus and pale-pink perennial geraniums.
À la prochaine!
RELATED POSTS
Sowing carrots
Thinly sliced raw radishes on buttered French bread
Braised radishes without greens
Raw radishes and their greens garnishing a stack of sauteed polenta slices with melted Edam
Sowing potatoes
 |
| With its cheery green and red, this side dish would be a worthy addition to a Christmas dinner |
Gardening holds many sensory delights, and tactile sensations are one of them. Radish leaves are a bit fuzzy, tickling my hands during harvesting and making me smile. Wash them and separate leaves from fifteen to twenty roots. Since my garden radishes are cylindrical ones, just a halving will do. With round radishes, cut several slices.
 |
| At the moment, the only vinegar in the world for me is Sherry. |
Melt a tablespoon of butter in a skillet and saute briefly a minced garlic clove till translucent, about a minute over medium heat. Add a teaspoon of sugar and stir for a few seconds. Toss in the radishes and stir occasionally until they start to brown.
Add the leaves and a tablespoon of Sherry vinegar and stir to mix everything together.
 |
| Too pretty! |
Simmer, covered, for a couple of minutes until the veggies are tender, most of the liquid is gone, and the radishes are slightly glazed. Any water clinging to the washed greens should be enough liquid, if not add a little water. Salt to taste, and to bring out the flavour even more, sprinkle a little fleur de sel just before serving.
Meanwhile in the potager, another root veggie, can pose a few challenges, though the flavour of home-grown carrots more than trumps any effort required, not to mention the extra bonus of soup-stock-enhancing leaves. One of the peskier aspects is to sow thinly since carrot seed is tiny. If sown thickly, meticulous thinning with its required clipped-off seedlings strewn about invites the carrot fly to come sniffing around to deposit its eggs which will hatch into larvae burrowing inside the carrot. Meanwhile you are happily walking around the carrot bed, lush with leaves, naively thinking about all that golden bounty which is sight unseen being devoured.
Mixing the tiny seed with clean, fine sand helps. Also, after a while, the knack of thinly distributing seeds develops. With my fourth sowing, the seedlings did not come up so thickly.
Thin the seedlings when they are about 3-4 inches high, preferably on a windless day and in late afternoon. Clip them with scissors or using your fingers, pinch off level with the ground as not to disturb the remaining seedlings, leaving about 2-3 inches between each depending on the size of the variety.
Thinning the carrots while on my knees, I cursed and grunted in English, startling a trucker from Spain--his truck was marked with its country of origin--as he walked along the refrigerator truck depot entrance which flanks one side of the potager. He also startled me, so we were mutually frightened for a few seconds until we managed to smile. At least we did not scream at each other like in that scene from the film, E.T. the Extraterrestrial. My noisy monologue would have been worse if not my using a gardening knee cushion. If you don't have such an indispensable item, please get one.
Try to remove all the felled seedlings.
Then cover the seedlings with horticultural fleece. Keep watering as necessary right over the fleece and remember to check underneath for any needed weed removal from time to time.
For the last five days, I was out of commission because of a flu replete with muscle aches and extreme fatigue. The only thing I managed to do was set out the potted seedlings each morning and bring them back in before dark. Today was the first day I began to think about any real work in the garden, like finally planting the remaining fifty seed potatoes--I had managed to plunk into the ground twenty-five early potatoes before the flu transformed me into a limp noodle.
 |
| The seed potatoes on the sill are well chitted and needed to go in the ground awhile ago |
Dayo also is just recently getting back into his outdoor routine as he is mostly recovered from his paw injury though I am keeping a watchful eye. So we just hung out together while I took photos.
 |
| Precision patrol: Dayo neatly walks in between narrow rows of beets during his inspection |
 |
| Dayo is pleased with how the David Austin climbing Falstaff rose with its damask fragrance is blooming |
 |
| If you think Dayo is chomping on the cottage pinks, you are wrong. He is judiciously weeding. |
As the lilacs turn brown, the roses are starting to bloom. If you have lilacs but not the flu comme moi, carefully deadhead them just below the bloom so as not to eliminate next spring's flowering.
 |
| Those brown masses are lilacs well past their prime |
 |
| One of the seven Queen Elizabeth hedge rose bushes |
 |
| Unknown rose, but one of my favourites with its deep pink, ruffled blooms |
The peonies are soon to follow.
As will the lavender.
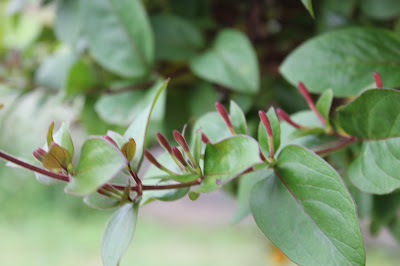
And the honeysuckle.
 |
| There is just a hint of their fantastic fragrance in the air |
Meanwhile the white Spirea and dark-pink Weigela are holding their own along with Heuchera's delicate, coral blooms.
Not to mention red Dianthus and pale-pink perennial geraniums.
 |
| Low growing sedum in the front and heather & Abelia in the background |
À la prochaine!
RELATED POSTS
Sowing carrots
Thinly sliced raw radishes on buttered French bread
Braised radishes without greens
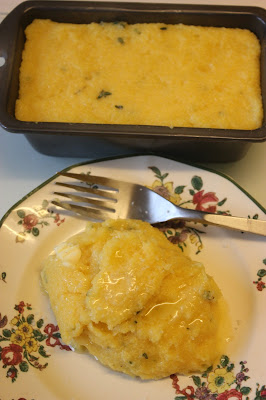
Raw radishes and their greens garnishing a stack of sauteed polenta slices with melted Edam
Sowing potatoes


