Tuesday, 18 February 2014

Pains de navet au cacao

This savoury turnip flan, enlivened with green peppercorns, brightened with diced carrot, held together with a rich custard, and dusted with unsweetened cocoa (an unexpectedly fantastic addition) is one of the many gorgeous entries found in Mousses et Terrines de Legumes, a scrumptious vegetarian cookbook that I bought shortly after our arriving in France. Book details can be found here.


Though each and every vegetable-based recipe is truly vegetarian, being a French cookbook, suggestions sometimes are made for these creative and delicious concoctions to accompany a meat dish, specifically with game in this recette. Well, I decided to have this as a side with itself, that is, a double helping, because these mounds of goodness bust the wow meter.

INGREDIENTS
makes four 4-inch diameter, 2-inch high individual flans


Turnips, 400 gms, (about four medium turnips)
Carrot, 1 medium
Butter, sweet, 40 gms/just under 3 T (extra for buttering the ramekins)
Peppercorns, green, 1 tsp
Eggs, 3 (recipe did not specify size, I used 3 medium ones)
Cream, heavy, 25 cl/8.3 fluid ounces
Cocoa, unsweetened, 1 T
Salt and sugar if needed

Wash, trim, and peel the turnips and carrot. Cut the carrot lengthwise into several slices. Cut each strip into thinner strips and dice these. Cut the turnips if large into half and slice thinly.


Simmer together the butter, turnips, carrots, and peppercorns till turnips are tender and beautifully translucent, about twenty minutes. Preheat oven to 150 degrees C/302 degrees F.


Let the turnip mixture cool down enough so you can handle the turnip slices. If the turnips are a bit bitter, you can add a little sugar. It was not necessary with mine. Salt to taste.


First butter well the insides of the molds, especially paying attention to their bottoms. Then line them with turnip slices. I used molds 10 cm (4 inches) in diameter by 6.5 cm (2.6 inches) tall. Leave about 2.5 cm (an inch) from the top free. A spiral pattern on the bottom which will become the top of the flan is a nice decorative touch but just make sure that the inside surface is mostly covered.


Crack the eggs into a mixing bowl and whisk till blended. Then beat in the cream.


Add the turnip mixture into the cream and eggs. Put the kettle on the boil.


With a small ladle or serving spoon, fill the ramekins about three-quarters to the top rim which will allow the flans to expand in the oven. First spoon an equivalent amount of solid bits and then evenly distribute the liquid. Lightly tap them on the work surface to eliminate air bubbles. Place in a shallow oven dish and pour an inch of boiling water around the molds.


Either cover with a lid or with foil.


After twenty minutes, remove the covering (contrary to the book's direction because I wanted the top edges to brown a bit) and bake for another twenty, testing by noting that an inserted knife comes out dry.


To serve warm, let them stand for about five to eight minutes. Loosen the flan with a knife or a thin spatula all around its sides. Tip them carefully onto paper towels; if the bottom sticks, remove those turnip slices and replace on the top of the unmolded flan. Let sit for a few minutes for excess moisture to be absorbed.

Though the author presents these in the chaud (hot) sector, I am convinced that not only they taste and look best (the cocoa 'bleeds' unattractively on a hot surface) when served tepid or cold, they are easier to unmold and lend to much more convenient serving as they can be made in advance and brought to room temperature as needed. In any case, dust with the cocoa just before serving. To get a really fine veil of cocoa, put a tiny amount (I used about a 1/2 tsp at a time) in a very fine sieve to prevent exuberant clumping.


Along with a pleasing piquant accent, the flan boasts of an incomparable richness in both flavour and texture.


Elmo the cat has kept away for a couple of weeks because of incessant rain, but I suspect it is because his maitresse wants to keep his pristine, white, long-haired belly and huge paws mud-free. Though he allows me to pet him outside, he will only let me take photos at a certain distance!

This is as close as he lets me get when taking photos of him outdoors before prancing away

Indoors is a different story. If he gets a little spooked by the proximity of the camera, I speak French softly and caress him with one hand until he relaxes so I can begin clicking away.

His small yellow eyes, long snout, and extreme floof has garnered him the nick of Wolfie.

His tail when he is cavorting about in the garden resembles a waving black flag. Despite his substantial bulk, his meow is a mere squeak. He gives out a series of these 'meows' when he needs assistance in climbing the wire fence separating our garden from Monsieur and Madame Ms. My job is to tap the safe spot which lacks spikes while calling to him. After a few minutes he makes a clean jump and whooshes into our sous sol.


If I am lucky enough, when he plays with me, he repeatedly bats my hands with his over-sized, padded paws inadvertently giving me a luxurious massage. He's a lovely fellow indeed!


À la prochaine!

Wednesday, 12 February 2014

The Potager Awakens...and a few quick recipes

Since I am spending time outside pruning and digging beds, that is, when the plentiful rains and nippy winds ease a bit, hot, easy, and fast meals are what I want. One such satisfying repast is made by stirring instant polenta into boiling water (one part polenta to four parts water) along with minced garlic and rosemary fresh from our potager. It's simmered while being stirred for a minute or two, piled unceremoniously into a bowl, and topped with grated cheese and butter. If I remember to sprinkle fleur de sel, I do.

Sunshine in a bowl! That's grated Parmesan scattered amidst the butter rivulets

White beans are luscious nuggets of tasty nutrition made even more delicious by sauteing minced garlic and onions in olive oil and adding some tomato paste, an ice cube or two of my concentrated, homemade chicken broth (water or veggie broth, packaged or homemade, can be substituted), a good quality paprika, smoked or not, along with some well rinsed, drained, canned white beans. Simmer for about five minutes. Line a bowl with French bread 'fingers' (one-inch slices cut in half) and fill with the bean mixture.


I been known to use the bread pieces as a fork/spoon substitute. Finger-licking good for sure!


Since my frying technique has measurably improved, I could just eat fritters day after day. For the latest batch, I mixed together some well seasoned, left-over mashed potatoes, flour, grated Edam cheese, chili powder, a large pinch of baking powder, and an egg. An inch of fresh sunflower oil along with a teaspoon of used oil in a skillet was heated until it passed the wooden spoon test (I had to tip the pan to conduct the test). Tablespoons of the batter were fried on each side for a total of about eight minutes. Drizzle some soy sauce on them. À table!

These fritters were exemplary in both their crispness and moist centres

But the real mainstay has been hot cocoa which is often served in big bowls for breakfast here in France.  The bigger the bowl, the better it seconds as a hands warmer. Viennoiseries like brioche and croissants are delicious on their own of course, but they also lend themselves to a thorough dunking into the warm, aromatic dark liquid.

Unsweetened cocoa is not only low in fat and calories, it packs a potent dosage of energy-boosting, nerve-calming magnesium. So after living here for almost two decades, I am getting with the program, no matter how belatedly. Put on the kettle. A heaping tablespoon of unsweetened cocoa goes into a small cup along with a dash of maple syrup (Why? Because there was some in the fridge and I adore the stuff!), some milk, and a smidgen of cream.

I like half milk, half hot water

Whisk til smooth.


The water should be boiling by now. Hot water meet smooth cocoa paste. Voilà! I am so happy that I forget momentarily about the difficult-to-work, sodden soil.


In the potager, the rhubarb continues to leaf out. Before their growth gets too luxuriant as they love cool weather, it's time to scratch in a balanced fertiliser around each plant.


Carpets of sweet violets along with a few brave blue irises are blooming, but at a personal price as they are being lashed by the wind and rain into soggy taters. Botanical tulips and daffodils are putting out foliage and buds, and so far are retaining their 'cool'.


Cuttings I took last spring from the Vinca minor growing around the camellia are flourishing under the pergola and are beginning to bloom.

Common name: periwinkle

In the potting room, sowing has gotten off to a good start: red bell peppers, Thunbergia alata, and piment doux des Landes are being coddled in the incubator.

Instead of loose Thunbergia seeds, my plant nursery sent four seed discs, each containing about 10 seeds

This is the first time I have used a biodegradable seed disc which is placed in a pot almost completely filled with potting mix. Then it is lightly watered to help the disc adhere to the soil. Finally, it is covered with an inch of mix, kept moist, and put in an incubator or on a heating pad. It was much easier to handle than individual seeds.


This is how the black-eyed Susan vines looked last year, simultaneously acting as a ground cover and a vine covering an unsightly fence. Its lush foliage and cheery flowers last from June to nearly November.


Lovage (a fantastic, perennial celery substitute), parsley, chives, and lettuce are snug in their little, cold 'greenhouse'.

A recycled meat tray filled with sowing mix and seeds is placed inside a plastic bag

All three varieties of potatoes are nestled into their recycled egg cartons, quietly chitting in the cold sunlight. Sprouts that are coloured brown, red, yellow develop in seed potatoes exposed to sunlight, unlike the long, brittle, white ones that happen in the dark. Though not essential especially for primeurs (May/June harvest), this practice does give a head start while the danger of frost is waited out.

From early to late: Dolwen, Jeannette, and Desiree

The peas, garlic, and onions are waiting to be planted outdoors. 

The garlic is stock from our own harvest from last summer

Before I know it, it will be time to plant spinach, carrots, and beets outdoors and sow indoors zinnias, tomatoes, melons, cucumbers, and butternut squash. Where's that hot cocoa?

À la prochaine!

RELATED POSTS

How to sow indoors
In defense of fried foods

Wednesday, 5 February 2014

Coffee Churros & Strawberry Coulis

Pâte à choux is the culinary version of the little black dress as it can be seen everywhere, at casual cocktail gatherings as gougères, at classy restaurants as profiteroles, and at street stands/country fairs as churros. Those who regard frying this dough as going over board are missing out on a fantastic taste experience. Since churros are often served as breakfast in some countries, I put the wake-up punch of a favourite morning beverage right into the pastry by tossing in some instant coffee.

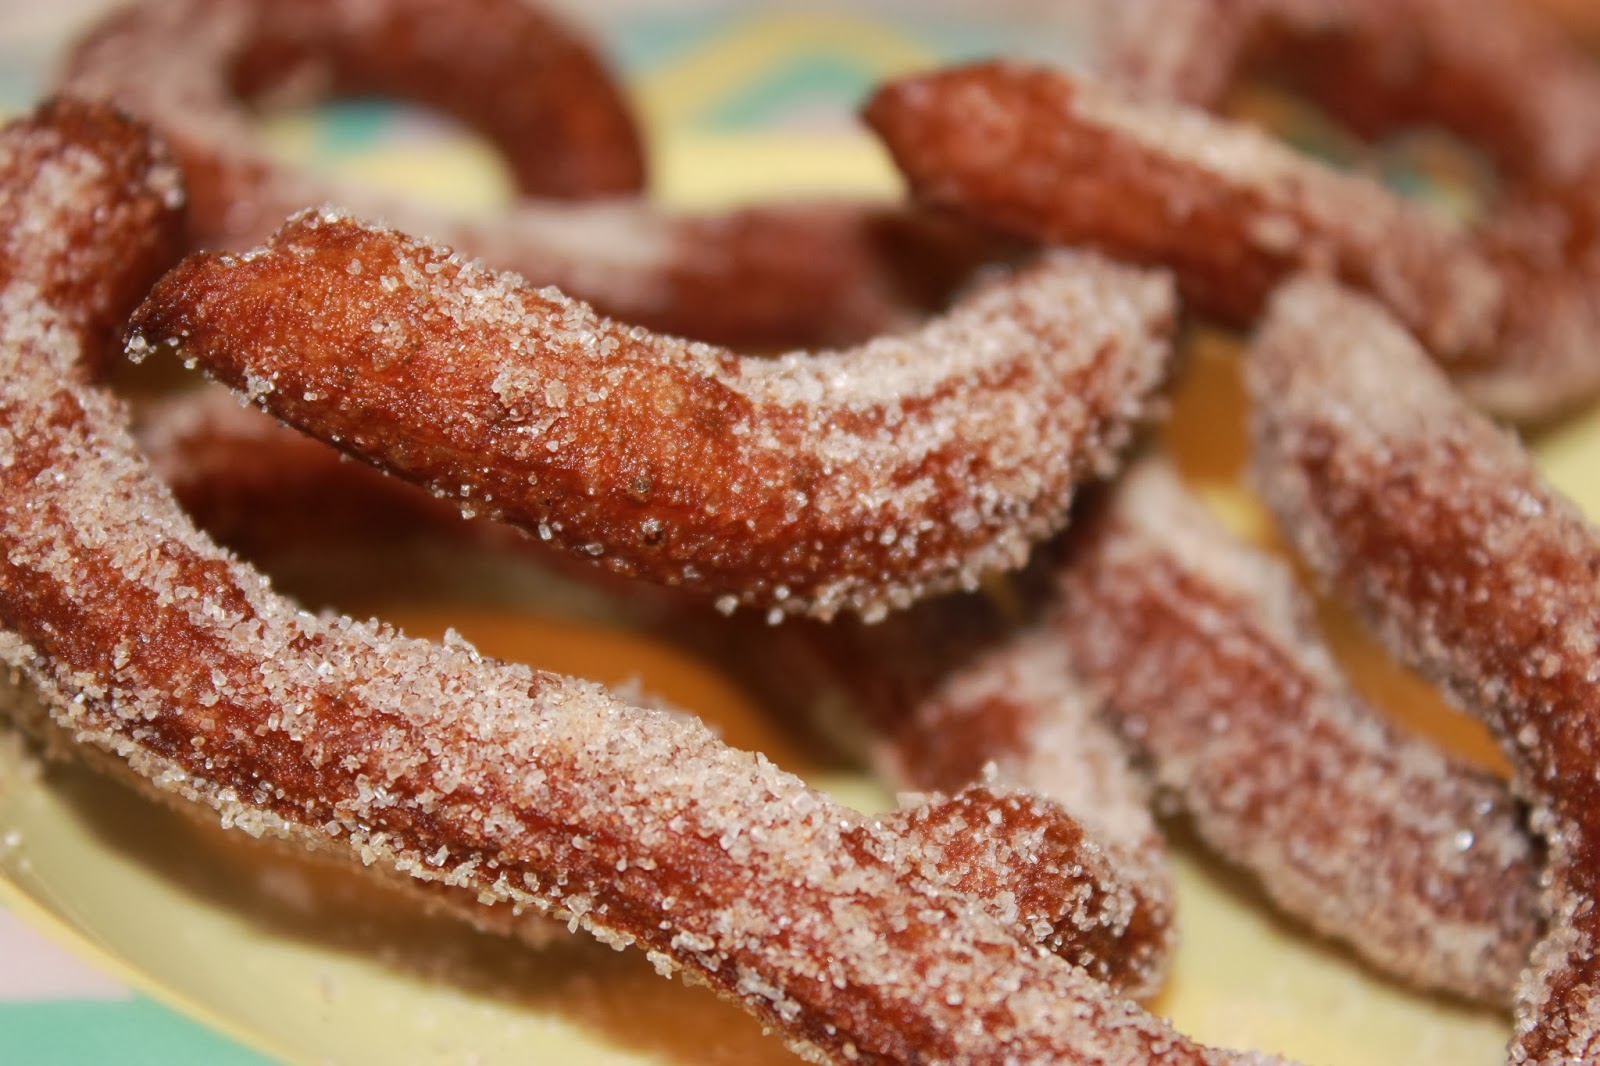
 Sprinkled-with-cinnamon-sugar coffee churros making waves

As some may need convincing that this treat is not without merit, instead of the traditional chocolate dipping sauce I chose strawberry coulis for the churros unadorned with sugar. The fresh tang of the fruity sauce added a lighter touch. Berries from our own garden which were frozen from the summer harvest were used.

Those little nibs at the tops of the churros indicate that I am a novice at piping dough

I also made a baked version which was fairly good, resembling a slender eclair in texture and taste. But when fried, they have a supreme crunchiness and custard-like center that I find irresistible. I, like Pastry Joe, regard the pronounced negativity hurled at all things fried as being based more on misconceptions than anything else. If your oil is fresh (except for a tiny bit of old oil mixed in) and the temperature is hot enough, frying is more akin to steaming.

Ramrod-straight baked coffee churros dusted with icing sugar.

Ingredients
(makes about 40 4-inch long churros, about one-inch thick)

  • Water, 8 fluid ounces
  • Coffee, granules, freeze-dried, either caffeinated or not, 1.5 T
  • Butter, sweet, 5.3 T
  • Sugar, vanilla, 2 T (if using plain sugar, add 1/2 tsp of vanilla extract)
  • Salt, 1/2 tsp
  • Flour, all-purpose, 8 fluid ounces
  • Eggs, 3 large (about 6 fluid ounces)
  • Coulis, strawberry (recipe here, but leave out the lemon juice and add a lot more icing sugar)
  • Sugar, granulated, 2 fluid ounces mixed with 1 tsp cinnamon
  • Icing sugar for dusting
  • Vegetable oil, fresh, for frying, but not olive oil (I used sunflower oil). Add a bit of re-used oil if you have some.

Preheat oven to 425 degrees F.  Prepare a piping bag, choosing a large star tip. If there no pastry bag available, then a gallon-sized, strong, plastic freezer bag with one of its corners snipped off can be substituted. If there are no piping tips, then the snipped-off corner itself will suffice but there will be no ridges. The dough will keep up to twenty hours in the fridge. I did some baked churros one day, and the next I fried up the remaining that was in the pastry bag.


Measure out the ingredients.


Put the butter, salt, sugar, coffee granules, and water into a medium-sized saucepan. Keep the flour and eggs near the cooker.


While stirring, simmer over medium heat until everything is dissolved and blended.


Add the flour all of a sudden. Vigourously mix with a large wooden spoon until a dough ball forms which pulls away from the sides of the pot. Gently cook for about a minute while continuing to stir so some moisture will evaporate. Remove from heat.


You can either wait a minute or run the lower sides of the pan under cold running water so the eggs can be safely added without being cooked. Beat in each egg by itself, using either a wooden spoon or a wire whisk. You can use a food processor if you choose the paddle attachment. After each addition, the dough will become slippery and separate into large pieces, unfortunately momentarily resembling raw liver lobes. Do not despair as it will wind up into a lovely, glossy, cohesive mass.


After beating in each egg, the mass will get more and more glossy but it will remain sticky.


After about ten minutes of beating, the mixture will be a lovely café au lait shade (funny that!), smooth, and shiny.


Using a wooden spoon, stuff the bag with the pâte à choux, squeezing the mixture towards the tip end after each spoonful.


Line some baking sheets with parchment paper. Though I have had my piping tips for decades, this is first time I have use them so I indulged in a little practice. The tip should be heard scratching along the surface, and the speed in which the dough is squeezed out should not be so fast that the strips are thin or so slow they are bunched up. If the plastic bag springs a leak, just slip another plastic bag over it (making sure you clip off a corner). When working the bag, twist the unfilled part.


Bake for about fifteen minutes and test by eating one (the best way I think!). The insides should be fluffy, a bit moist, and thoroughly cooked. Mine came out crisp enough considering they were baked, but you could run them under a broiler for a minute or so for extra crunch. Dust with icing sugar (granulated sugar does not adhere that well to baked churros) and serve hot.

I didn't remember to tamp down the spikey bits with a moistened fingertip to prevent them from getting burnt

If going the shallow fry route, mix sugar and cinnamon together and spread on a plate.


If you have a deep fryer, you are sitting pretty. If not, substitute a deep skillet like I did, adding about two inches of oil. To test without a thermometer, insert the handle end of a wooden spoon into the oil. When the temperature is in the range of 160 degrees F to 175 degrees F, there will be a steady though lively circular stream of tiny bubbles. If there is wild, tumultuous bubbling, then it is too hot and the heat needs to be lowered. After determining that it is hot enough, keep the flame low.


Layer a plate with paper towels and keep nearby. If you are new at piping, make sure you do a few practice runs first on a plate before doing them into the oil. You will get the hang of it fairly soon. I enjoyed playing around and squirted out some long ones which then gloriously curled up into curved shapes. Keep a sharp, non-serrated knife close so the dough can be scraped off the tip. Four-inch segments are more manageable though and should come out mostly straight. Fry about four minutes. Test by tapping them with the wooden spoon: they need to feel fairly hard when pressed down slightly. Remove with tongs.


Blot them on the paper towels and then coat with the sugar, making sure you sprinkle all parts, including any curved bits.


Pile them on a colourful plate or a plain one (your taste buds won't know the difference!) if that is all is available and serve them hot.


Biting into these churros is not only fun but also delightful.


À la prochaine!

RELATED POSTS

How to make gougeres
How to make profiteroles

RELATED LINKS

Three tests for ensuring frying oil is hot enough without using a thermometer