Tuesday, 28 August 2012

How to Harvest Charentais Melons and Grow Carrots...plus making velouté de carottes

Since we live in the Poitou Charente region of France, it's appropriate to grow succulent, fragrant Charentais melons which look like smoother skinned, small cantaloupes.   To check ripeness,  I smell the unattached end of the melon, often having to contort myself as not to break the vine, but nothing is more disappointing than a melon not bursting with ripe flavour.  It also needs to be flushed with gold and feel heavy.  Stopping watering around a week before harvesting may prevent melons splitting.  During the end of August, I walk and sniff around the melon patch because a split melon that is mostly ripe will fill the air with its heady fragrance.  If I note a split melon soon enough I will be able to eat it before the ants do.


When moving to France over a decade ago, the first dinner I was invited to had as its first course a slice of cantaloupe au nature, separated from its rind, cubed, and served on said rind.  Presenting melons this way emphasises their freshnessThough melons  can be halved, seeds scooped out, and be eaten with a spoon, chunks have a satisfying texture and are a bit neater to eat.  First scrub the outside of the melon with a veggie brush under running water to prevent dirt and bacteria being transferred to the melon flesh.  Cut the seeded halves into slices, slip a knife between the rind and the flesh, and then slice in thick pieces and either serve on the rind or in a dish.  The Calm One eats way more fruit when it is not a chore for him to do.

Slice on the bottom is separated from its rind and cubed.

Luscious, juicy, golden chunks

Watering has been necessary all throughout August and doing it at twilight is a mellow time both Dayo and I enjoy.  He needs to make sure each and every time I drag out the yellow hose that it has not become a snake.  He is very careful about such matters.

Iris foliage, yellow hose, and snake handler Dayo lit up by the setting sun

Carrots have an infamous reputation in the veggie patch as being difficult to grow.  Baby or short, round carrots are a cinch, but if you want substantial carrots it gets a bit more demanding.  My soil is semi-conducive to carrot growing, so half the crop comes out looking like this:


While the other half come out like this:


And if I am really lucky, I get a carrot as intriguing in appearance as this:


About two and half years ago, when I first started to grow our produce, I left out root veggies because home-grown did not seem to be cost-effective as store-bought is so inexpensive, and I had the mistaken conception that the quality would not be that different than if I grew my own.  In addition, the soil was a little stony which would impede the growth of succulent roots.  Be rest assured, beets, potatoes, onions, and carrots grown in the garden are exceptionally flavourful--earthy with a touch of sweetness and worth the effort.

Once you decide what size root is best for your soil--I choose mid-long varieties--the three main problems with growing carrots is that their seed is small so it is difficult to space well, they are vulnerable to getting blitzed by carrot fly, and they take several weeks to become little plants making weeding difficult.

I usually plant two carrot crops, one in early spring and the other in late summer as they prefer cooler weather. For the fall/winter harvest, I choose varieties which can withstand some frost and can be stored in the ground as the soil here does not freeze deeply.  First I prepare the area by spading, removing weeds and as many stones as possible, and forking in compost, letting the bed settle down for a week or so before actually sowing.  Young plants don't take kindly to either an impacted soil or a very loose one.

Taking a large pinch of seeds, I slowly deposit them by rubbing them between my first two fingers and thumb as I go down the furrow--spacing is about four to five inches between rows in my block beds--that has been partially filled with sowing mix.  Using sowing mix will not turn magically a stony soil into the perfect one for growing carrots, but it will allow for a greater number of tiny seeds not to meet up with a pebble or a soil lump that would prevent it from starting the growing process.  Once that process is started, the roots may not form straight, but they will form.

Rake, carrot seed packet, and sowing mix.  Note how fluffy the sowing mix is compared to the soil.

I then sow some widely spaced large radish seeds down the rows and then cover up with a light dusting of sowing mix.  Radishes sprout quickly, marking the row and guiding weeding plus I get a few radishes to eat as I harvest them in several weeks, allowing plenty of room for the carrots to develop, usually about three to four months. Using the back of the rake, I tamp down the rows and water thoroughly with a light spray.  To encourage sprouting, I keep the bed moist, but not soaked.

Once the plants are about two inches high, I place horticultural fleece over the bed, securing it by tucking it under the tiles framing the bed.  The fleece forms a mechanical barrier against carrot fly preventing its depositing eggs which would become legions of  hungry munchers devastating crop yields.  You would not be aware of this underground devouring until harvesting.  There is at least one variety that is resistant to carrot fly, but there are so many delightful varieties that aren't.

Velouté in French cuisine means the addition of chicken broth and cream which lends a velvety richness.  This is a gorgeous soup in taste and looks. It gives me immense pleasure when all the veggies and herbs in a recipe come from my potager Potage after all is the French word for soup. 

Velouté de carottes
(6 servings)

  • Carrots, 8 large, sliced about 1/4 inch thick
  • Chicken broth, preferably homemade, 2 liters
  • Cream, 500 ml
  • Potatoes, 4 medium
  • Celery, 1/4 cup or preferably lovage, 1/8 cup
  • Onions, 2 medium, chopped
  • Parsley, flat leaf, a few sprigs and extra for garnishing
  • butter, 60 grams
  • Salt and freshly ground black pepper
  • Bacon, two slices for each serving
  • French bread, two slices for each serving

Melt the butter in a soup pot and let the carrots, onions, and celery/lovage saute for about 15 minutes.  This step brings out the flavour and ensures a nice colour to the soup.  Then add the cubed potatoes and parsley, mixing well.


Pour in the chicken stock and simmer until all the veggies are tender, about 20 minutes. 


Using a stick mixer, blend until very smooth.  Add cream/seasoning and keep hot.  Fry up the bacon, reserve, and keep warm.  Pan fry slices of French bread in the bacon fat. For each serving, sprinkle crumbled bacon and some minced parsley and serve with a slice or two of fried bread.


Bon appétit!


Tuesday, 21 August 2012

How to Make French Onion Soup...and fresh green bean salad

With temperatures in the nineties, summer is reaching a climax.  This tall Queen Elizabeth rosebush is preparing for autumn with a last spurt of growth, reaching for the clear, blue sky before its petals drop and hips form.  Remember to refrain from fertilising bushes as new, tender growth will increase their vulnerability to frost.


I adore green beans and have planted four successions this season.  Succession planting, that is, sowing every ten to fourteen days ensures a steady supply of fresh produce.  Another advantage is protection against less than ideal conditions, for example, insect infestations happen just some of the time during the growing season so chances increase at least part of the crop will come in nicely.


An easy and delicious way to serve green beams is to make a salad.  Snap the ends off and break into small pieces.  Boil small potatoes for about five minutes, adding the beans for another five minutes or until the veggies are tender.  Slice the peeled potatoes and pat them and the beans dry.  Toss them into a bowl along with a crushed garlic clove, some apple cider vinegar and olive oil, Parmesan shavings, fleur de sel, and freshly ground black pepper.  This salad can be served tepid or chilled.  Use French bread to sop up the dressing--a simple, fast, and delicious supper.


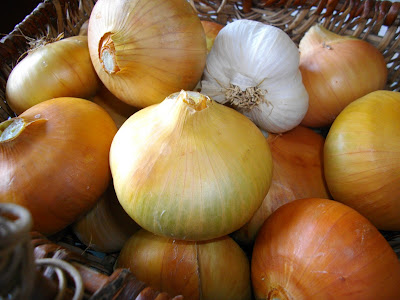
After a month of dry curing onions and garlic under the pergola, I tidied them by shortening their tops and clipping their roots.  About a week later, I trimmed off the rest of the garlic tops, and they are now stored in a cool, dark spot in the sous sol. The onions need more curing before they can be stored.  Just as with garlic, when there is no smell when snipping them close to the bulb, I will know they are ready for storage.

The largest garlic bulbs will be planted this fall for next season's crop

Dayo likes to hang out under the pergola with me because it is much cooler there.  He also helps me as I discard the dry tops of onions and garlic, diligently swatting some as they fall from the table, guiding them into a compost crate. 


French Onion Soup or Soupe à l'Oignon Gratinée is a staple in our household throughout the year.  Though proper carmelisation is important, using home-grown onions heightens the taste even further.


INGREDIENTS
(recipe make four servings)
  • Onions, yellow, thinly sliced, 700 grams
  • Garlic, 1 fat clove, crushed
  • sugar, 1 tsp
  • Olive oil, 2 Tbls
  • Butter, 30 grams
  • Beef broth, homemade or the best you can buy, 2 liters
  • Bay leaf, crumbled, 1/8 tsp
  • Thyme, 1/8 tsp
  • French bread, slices, 8
  • Gruyere cheese, grated, 200 grams
  • Additional crushed garlic and olive oil

I find onion soup easier to eat if the onions are not sliced into rings, so I halve them first and then slice.


Bring the olive oil and butter to a bubbling boil in a heavy bottomed pot.  If the pot is broiler safe, then the same pot can be used to complete the dish.


Add onions, garlic, and sugar and over high heat, cook for about 6-10 minutes until most of the onions have browned edges.


Keep heat as low as possible and let carmelize about 30 to 40 minutes.  Fresher onions will take longer than older ones.  Sample them from time to time to get an idea what partially carmelized onions taste like.  When they are fully carmelized, the depth of soft, moist sweetness will knock you over.  It does for me, each and every time.

The onions will have the colour of caramel

Pour in the beef stock, stirring well with a wooden spoon to dissolve all the browned goodness at the bottom of the pot.  Add thyme, bay leaf, salt and freshly ground pepper and simmer, partially covered for an hour.


While the soup is simmering, preheat oven to 350 degrees F.  Cut two slices of French bread per serving.  Though this recipe can serve four, I freeze half of the soup for another meal as there are just two of us, making the rest of the croutons at that time. Slices should be not much more than 1/4 inch thick to prevent them from soaking up most of the soup.  On a shallow oven pan lined with oven-proof paper, mix a couple of crushed, large garlic cloves and several tablespoons of olive oil.  Rub both sides of the bread slices in this mix until well coated.


Put the tray in the oven for about 25 minutes, flipping over the slices after 12 minutes.  The slices should be fairly dry and golden brown.  Grate the cheese and divide into two equal piles for each serving.  Preheat broiler to the highest setting. 

Since I halve the recipe, I make about five large croutons to fit into my Corning casserole

Float the slices on the surface of the soup in a broiler-safe casserole and cover them with the cheese, each pile mostly going on top of a slice as some will land in the soup.  Place the casserole about four or five inches under the heating element and broil for about 3-5 minutes.  Carefully bring piping-hot casserole to table and serve in soup plates.


Bon appétit!


RELATED POSTS

Sowing, fertilising, and harvesting onions

Tuesday, 14 August 2012

How to Make Mirabelle Plum Jam...and refrigerator pickles

Being the third summer into my rejuvenating an once neglected garden, it is encouraging to see plans being realised.  An eight-foot square patch right off the patio was once just nettles and thistles, and now is fairly covered with heather, abelia, bearded irises, zinnas, dianthus, perennial geraniums, and sedum.

Bees love the graceful, sparkling abelia in the centre as much as I do

The Charentais melons are getting close to harvesting.  I use pieces of terracotta roofing tiles to protect these luscious, smooth-skinned cantaloupes from rotting on moist ground.


August is proving to be very hot, but Dayo knows how to stay cool.  He strolls into the sous sol, opens one of the base cupboards, and settles down comfortably.


Mirabelles are a much loved plum variety in France.  These golden fruits are referred to as cherry plums because they are the same size and are often flushed with red.  I had to chuckle while reading The Elegance of the Hedgehog because these are the plums used in the cherry plum test.


Being such prolific producers, even in this year with greatly diminished fruit harvests, I was able to pick about nine pounds/four kilos.   I added some chopped ginger and lemon juice when making my first batch of Mirabelle jam--keeping batches small helps to retain the fresh flavour because less time is spent boiling.  Mirabelles have a spicy undertone, and I wanted to heighten that even more.   Though it turned out fine, I will make the second batch plain as I did last season.  Since Mirabelles have such a complex flavour--peach, cinnamon, and honey notes--this jam works very well with just Mirabelles in all their glory.  Since the consistency of this jam is also like honey, it goes well over a stack of buttered pancakes.

Please refer to these general instructions before making this jam.  Wash the Mirabelles, halve them, and pit.  Weigh out  2 kilos (4.4 pounds).


Because there is more pectin in plums than in strawberries, there is less need for sugar in this jam than for my strawberry jam.  However, this is still a very sweet jam as I prefer sweet over the dulling effect of additional pectin while getting a jam with body. With such an intense flavour, I use a very small amount at a time. Add 1400 mg of sugar gradually and stir until well mixed and leave in the fridge overnight.  The next morning all that sugar will have pulled out some wonderful juices. 


The next morning, clean jars and lids and get equipment ready.  I used three 600 ml jars and one 350 ml.


In a suitable sized non-aluminum pot, bring the macerated fruit to a rolling boil lasting about 20 minutes, using the sheet test starting after 15 minutes to determine the moment of setting. 

Lots of foam in the beginning

Eventually when jam is close to being finished, most of the foam will be gone and the fruit will become shiny.

Skim off any remaining foam which can be eaten as it is delicious but it's not safe for preserving

Pour into jars, tightly and carefully screw on lids, turn over while protecting hands with pot holders/mitts and leave to cool completely.  They will keep in the fridge for a year.


As the cucumber patch is winding down for the season, my focus is more on pickling than eating them fresh.  In that case, I only harvest cucumbers smaller than four inches.


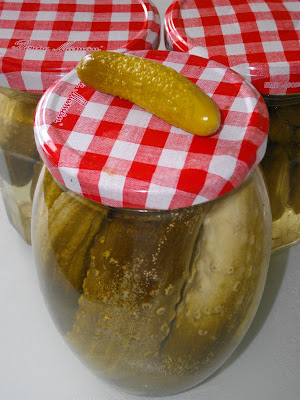
Refrigerator pickles are easy to make and very delicious.  Flavourings are many and varied, so include what you have and like.  I noticed that the only spice in the rather snooty Maille brand cornichons are mustard seeds which comes off as too sedate for my tastes.  Some lively additions could be: bay leaves, garlic, pearl onions, crushed black peppercorns, fennel, dill, freshly ground nutmeg, chopped ginger, cardamon,  red pepper flakes, and whole cloves.  Use about a teaspoon or so of spice for each  600 ml/3/4 quart jar.  If using crushed or minced fine spices, you will need less.

First make a brine.  Bring a quart of water to a boil, take off the burner, and stir in 3 tablespoons of fleur de sel (or coarse salt) till dissolved.  When cool--to avoid inhaling stinging vinegar vapours--add in 3/4 cup of white vinegar.  For mine, I line the bottom of clean jars with fresh fennel, pack in the small cucumbers (I do a dry trial first), pop in a spilt garlic glove, 1/4 tsp fresh ginger, some red pepper flakes or 1/8  tsp crushed black peppercorns, 1/4 tsp crumbled bay leaf, 1/8 tsp freshly ground nutmeg, and top with more fresh fennel.

As I have a seven-foot high fennel plant, I use that instead of dill

Pour in the brine, making sure all cukes are completely in the brine and cover jars loosely with plastic, letting the pickles sour for several days at room temperature.  Tiny pickles will sour faster than larger ones.  Dulling of the bright green colour is an indication that souring is taking place. Then tightly screw on lids and place in the fridge where they will keep nicely for several months.  If you have left over brine, keep it in the fridge for future use but do not reuse already used brine.  These make wonderful low caloric, crunchy, tasty snacks and accompaniments to sandwiches and cold meats.


Tuesday, 7 August 2012

How to Make Fresh Basil Pesto...and tomato soup concentrate & gazpacho

The fruit harvest throughout France has been greatly reduced this season. Instead of several bushels of plums,  I have just a few small baskets from our trees.  Happily, I will be able to make a few pots of jam and maybe some fruit leather.

Purple ente plums and mirabelle plums

When I get a little down because of having so much less fruit for preserving, I walk by the Rose of Sharon bushes with their pastel clouds of flowers and immediately feel better.


Dayo, being his own man, likes to wander off by himself in some undisclosed corner, usually tucked away in a veggie bed.  Just as I wonder where he might be, I look down, and there he is, inspecting the basil with me.


Basil is a very attractive green herb with an alluring aroma and taste.  It goes well in many dishes, especially tomato-based ones.  It is simple to grow an ample harvest from seed:  sow in early spring indoors in a plant incubator or on a heat mat and transplant when weather is reliably warm, mid-May in my garden.  Several weeks after transplanting, a new flat of freshly sowed seeds is a good idea, as basil bolts and goes woody, that is, flowers usually by late July which makes basil a bit bitter.  This way, as the first succession is pooping out, you have a nice new planting rearing to go for flavouring late-season tomatoes. For basil to stay bushy, it helps to harvest frequently.  Pinch as soon as there are six leaves--leaving four--and repeat pinching/harvesting.  My preferred method of serving fresh basil is by making a chiffonade.

Basil can be preserved by first washing, then chopping and adding either olive oil or a little water, placing in ice cube trays, freezing, and then separating and putting into freeze bags.  Individual leaves can be frozen also--wash, pat dry, and freeze on a tray, with space in between each leaf, then place leaves in freezer bags.


Since the walnuts grown near Grenoble in southeast France are so good--light golden brown without a touch of bitterness--I use those instead of pine nuts for making pesto.


For a cup of pesto, toss in an 1/3 cup of shelled walnuts into the food processor for a few pulses, then add two cups of washed and dried, packed, fresh basil leaves along with two fat, crushed garlic cloves and pulse a few times more.  Then add an 1/2 cup of a good quality olive oil and an 1/2 cup of freshly grated Parmesan and blend until smooth, scraping down the contents at least once. Season to taste with salt and freshly ground black pepper.

It goes beautifully on top of your favourite pasta or spread on French bread.  Actually if you love its taste, it can go on just about anything--baked potatoes, a smear on hard-boiled eggs, as a dip for  crudités, etc.  Pesto can be prepared for the freezer by leaving out the cheese and adding it after defrosting and before serving.  Upon exposure to air and freezing, the bright green colour changes to an olive green but its taste remains vibrant.


Mildew has attacked tomatoes in many gardens and fields throughout France.  It is very contagious and before you know it you are staring at dry and lifeless plants.  Since I eschew all chemical treatments for my edibles, all I can do is to remove infected leaves when I see them.

One hot and windy day, Madame M and I were in our individual gardens at the same time picking off infected leaves from a total of eighty plants between the two gardens.  After a bout of huffing and puffing, we would rest an arm on a tomato stake, look across our garden to the other's and laugh at ourselves.  The small mountain of yellowed leaves were not put on the compost, but carefully bagged.  So far, I have harvested enough juicy beefsteaks to make tomato soup concentrate and other goodies.  Hopefully, the remaining green toms will mature into plump globes of irresistible flavour.

Note the yellowed, brown spotted leaf in the upper right corner

It is an absolute delight to have a plentiful supply of ripe, juicy tomatoes.  I consider it an honour to figure out what to do with them all.  The Calm One has a knack of incorporating our garden produce into our routine dishes.  He makes a mean top-of-the-stove macaroni and cheese with three different cheeses and three different pastas.  His embellishment during tomato season is to put the macaroni and cheese in an oven casserole, top it with thickly sliced tomatoes, add additional grated cheese on top and place it under the broiler for about five minutes until nicely browned and the tomatoes have become more like a sauce.  I added some basil to mine, but he didn't as he already had reached his daily quota for green things on his plate.


Making a concentrated soup base is a good way to preserve tomatoes, serving as a base for both cold and hot, late summer/fall soups like my creamy tomato with Edam and brown rice soup--look out for the recipe around autumn.  For cold soups, I add either some cream or crème fraîche and add appropriate garnishes.

Dice tomatoes and add garlic, onions, celery/lovage, carrots, black peppercorns, heaps of fresh basil, and a bouquet garni, barely covering the whole lot with water.  If you have some rind ends of Parmesan, toss those in too. Fish them out before serving; they can be cut into small pieces and are quite delicious to eat on the side.


That's lovage on the bottom left

Simmer about an hour--the veggies should be very soft to make sieving easy. A thorough sieving via a Foley Mill is all that is necessary to have a thick soup base which can then be frozen. 


Another way to use tomatoes is to blend them raw along with other tasty ingredients.  Since gazpacho has many recipes whose creators insist are the true version on the Web, I decided to add to the already huge collection.  I am attempted to call mine the omission/addition gazpacho recipe because it lacks all the ingredients I did not have on hand while using all the ones I had and thought would go well in this kind of cold soup.  I was very pleased with how it came out.


Instead of bread--some admonish those who use bread, but I recommend ignoring those people--I used some leftover buttered cous cous which imparted creaminess and a slightly nutty taste.  I didn't have green peppers, and besides I don't care for them much which is probably why there weren't any around.  Now red peppers are another matter; I adore those but my garden ones are not yet ready for harvesting.  Note to self:  get some shelf-loving powdered paprika.  I also think that raw onions when blended can be too overpowering so they were left out even though I have heaps of those from the garden.  Of course, gazpacho is all about tomatoes, so unless you can get wonderful, ripe, flavoursome tomatoes, it is probably not worth the effort.

Chop 1 kilogram of unpeeled ripe tomatoes, crush one fat clove of garlic, and peel and chop a medium cucumber.   A couple of slices of bread, soaked in water and squeezed out well can easily be substituted for an 1/3rd cup of left-over, cooked, buttered cous cous.  Measure out 50 ml of olive oil and 1 tablespoon of apple cider vinegar.   Fill up the blender with one third of the ingredients, blend till mushy, add another third, blend again, and then add the final third, blending this time several minutes until very smooth.

Sieve or not to sieve?  I consider both versions to be delicious, just different--the sieved one is undeniably more smooth and a bit more urbane while the not sieved one is somewhat boisterous with its more grainy and earthy texture.  If a food processor is used instead of a blender, sieving may be more compelling.  Dilute with a little water if too thick for your taste--I found the thickness to be as satisfying as a nice substantial porridge.

To chill or not to chill?  So many important questions when making such a simple soup!  If most of your ingredients came from the fridge, the soup will be cold enough to scoff down right away.  If not, then chill in the fridge for an hour or so.  Garnish with cucumber ribbons, minced flat leaf parsley, and finely chopped hard-boiled egg.  Serve with tortilla chips.


Bon appétit!

RELATED POSTS AND LINKS

Raw tomatoes stuffed with tuna served on a bed of cous cous
A superb collection of creative gazpacho recipes at Scoop.it!