Thursday, 24 September 2020

Ink Cap Mushrooms, Deliquescence & Art

A quartet of ink cap mushrooms (Coprinus comatus) recently appeared in a sizable planter filled with lobelia.


The hefty pot is supported by another large pot.

The whole structure makes a nice visual closure for the main garden path.

Within forty-eight hours, the ink caps transformed into an elongated button shape, fresh and edible, to a form more open with beginnings of inkiness.


The underneath of the cap blackened with curling edges.


The perimeter kept curling and blackening.


Little pieces broke off as they softened.


The cap finally became complete goop.


All the clumps of ink were placed in a recycled yogurt container, water added, and stirred well.


A quick sketch was made with a slender brush resulting in a drawing of an ink cap using the ink made from itself.

À la prochaine!

RELATED LINK

An excellent article explaining why ink caps digest themselves

Thursday, 17 September 2020

Homemade Pecan Butter

Nut butter brings out the versatility of nuts in a gorgeously creamy way. If there's a food processor or powerful blender chez vous, then it's possible to make your own, super fresh from scratch allowing the choice of nuts, whether standalones or a mix, roasted or not, blanched or with their glorious skins left on along with any flavourings like vanilla, cinnamon, cocoa powder, maple syrup, etc.  The cost most likely will be lower than store bought.

The only pecans available at the supermarket were raw. Besides intensifying flavour, toasting also encourages oil release which is perfect for making nut butter. 237 millilitres (an 8 ounce fluid cup) of pecans were placed in a single layer on a shallow baking pan in a preheated oven of 177 degrees C (350 degrees F) and roasted for about ten minutes until their colour deepened during which the pan was shook a couple of times. Let cool about ten minutes. They should be warm to the touch when ready for processing.


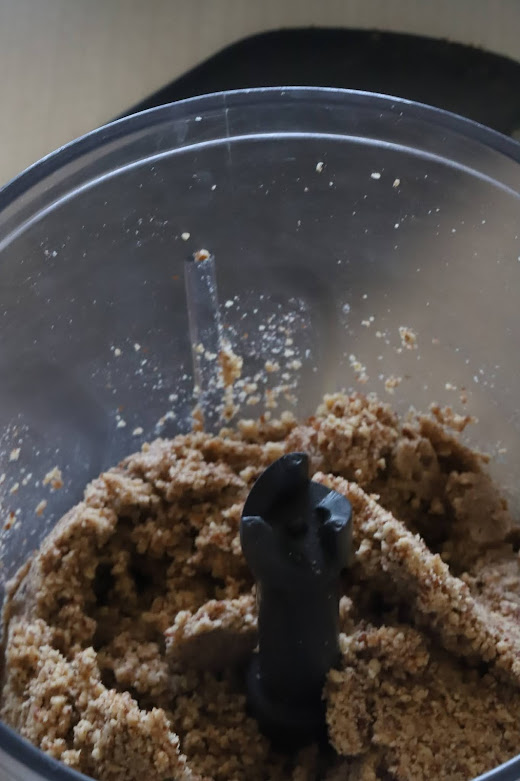
Our food processor's capacity is small hence the paltry number of pecans, but it does boast a wattage of 750, processing them into butter in several minutes. If your appliance has less or more power, the time could be just a minute or up to twenty minutes. If yours has more room than our 2 cup one, then you can process a bigger quantity of nuts. In any case, the procedure has the same visual transition, from finely chopped to . . .


. . . their sticking to the sides of the mixer requiring scraping off with a spatula.


Repeat blending and scraping until you get the level . . .


. . . of creaminess desired. Add what you like, like fleur de sel, nutmeg, ginger among others, or as in my case for a small percentage of the total amount processed, some icing sugar and a melange of sweet spices which thickened the consistency somewhat. It can then be whirred a bit in the mixer to maintain smoothness. Tightly lidded, it will keep for up to a month in the fridge.


This is where a homemade muffin made with our garden blueberries enters the picture.


A muffin gets split and without much ado, receives a light pecan butter slathering.


This pecan butter is more fluid than your average peanut butter . . .


. . . allowing it to fill the fluffy crumb of the muffin to perfection. The slight bitterness of this nut butter offsets the rather sweet muffin very well. I envision marbling a cake batter, dribbling over pancakes, and topping coffee/chocolate/fig ice cream with this easy, delicious saucy pecan butter. For savoury dishes, the unsweetened version can be added to pilafs, casseroles, especially bean for a complementary protein kick, and meat or vegetarian loaf.


À la prochaine!


Thursday, 10 September 2020

Layered Puree Of Roasted Beetroots & Their Greens

Our beet crop is in full swing. Roasting veggies is a wonderful way of preparing them, especially when serving as a mash because their moisture content is decreased to the point that flavour is intensified while the texture is made more pleasing. Beetroots are no exception. Cooler weather makes turning the oven on not too much of a big deal. Beets, along with radishes and turnips, work hard for the kitchen garden as they provide both roots and foliage resulting in a double harvest. Since red and green are complementary colours and pack a visual punch, I layered the roasted, creme-fraiche-enriched beet puree with a puree of greens sauteed in olive oil with garlic. Double harvest, double puree. Topped with a lemon slice and fleur de sel, it makes a light lunch or supper when served with cheese and crackers.


If beets with their greens are not to be had at your market, fret not, roasted beetroot puree topped with creme fraiche is wonderful.


Ingredients are bolded. To roast beets: Preheat oven to 204 degrees C/400 degrees F. (The beets can be roasted along with other stuff at lower temperatures but they will take longer.) Trim both tops and bottoms. Scrub well. Though they can be enclosed in foil, it is much easier to check doneness if they are placed in a foil-lined, lid-covered oven dish. Oil the foil. When checking them as they bake, if they look dry or sticking then add a bit of water. They are done when a knife inserted into their centres meets with no resistance. My melange of small to medium beets took about an hour. Peel carefully with a sharp knife, trimming away any dark bits as they tend toward bitterness. The finished beet will look translucent and bright red. If there are excess beets, let cool, portion, and then freeze. This way you can have borscht in the future. A tablespoon or so of creme fraiche or sour cream added to the blender or a stick mixer's container will ensure lusciousness. Salt to taste. Reserve.

To make the sauteed greens puree: Wash the beet greens.

Trim off most of the red stems as they make a grainy texture in addition to being quite bitter.


Dry them in a kitchen or paper towel.


In a large pot, heat up some olive oil (if you adore olive oil slicked greens as much as I do, then thinly cover the pot's bottom with the oil) over medium low heat. Add as much minced fresh garlic as you want and saute for a minute (no browning!) or as in my case, if you are making do with garlic powder, wait until the greens are added. Turn the heat to high and depending on the size of the pot and the amount of greens, add them in increments. As they start to wilt, add more, stirring all the time. Cover, and lower heat to a small flame, braise until tender, around ten minutes. During that time, check to see if a bit of water needs to be added to prevent any burning and sticking. Blend till smooth. Salt to taste.


To present: When layering, first spoon the puree close to the sides of the glass and then work towards the centre. This way the demarcated layers will be clearly seen from the outside. Start with the greens, followed with the beetroot, another layer of greens, and then edge the top with beetroot letting the previous layer of greens to peek through. Cut a thin slice of lemon from its edge to its centre and then twist it into a swirl, topping the double puree with it. Sprinkle with fleur de sel. I served it at room temperature, but it can be chilled if desired. The sweetness from the beetroots contrasted nicely with the slight bitterness of the greens. Lovely to look at, and lovely to eat.


À la prochaine!

Thursday, 3 September 2020

Keeping Up With The Figs Plus The Late Summer Garden

Our fig tree started last week to present fruit ripe enough for picking. Presently it is yielding about twenty large figs daily. Learning from our massive blackberry harvest earlier in the season, I knew I wanted to process our figgy bounty in a similar way. Without generating any more heat than what the summer was already providing along with retaining as much vitamin content as possible, the uncooked fruit in the case of the blackberries were put through a Foley mill followed by an addition of confectioner's sugar per sweetness preference; in the case of the figs, they, along with maple syrup, cinnamon, ginger, and nutmeg added to taste, were pureed with a stick blender. Once portioned and popped into the freezer, these home-grown fruits will be ready for future use in all kinds of goodies. I do reserve daily some fresh fig puree to mix into yogurt or if I am experiencing a super home-grown-fruit-appreciation day, I make a tall parfait to take out into the garden. It showcases our blackberries, blueberries, and figs all in one fell swoop. First goes in a layer of crumbled blueberry muffin, followed with the spiced fig puree, blackberry coulis, and yogurt. Topped with more muffin crumbs and a deluge of fig puree and blackberry coulis, it is out of this world with the goodness of fruit.

I love digging a spoon in and seeing swirls of fig puree and blackberry coulis spontaneously appear in a plethora of patterns.


A blueberry muffin crumb gracing the gustatory situation just makes everything even better.


Not only are fig trees vigorous, they are also easy to grow and maintain. Pruning is not that difficult as the wood isn't too hard. Since arriving here ten years ago, I haven't yet fertilised it. I do water it in between rains during summer. How to know when they are ripe? First thing, you need to know the colour for your fig variety when it's mature. Ours is mostly purplish brown with swatches of green. Also the fig should not be right angles to its twig/branch, but instead be drooping a bit. Additionally when pressing ever so gently, it will feel like a small balloon filled tightly with air. Lastly, though not always, there will be a drop of juice oozing from the bottom centre. Those are best eating right out of hand immediately. Picking involves slightly twisting the stout stem that afixes each fig to its branch until there's a plump packet of delight sitting in your palm. Since their skin is fragile, bruising easily which is why storebought figs are expensive, place each fig in a single layer. Recycled egg cartons are great as fig harvest baskets.


Two thirds of our tree is in our garden and the other third is in .  .  .

. . . in the yard of a refrigeration depot which is directly behind our urban garden. When their entrance is open I can harvest figs from that side. This coming late winter, I will remember to prune that part of the tree which presently is touching the ground!


Late summer is such a lovely time. It's so enjoyable to sit under the pergola and gaze upon . . .


. . . all the abundance.


Out in the front garden, the border directly in front of the balcony stairs leading to the front entrance door is a tropical riot of yucca and canna with a cooling splash of temperate dahlias, lobelia, and sedum.


À la prochaine!

Thursday, 23 July 2020

Summer Break 2020

Souped-up Garden will return the earliest mid-August, the latest the first week in September!

Thursday, 16 July 2020

High Summer 2020

A fresh spring garden, all bright green and friendly, became a lush summer solstice one which is now becoming a glorious mature profusion but not surprisingly showing signs of wear and tear. Watering, weeding, and deadheading will prolong the abundance for a while.


There are three large pots of orange/yellow calendula and deepest blue lobelia, all sowed from seed, throughout our garden. They did need to be sprayed with sulfur to combat a fungal disease called calendula smut. And they may need to be dosed again in order for them to continue flowering all through summer.


For years now social media images of a pot on its side spilling out lobelia visually simulating a small stream intriqued me, and this was the summer I finally got around realising this clever concept.


The 'stream' flows amidst cannas and dahlias. I love it so. It was just a matter of burying one quarter of the depth of an empty pot put on its side, filling it one thirds with soil, and planting by laying the roots laterally with the flowers placed beyond the pot's opening before topping up with more soil. 


It is now the fourth summer that this fragrant tuberous begonia has graced a small sous sol window sill. I hope it will bloom yet again in 2021.


Pots of miniature roses have found their home in a large tub along with a blueberry bush. In this way, not only does the display look full, when the roses are watered/fertilised so is the blueberry!


Hydrangeas are now fading into glorious subtle tones/texture and by autumn will become much like silver lace which always is a treat to behold.


The ivy topiary heart is being shaped gradually.  I just love it! Sculpting greenery is fun and gives so much joy. The structure on which it grows is a thick honeysuckle trunk that gave up the ghost nearly a decade ago. Requiring both patience and decisiveness makes topiary quite a learning experience.


Beets are putting out foliage which when thinned are added to minestrone.


Green beans are flowering. Soon tiny pods will appear and in several weeks they will be ready for picking.


À la prochaine!

Thursday, 9 July 2020

Preservation of Produce: Blackberry Coulis

Our single blackberry bush already has given us ten litres and is still going as there's no tomorrow. I suspect there's another ten litres in its future.


Our cultivar is thornless which makes harvesting a cinch.


Though consistently watered and pruned, I yet have fertilised it in the ten years we have been here. I am not sure if I ever want to as its largesse is already a challenge to keep on top of via processing. Pruning is a simple job of keeping the new canes which spring up during summer not much longer than ninety centimetres (three feet) and its lateral branches approximately thirty centimetres (one foot) in length. After all the berries are picked, then the canes that sprung up last summer and carried the present harvest will be clipped off at ground level. In the below photo, the new cane on the left which will bear fruit next season has been trimmed; the older cane, once all its berries have been plucked, will be removed completely.


A ripe berry will have plump, individual drupelets. If they ripen too much, their fibrous centres will be replaced with juice which can be seen oozing among the drupelets. The juice can become slightly fermented; when popping one such berry into your mouth, it's like taking a tiny sip of blackberry wine.


A Foley mill made short order of all those berries.


Icing sugar was added to the sieved, mashed, fresh berries, better known as coulis, until it reached the desired sweetness which isn't too much as additional sweetening can be added if desired. It is the uncooked state of the fruit that gives such a burst of flavour as contrasted to a puree which is sieved, mashed, cooked fruit.


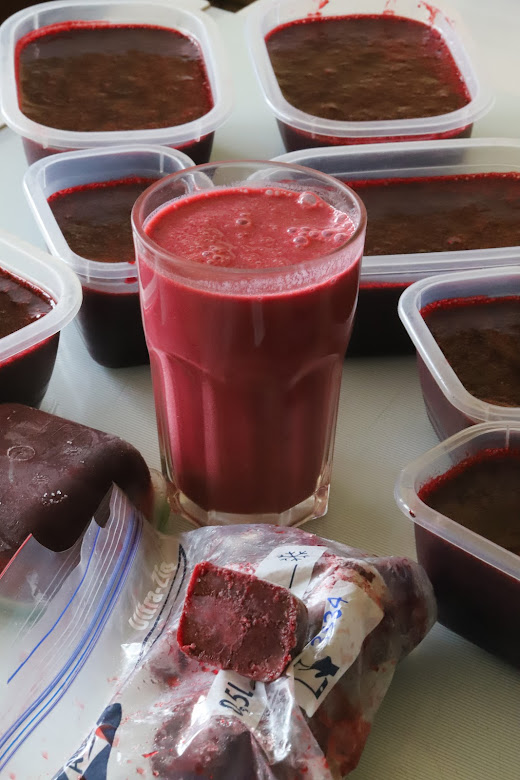
Those ten litres of blackberries became three litres of coulis. Besides ladling it into variously sized containers, ice cube trays were filled also. Once frozen, the cubes were placed into a ziplock bag. The luscious coulis, once defrosted or if your mixer is powerful enough, throw in a few blackberry ice cubes instead, is used in smoothies (the one below has yogurt, water, coulis, maple syrup, and powdered ginger) . . .


. . . and parfaits (the one below has a layer of yogurt and one of creme fraiche, two of coulis, and a topping of yogurt marbled with coulis sprinkled with icing sugar) . . .


. . . not to mention a dessert sauce, as in the below photo, smothering coffee ice cream. Coulis can drench cake/muffins, fill doughnuts/hand pies/cake rolls, and made into blackberry butter (reduce either over a low flame or in an oven until very thick). Versatility, thy name is blackberry coulis.


À la prochaine!