Thursday, 22 October 2020

Preservation of Produce: Raisin Puree

The other day I finally noticed two, large,  long-neglected bags of raisins in our sous-sol cupboard. They were a smidgin away from their due date. Though I been wanting to bake some whole wheat raisin muffins for a while, I figured doing that would use up just a fraction of this dry fruit deluge so what to do with the rest? Fruit puree, whether fresh or made from dried fruits, freezes well.


I made two separate batches of raisin puree. The larger one was covered with water.


A smaller batch was covered instead with orange juice, and a large pinch of powered ginger was stirred in. Both batches were lidded and placed in the fridge for twenty-four hours.


My 750 watts Bosch hand-held mixer did the small batch with ease, taking about ten minutes to reach a very smooth consistency.


The larger batch took forever, at least it seemed that way. About 8 PM, I started the blending. After ten minutes the mixer heated up so much that it was necessary to let it cool for about a half hour so as not to burn out the motor. This was repeated four times bringing me close to bedtime. Therefore I left the partially processed puree, covered, in the fridge overnight. The next morning, I was able to finish the blending in ten minutes. It's possible that not only was this batch significantly bigger, it is also conceivable that water doesn't macerate the raisins as readily as orange juice.  I would suggest that small batches in general would be easier to do, but also if you want to do a large one, then let soak in the fridge for two to three days. The puree is absolutely delicious and is versatile. I marbled yogurt and swirled some through hot oatmeal. I imagine that it would be great as a topping for ice cream or served with a cheese platter in place of honey or jam. Whole wheat muffin batter is just calling for the marble treatment which is what I am planning to do fairly soon, choosing the orange/ginger batch. Perhaps an orange icing drizzle on top?


To marble either yogurt or muffin/cake batter: Put separate dollops of puree and yogurt/batter in a checkerboard pattern in the first layer. For consequent layers, alternate the dollops, that is, put puree over yogurt/batter, then yogurt/batter over puree until the glass or baking pan is filled. Using a wooden skewer, insert it all the way to the bottom of the glass or pan and working from side to side, twirl the skewer. Turn the glass or pan a quarter turn and repeat the twirling.


À la prochaine!

Thursday, 15 October 2020

View From The Balcony Autumn 2020

Our front balcony entrance brings so much enjoyment, and not only to us but also to Eli the Cat who shows his appreciation for the doormat every chance he gets.


I love leaning over the railing to check out the front garden. The flowering shrubs in the upper right corner of the below photo are two abelia, beloved by bees.  When I recently did my afternoon exercise walk around the garden the other day, I got to see a HUGE bee all on his lonesome, probably belonging to the Megachilidae family, thrusting its upper body into one of the tubular flowers. 


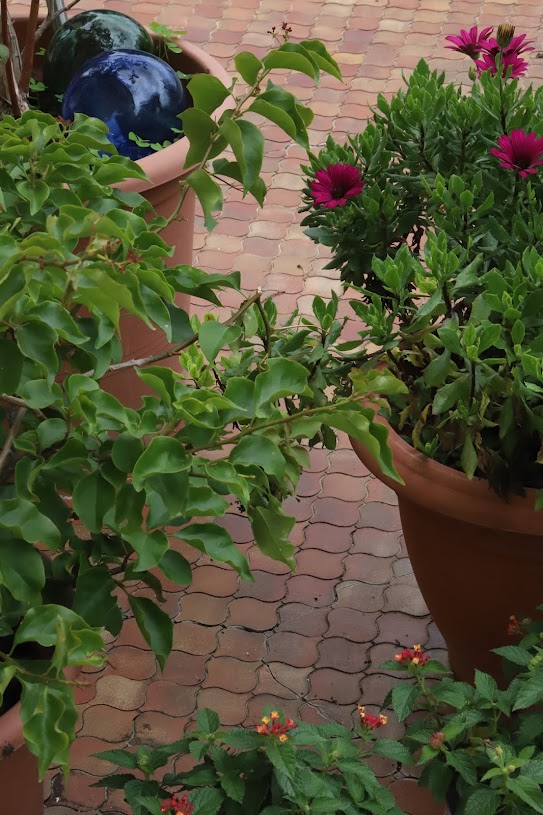
The meandering brick path flanks the part of the garden situated between the entrance walk and the driveway. The aucuba was propagated from plants already present when we moved here ten years ago. Its evergreen, shade-loving, glossy, substantial leaves splashed with gold flourish in a spot facing north, brightening up that dark corner.

The balcony wraps itself partially around the eastern side of our home. Access to the balcony from the inside is facilitated by not only the foyer door but also two living-room French doors. Presently asters are the dominant blooms from that perspective.

While on the side balcony if one turns towards the south, the rest of the eastern planting with its ivy-covered wall can be seen as it continues into the back garden. Eli the Cat stands guard at various points along the eastern perimeter, mesmerised by sounds coming from the plants' direction, mostly made by insects and the wind.

Once back on the ground, going around the southeast corner of the house brings you to the south-facing back garden with its patio and ivy-covered pergola. The pergola-facing potting room is in the sous-sol (our home is a pavillon sur sous-sol, that is, the living quarters are on the top floor; downstairs houses the unheated garage, utility/storage room, potting/mud rooms, and cellier). The temperature is now cold enough for all the frost-tender potted plants to spend at least the nights inside the sous-sol, near the potting room's window, including the tuberous begonia which is spending the day on the table under the pergola.


It is still flowering but will start shedding leaves fairly soon, feeding its tuber, hopefully giving us a fifth year of flowers starting in June and going all the way to November.


Other frost-tender potted plants that need to be sheltered at least during the night are calendula . . .


. . . bougainvillea, osteospermum, and lantana. If successfully over-wintered, they will bloom outdoors once again.


When gardening most days, I wear woolen hats to keep my noggin warm. The summer jobbies are in the mud room biding their time.


À la prochaine!

Thursday, 8 October 2020

Photography Series: Indoor Studio on a Rainy Day

It's been raining for a while now, close to two weeks and is looking to continue.


Here in southwest France, autumn is the rainy season. All the trees, bushes, and plants are getting their root systems engorged with ample moisture, fortifying them for the winter to come.


Some days the rain is intermittent, others, just one continual downpour. The day I took these photos belonged to the latter category. The Canon 6D Mark II which I got about three years ago is a marvel. Moi, not so much! This full range model which is known for how it accommodates both the bokeh effect and low-light situations has many a zillion other wondrous features which are maddeningly still beyond my reach. I know there are answers to my specific problems buried somewhere in a class, book, and website, and I do search for it, but mostly am coming up purblind and empty-handed. Though I acknowledge how much I don't know, what I do know is what holds my attention which of course helps to define my developing style. And what draws me is not only the subject matter but also how I access it and how I handle the camera. No tripod. Please! And certainly no photoshop (though I make an exception for Saul Leiter painting on developed prints and would love to get a print for the photo below and paint splashes of various blues and golds, here and there, to emphasise three dimensionality and vibrancy). Double please! Or special lighting. Triple please! Though I do meddle with arrangements from time to time, I look for one already accomplished just by living the rhythm of one's life.


What I do drive myself to distraction is from what angle I will view what I am photographing. I will lie on my side, climb on chairs, put stuff on the floor and stand over it, and walk around the objectsinvolving at time moving sofas and bookcasesuntil I am dizzy. Relying on this camera's combo of live view and flip-out screen would save my knees from a lot of creaking, but it would also mean using the forbidden tripod to get steady shooting.


I did move the zebra-patterned lipstick case (it was nearby) into the below shot to create a complementary colour duo of blue and orangey gold.


My addiction of choosing in most photos a macro prime lens for both its close-up capability and its crisp image creates difficulty in achieving depth of field. The surest way to get depth of field is by moving away from your subject which of course would defeat the purpose of a macro lens.


Another significant aspect of what rivets my eye is texture. The black patent leather effect of the cardboard socks box along with the letter X and the shiny red heart on its side contrasts with the softness of the fabric-covered sewing basket.


I often set the camera on the aperture mode which means I get to choose the f-stop. A lower number is correlated with a more opened lens along with more light but with less depth of field and a higher number with a less opened lens along with more depth of field but with less ambient light. The camera's range is from f/2.8 to f/32. I teeter on that technical tightrope with each shot never striding confidently any great distance. The visual conclusion is often that there is either too little light but decent depth of field or adequate light but not enough depth of field.

The below photo and the following one show that depth of field and adequate light is simultaneously possible. It's just I can't count on amalgamating those two features with a sufficient degree of consistency!

My furry model then suddenly decided, as they often do, that he was hungry.

À la prochaine!

Thursday, 24 September 2020

Ink Cap Mushrooms, Deliquescence & Art

A quartet of ink cap mushrooms (Coprinus comatus) recently appeared in a sizable planter filled with lobelia.


The hefty pot is supported by another large pot.

The whole structure makes a nice visual closure for the main garden path.

Within forty-eight hours, the ink caps transformed into an elongated button shape, fresh and edible, to a form more open with beginnings of inkiness.


The underneath of the cap blackened with curling edges.


The perimeter kept curling and blackening.


Little pieces broke off as they softened.


The cap finally became complete goop.


All the clumps of ink were placed in a recycled yogurt container, water added, and stirred well.


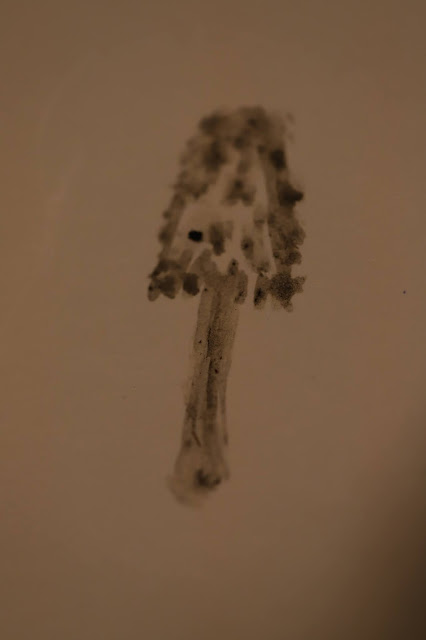
A quick sketch was made with a slender brush resulting in a drawing of an ink cap using the ink made from itself.

À la prochaine!

RELATED LINK

An excellent article explaining why ink caps digest themselves

Thursday, 17 September 2020

Homemade Pecan Butter

Nut butter brings out the versatility of nuts in a gorgeously creamy way. If there's a food processor or powerful blender chez vous, then it's possible to make your own, super fresh from scratch allowing the choice of nuts, whether standalones or a mix, roasted or not, blanched or with their glorious skins left on along with any flavourings like vanilla, cinnamon, cocoa powder, maple syrup, etc.  The cost most likely will be lower than store bought.

The only pecans available at the supermarket were raw. Besides intensifying flavour, toasting also encourages oil release which is perfect for making nut butter. 237 millilitres (an 8 ounce fluid cup) of pecans were placed in a single layer on a shallow baking pan in a preheated oven of 177 degrees C (350 degrees F) and roasted for about ten minutes until their colour deepened during which the pan was shook a couple of times. Let cool about ten minutes. They should be warm to the touch when ready for processing.


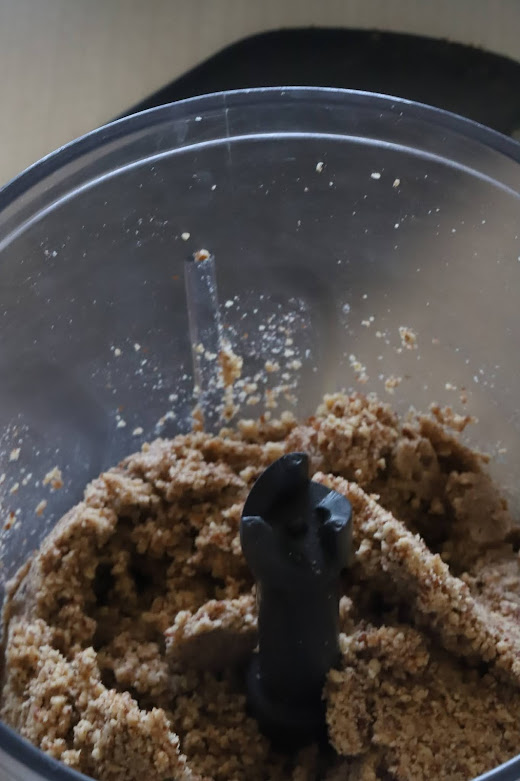
Our food processor's capacity is small hence the paltry number of pecans, but it does boast a wattage of 750, processing them into butter in several minutes. If your appliance has less or more power, the time could be just a minute or up to twenty minutes. If yours has more room than our 2 cup one, then you can process a bigger quantity of nuts. In any case, the procedure has the same visual transition, from finely chopped to . . .


. . . their sticking to the sides of the mixer requiring scraping off with a spatula.


Repeat blending and scraping until you get the level . . .


. . . of creaminess desired. Add what you like, like fleur de sel, nutmeg, ginger among others, or as in my case for a small percentage of the total amount processed, some icing sugar and a melange of sweet spices which thickened the consistency somewhat. It can then be whirred a bit in the mixer to maintain smoothness. Tightly lidded, it will keep for up to a month in the fridge.


This is where a homemade muffin made with our garden blueberries enters the picture.


A muffin gets split and without much ado, receives a light pecan butter slathering.


This pecan butter is more fluid than your average peanut butter . . .


. . . allowing it to fill the fluffy crumb of the muffin to perfection. The slight bitterness of this nut butter offsets the rather sweet muffin very well. I envision marbling a cake batter, dribbling over pancakes, and topping coffee/chocolate/fig ice cream with this easy, delicious saucy pecan butter. For savoury dishes, the unsweetened version can be added to pilafs, casseroles, especially bean for a complementary protein kick, and meat or vegetarian loaf.


À la prochaine!


Thursday, 10 September 2020

Layered Puree Of Roasted Beetroots & Their Greens

Our beet crop is in full swing. Roasting veggies is a wonderful way of preparing them, especially when serving as a mash because their moisture content is decreased to the point that flavour is intensified while the texture is made more pleasing. Beetroots are no exception. Cooler weather makes turning the oven on not too much of a big deal. Beets, along with radishes and turnips, work hard for the kitchen garden as they provide both roots and foliage resulting in a double harvest. Since red and green are complementary colours and pack a visual punch, I layered the roasted, creme-fraiche-enriched beet puree with a puree of greens sauteed in olive oil with garlic. Double harvest, double puree. Topped with a lemon slice and fleur de sel, it makes a light lunch or supper when served with cheese and crackers.


If beets with their greens are not to be had at your market, fret not, roasted beetroot puree topped with creme fraiche is wonderful.


Ingredients are bolded. To roast beets: Preheat oven to 204 degrees C/400 degrees F. (The beets can be roasted along with other stuff at lower temperatures but they will take longer.) Trim both tops and bottoms. Scrub well. Though they can be enclosed in foil, it is much easier to check doneness if they are placed in a foil-lined, lid-covered oven dish. Oil the foil. When checking them as they bake, if they look dry or sticking then add a bit of water. They are done when a knife inserted into their centres meets with no resistance. My melange of small to medium beets took about an hour. Peel carefully with a sharp knife, trimming away any dark bits as they tend toward bitterness. The finished beet will look translucent and bright red. If there are excess beets, let cool, portion, and then freeze. This way you can have borscht in the future. A tablespoon or so of creme fraiche or sour cream added to the blender or a stick mixer's container will ensure lusciousness. Salt to taste. Reserve.

To make the sauteed greens puree: Wash the beet greens.

Trim off most of the red stems as they make a grainy texture in addition to being quite bitter.


Dry them in a kitchen or paper towel.


In a large pot, heat up some olive oil (if you adore olive oil slicked greens as much as I do, then thinly cover the pot's bottom with the oil) over medium low heat. Add as much minced fresh garlic as you want and saute for a minute (no browning!) or as in my case, if you are making do with garlic powder, wait until the greens are added. Turn the heat to high and depending on the size of the pot and the amount of greens, add them in increments. As they start to wilt, add more, stirring all the time. Cover, and lower heat to a small flame, braise until tender, around ten minutes. During that time, check to see if a bit of water needs to be added to prevent any burning and sticking. Blend till smooth. Salt to taste.


To present: When layering, first spoon the puree close to the sides of the glass and then work towards the centre. This way the demarcated layers will be clearly seen from the outside. Start with the greens, followed with the beetroot, another layer of greens, and then edge the top with beetroot letting the previous layer of greens to peek through. Cut a thin slice of lemon from its edge to its centre and then twist it into a swirl, topping the double puree with it. Sprinkle with fleur de sel. I served it at room temperature, but it can be chilled if desired. The sweetness from the beetroots contrasted nicely with the slight bitterness of the greens. Lovely to look at, and lovely to eat.


À la prochaine!